
In this chapter, we will study about Template Customize Manager in Joomla. The Customize template allows editing or creating new files in the template.
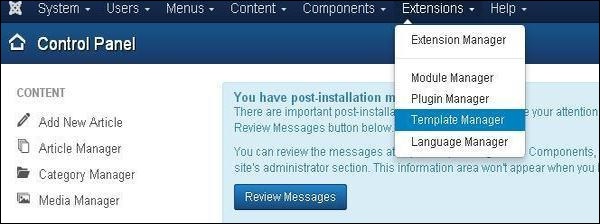
Step (1) − Click Extensions → Template Manager as shown below.
 Step (2) − After clicking on Template Manager, the Template Manager: Styles page will get displayed.
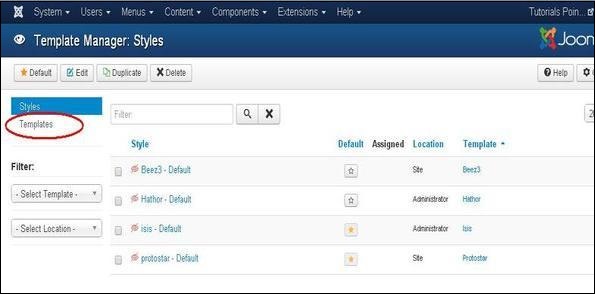 Step (3) − Next, click on Templates as shown above, you will get the following screen. Here select any one of the Templates.
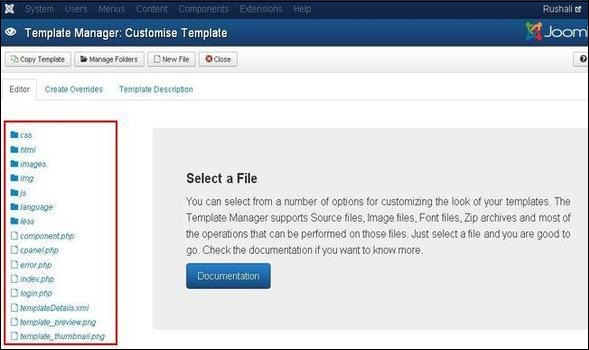
 Step (4) − After selecting a template you will get the screen as shown below. In the Editor tab, template files are listed on the left side of the page as seen below.
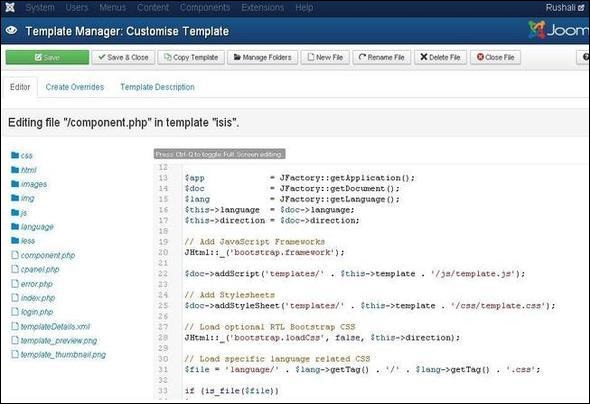
 Step (5) − Select any of the files by clicking on it for editing.
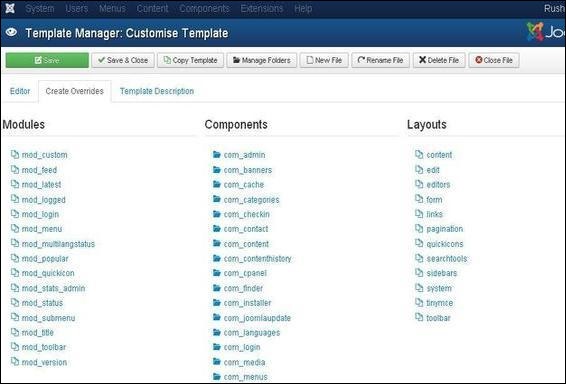
 Step (6) − Click on Create Overrides tab, you will see the list of Modules, Components, and Layouts present in the template manager as shown below. Here you can easily override the new templates.
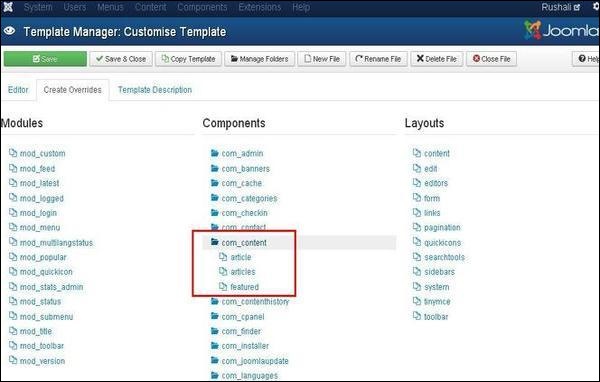
 Step (7) − Click on any one component and you will see many sub-components present inside it as shown below.
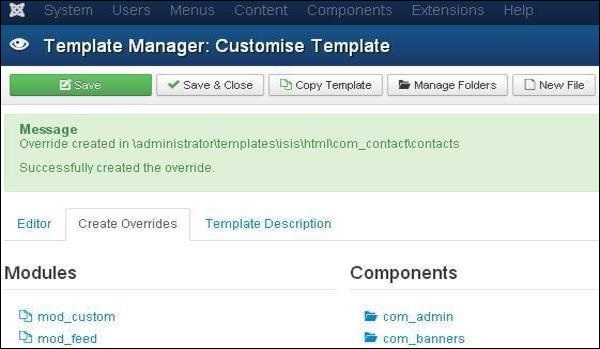
 Step (8) − When you click on any one sub-component then you will get the following message.
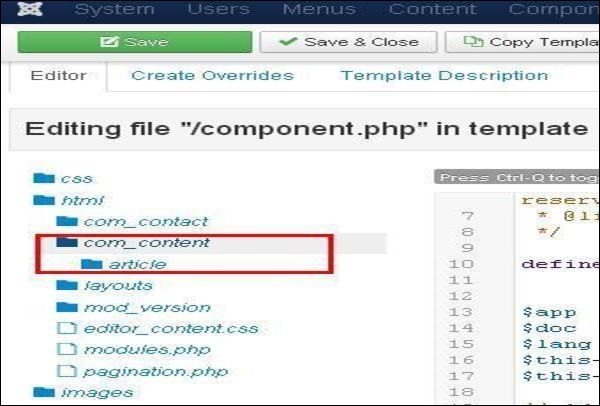
 Step (9) − You can see the overrides file is available for editing or not by going back to the Editor tab as shown below.
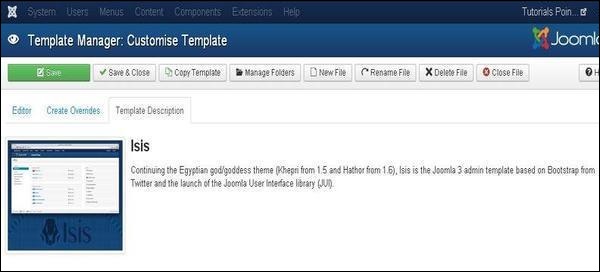
 Step (10) − After clicking on Template Description tab, you will see the detail description of the selected template as shown below.
Customize Template
Following are the simple steps to customize the template in Joomla.Step (1) − Click Extensions → Template Manager as shown below.
Step (2) − After clicking on Template Manager, the Template Manager: Styles page will get displayed.
Step (3) − Next, click on Templates as shown above, you will get the following screen. Here select any one of the Templates.
Step (4) − After selecting a template you will get the screen as shown below. In the Editor tab, template files are listed on the left side of the page as seen below.
Step (5) − Select any of the files by clicking on it for editing.
Step (6) − Click on Create Overrides tab, you will see the list of Modules, Components, and Layouts present in the template manager as shown below. Here you can easily override the new templates.
Step (7) − Click on any one component and you will see many sub-components present inside it as shown below.
Step (8) − When you click on any one sub-component then you will get the following message.
Step (9) − You can see the overrides file is available for editing or not by going back to the Editor tab as shown below.
Step (10) − After clicking on Template Description tab, you will see the detail description of the selected template as shown below.
Toolbar
Below we have mentioned details about the fields on toolbar in the Template Manager.- Save − Saves your template manager.
- Save & Close − Saves the templates and closes the current screen.
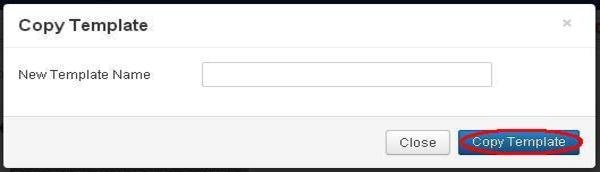
- Copy Template − Enter the template name and click on Copy Template button which will help you to copy the template.
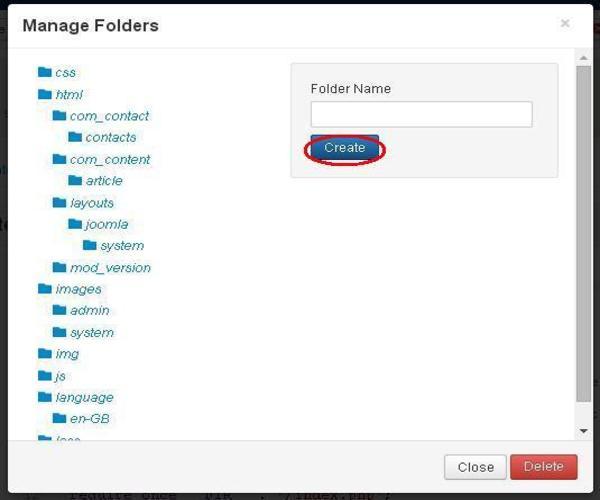
- Manage Folders − It creates a new folder inside the template. Write the folder name in the field and click on Create button.
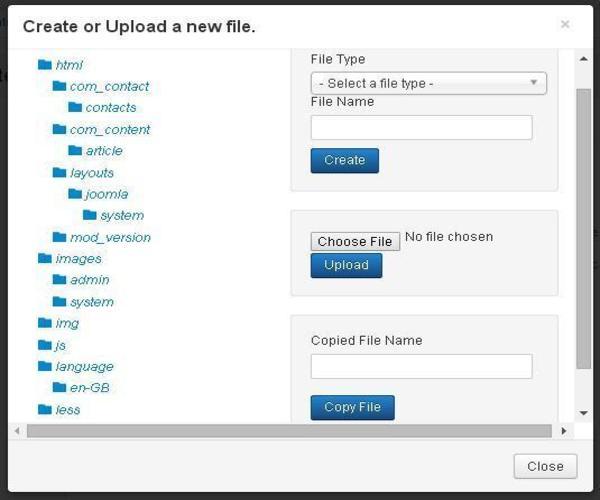
- New File − You can select the file type by clicking on the dropdown of File Type and write the name of the file and click on Create button which will create a new file. The second block is used to upload a file directly from your system and the last block is used to copy the file.
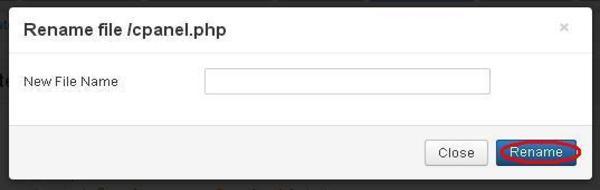
- Rename File − Enter the new name for the file and click on Rename button.
- Delete File − Deletes the particular file.
- Close File − Closes the current file.
No comments:
Post a Comment