
In the First MVC Tutorialchapter, we learnt how Controllers and Views interact in MVC. In this tutorial, we are going to take a step forward and learn how to use Models and create an advanced application to create, edit, delete and view list of users in our application.
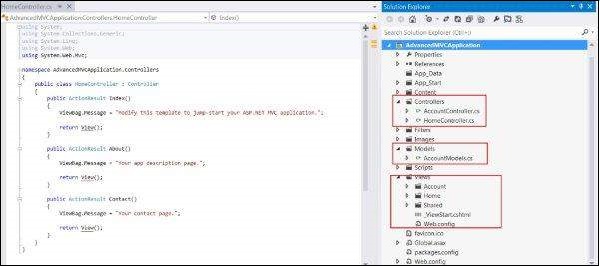
 This will create a new solution project as shown below. Since we are using the default ASP.NET theme, it comes with sample Views, Controllers, Models and other files.
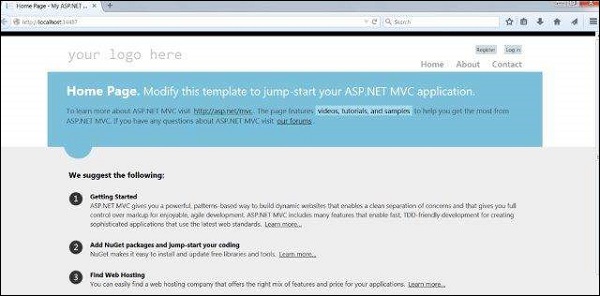
 Build the solution and run the application to see its default output as this:
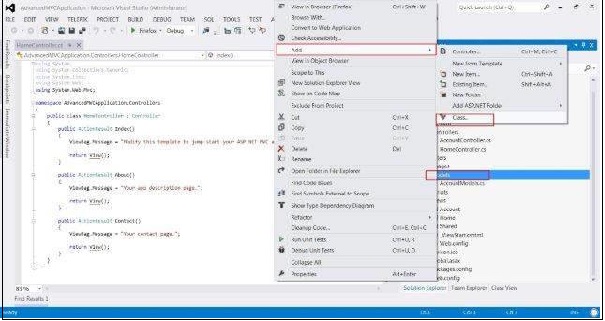
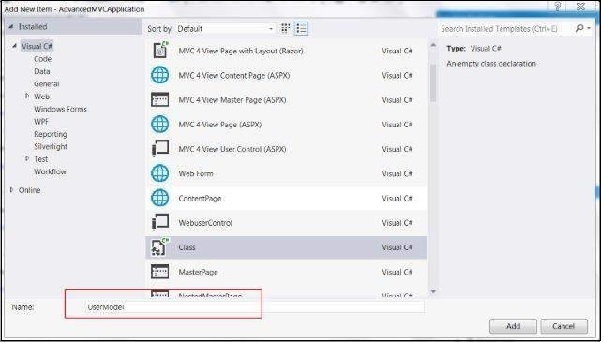
 Step 2: We will add a new model which will define the structure of users data. Right click on Models folder and click Add->Class. Name this as UserModel and click Add.
 Step 3: Now copy the following code in the newly created UserModel.cs:
Step 4: Now that we have our User Model ready to hold the data, we will create a class file Users.cs which will contain methods for viewing users, adding, editing and deleting users. Right click on Models and click Add->Class. Name it as Users. This will create users.cs class inside Models.
Copy the following code in the users.cs class.
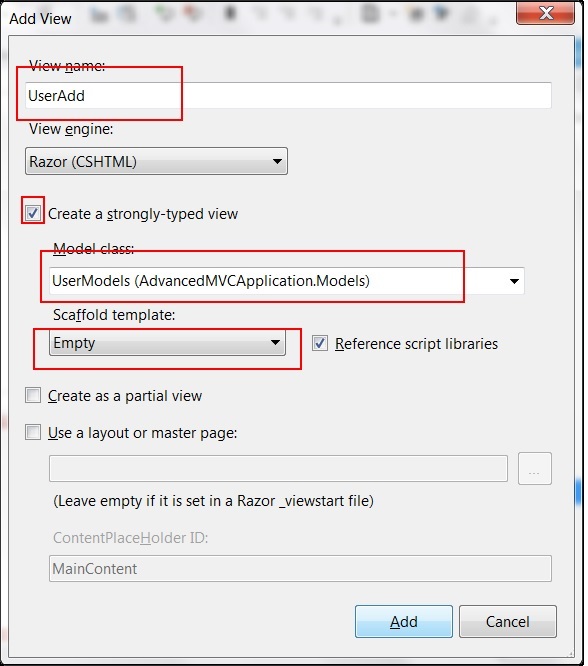
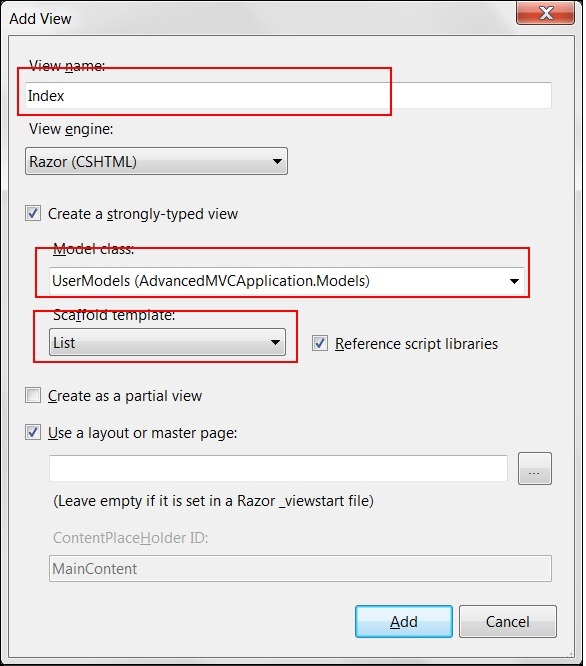
 In the next window, select the View Name as UserAdd, View Engine as Razor and select the Create a strongly-typed view checkbox.
 Click Add. This will create the following CSHML code by default as shown below:
 Similar to UserAdd, now we will add four more Views given below with the given code:
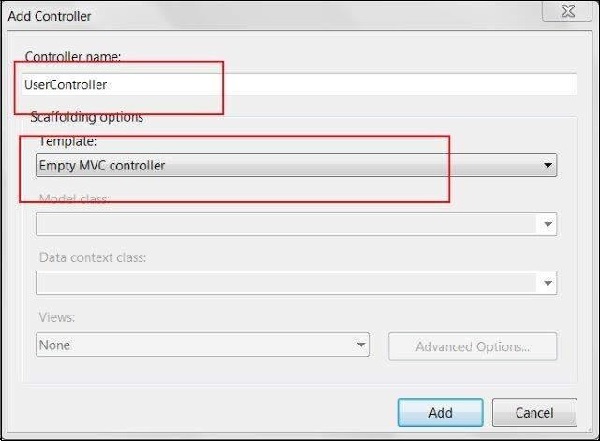
 Step 6: We have already added the Models and Views in our application. Now finally we will add a controller for our view. Right click on the Controllers folder and click Add->Controller. Name it as UserController.
 By default, your Controller class will be created with the following code:
Step 6: Right click on the Index method and select Create View to create a View for our Index page (which will list down all the users and provide options to create new users).
 Step 7: Now add the following code in the UserController.cs. In this code, we are creating action methods for different user actions and returning corresponding views that we created earlier.
We will add two methods for each operation: GET and POST. HttpGet will be used while fetching the data and rendering it. HttpPost will be used for creating/updating data. For example, when we are adding a new user, we will need a form to add a user which is a GET operation. Once we fill the form and submit those values, we will need the POST method.

Steps to create advanced MVC Application
Step 1: Select File->New->Project->ASP.NET MVC Web Application. Name it as AdvancedMVCApplication. Click Ok. In the next window, select Template as Internet Application and View Engine as Razor. Observe that we are using a template this time instead of an Empty application.
This will create a new solution project as shown below. Since we are using the default ASP.NET theme, it comes with sample Views, Controllers, Models and other files.
Build the solution and run the application to see its default output as this:
Step 2: We will add a new model which will define the structure of users data. Right click on Models folder and click Add->Class. Name this as UserModel and click Add.
Step 3: Now copy the following code in the newly created UserModel.cs:using System; using System.ComponentModel; using System.ComponentModel.DataAnnotations; using System.Web.Mvc.Html; namespace AdvancedMVCApplication.Models { public class UserModels { [Required] public int Id { get; set; } [DisplayName("First Name")] [Required(ErrorMessage = "First name is required")] public string FirstName { get; set; } [Required] public string LastName { get; set; } public string Address { get; set; } [Required] [StringLength(50)] public string Email { get; set; } [DataType(DataType.Date)] public DateTime DOB { get; set; } [Range(100,1000000)] public decimal Salary { get; set; } } }In the above code, we have specified all the parameters that the User model has, their data types and validations such as required fields and length.
Step 4: Now that we have our User Model ready to hold the data, we will create a class file Users.cs which will contain methods for viewing users, adding, editing and deleting users. Right click on Models and click Add->Class. Name it as Users. This will create users.cs class inside Models.
Copy the following code in the users.cs class.
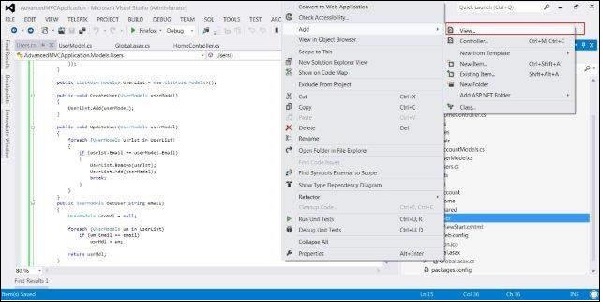
using System;
using System.Collections.Generic;
using System.EnterpriseServices;

namespace AdvancedMVCApplication.Models {

   public class Users {

      public List UserList = new List();

      //action to get user details
      public UserModels GetUser(int id) {
         UserModels usrMdl = null;

         foreach (UserModels um in UserList)
            if (um.Id == id)
               usrMdl = um;
         return usrMdl;
      }

      //action to create new user
      public void CreateUser(UserModels userModel) {
         UserList.Add(userModel);
      }

      //action to udpate existing user
      public void UpdateUser(UserModels userModel) {
         foreach (UserModels usrlst in UserList) {
            if (usrlst.Id == userModel.Id) {
               usrlst.Address = userModel.Address;
               usrlst.DOB = userModel.DOB;
               usrlst.Email = userModel.Email;
               usrlst.FirstName = userModel.FirstName;
               usrlst.LastName = userModel.LastName;
               usrlst.Salary = userModel.Salary;
               break;
            }
         }
      }

      //action to delete exising user
      public void DeleteUser(UserModels userModel) {
         foreach (UserModels usrlst in UserList) {
            if (usrlst.Id == userModel.Id) {
               UserList.Remove(usrlst);
               break;
            }
         }
      }
   }
}
Step 5: Once we have our UserModel.cs and Users.cs, we will add Views to our model for viewing users, add, edit and delete users. First let us create a View to create user. Right click on the Views folder and click Add->View.
In the next window, select the View Name as UserAdd, View Engine as Razor and select the Create a strongly-typed view checkbox.
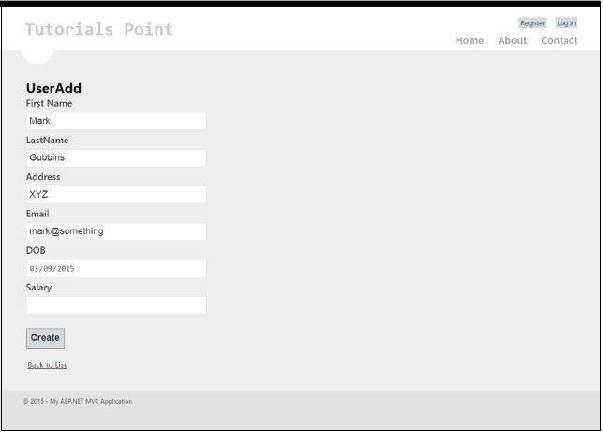
Click Add. This will create the following CSHML code by default as shown below:@model AdvancedMVCApplication.Models.UserModels @{ ViewBag.Title = "UserAdd"; } <h2>UserAdd</h2> @using (Html.BeginForm()) { @Html.ValidationSummary(true) <fieldset> <legend>UserModels</legend> <div class = "editor-label"> @Html.LabelFor(model => model.FirstName) </div> <div class = "editor-field"> @Html.EditorFor(model => model.FirstName) @Html.ValidationMessageFor(model => model.FirstName) </div> <div class = "editor-label"> @Html.LabelFor(model => model.LastName) </div> <div class = "editor-field"> @Html.EditorFor(model => model.LastName) @Html.ValidationMessageFor(model => model.LastName) </div> <div class = "editor-label"> @Html.LabelFor(model => model.Address) </div> <div class = "editor-field"> @Html.EditorFor(model => model.Address) @Html.ValidationMessageFor(model => model.Address) </div> <div class = "editor-label"> @Html.LabelFor(model => model.Email) </div> <div class = "editor-field"> @Html.EditorFor(model => model.Email) @Html.ValidationMessageFor(model => model.Email) </div> <div class = "editor-label"> @Html.LabelFor(model => model.DOB) </div> <div class = "editor-field"> @Html.EditorFor(model => model.DOB) @Html.ValidationMessageFor(model => model.DOB) </div> <div class = "editor-label"> @Html.LabelFor(model => model.Salary) </div> <div class = "editor-field"> @Html.EditorFor(model => model.Salary) @Html.ValidationMessageFor(model => model.Salary) </div> <p> <input type = "submit" value = "Create" /> </p> </fieldset> } <div> @Html.ActionLink("Back to List", "Index") </div> @section Scripts { @Scripts.Render("~/bundles/jqueryval") }As you can see, this view contains view details of all the attributes of the fields including their validation messages, labels, etc. This View will look like this in our final application:
Similar to UserAdd, now we will add four more Views given below with the given code:Index.cshtml
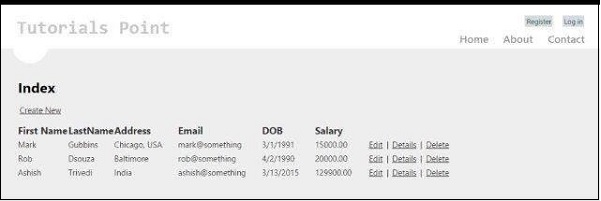
This View will display all the users present in our system on the Index page.@model IEnumerable<AdvancedMVCApplication.Models.UserModels> @{ ViewBag.Title = "Index"; } <h2>Index</h2> <p> @Html.ActionLink("Create New", "UserAdd") </p> <table> <tr> <th> @Html.DisplayNameFor(model => model.FirstName) </th> <th> @Html.DisplayNameFor(model => model.LastName) </th> <th> @Html.DisplayNameFor(model => model.Address) </th> <th> @Html.DisplayNameFor(model => model.Email) </th> <th> @Html.DisplayNameFor(model => model.DOB) </th> <th> @Html.DisplayNameFor(model => model.Salary) </th> <th></th> </tr> @foreach (var item in Model) { <tr> <td> @Html.DisplayFor(modelItem => item.FirstName) </td> <td> @Html.DisplayFor(modelItem => item.LastName) </td> <td> @Html.DisplayFor(modelItem => item.Address) </td> <td> @Html.DisplayFor(modelItem => item.Email) </td> <td> @Html.DisplayFor(modelItem => item.DOB) </td> <td> @Html.DisplayFor(modelItem => item.Salary) </td> <td> @Html.ActionLink("Edit", "Edit", new { id=item.Id }) | @Html.ActionLink("Details", "Details", new { id=item.Id }) | @Html.ActionLink("Delete", "Delete", new { id=item.Id }) </td> </tr> } </table>This View will look this in our final application:
Details.cshtml:
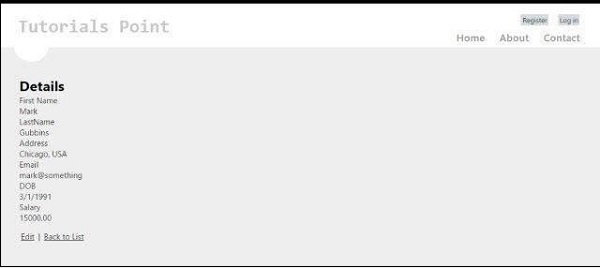
This View will display details of a specific user when we click on user record.@model AdvancedMVCApplication.Models.UserModels @{ ViewBag.Title = "Details"; } <h2>Details</h2> <fieldset> <legend>UserModels</legend> <div class = "display-label"> @Html.DisplayNameFor(model => model.FirstName) </div> <div class = "display-field"> @Html.DisplayFor(model => model.FirstName) </div> <div class = "display-label"> @Html.DisplayNameFor(model => model.LastName) </div> <div class = "display-field"> @Html.DisplayFor(model => model.LastName) </div> <div class = "display-label"> @Html.DisplayNameFor(model => model.Address) </div> <div class = "display-field"> @Html.DisplayFor(model => model.Address) </div> <div class = "display-label"> @Html.DisplayNameFor(model => model.Email) </div> <div class = "display-field"> @Html.DisplayFor(model => model.Email) </div> <div class = "display-label"> @Html.DisplayNameFor(model => model.DOB) </div> <div class = "display-field"> @Html.DisplayFor(model => model.DOB) </div> <div class = "display-label"> @Html.DisplayNameFor(model => model.Salary) </div> <div class = "display-field"> @Html.DisplayFor(model => model.Salary) </div> </fieldset> <p> @Html.ActionLink("Edit", "Edit", new { id = Model.Id }) | @Html.ActionLink("Back to List", "Index") </p>This View will look like this in our final application:
Edit.cshtml:
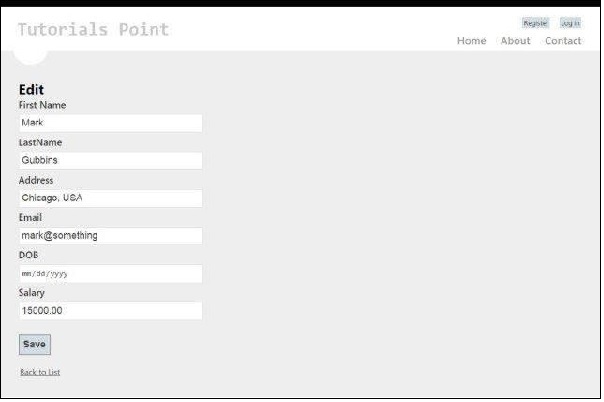
This View will display the edit form to edit the details of an existing user.@model AdvancedMVCApplication.Models.UserModels @{ ViewBag.Title = "Edit"; } <h2>Edit</h2> @using (Html.BeginForm()) { @Html.AntiForgeryToken() @Html.ValidationSummary(true) <fieldset> <legend>UserModels</legend> @Html.HiddenFor(model => model.Id) <div class = "editor-label"> @Html.LabelFor(model => model.FirstName) </div> <div class = "editor-field"> @Html.EditorFor(model => model.FirstName) @Html.ValidationMessageFor(model => model.FirstName) </div> <div class = "editor-label"> @Html.LabelFor(model => model.LastName) </div> <div class = "editor-field"> @Html.EditorFor(model => model.LastName) @Html.ValidationMessageFor(model => model.LastName) </div> <div class = "editor-label"> @Html.LabelFor(model => model.Address) </div> <div class = "editor-field"> @Html.EditorFor(model => model.Address) @Html.ValidationMessageFor(model => model.Address) </div> <div class = "editor-label"> @Html.LabelFor(model => model.Email) </div> <div class = "editor-field"> @Html.EditorFor(model => model.Email) @Html.ValidationMessageFor(model => model.Email) </div> <div class = "editor-label"> @Html.LabelFor(model => model.DOB) </div> <div class = "editor-field"> @Html.EditorFor(model => model.DOB) @Html.ValidationMessageFor(model => model.DOB) </div> <div class = "editor-label"> @Html.LabelFor(model => model.Salary) </div> <div class = "editor-field"> @Html.EditorFor(model => model.Salary) @Html.ValidationMessageFor(model => model.Salary) </div> <p> <input type = "submit" value = "Save" /> </p> </fieldset> } <div> @Html.ActionLink("Back to List", "Index") </div> @section Scripts { @Scripts.Render("~/bundles/jqueryval") }This View will look like this in our application:
Delete.cshtml:
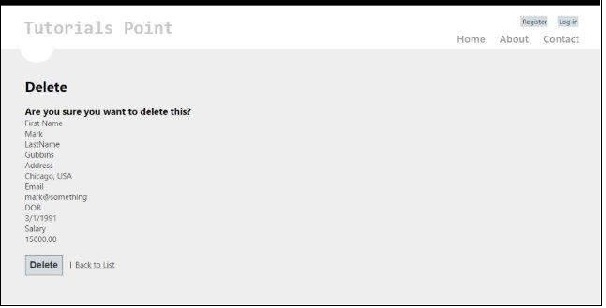
This View will display the form to delete the existing user.@model AdvancedMVCApplication.Models.UserModels @{ ViewBag.Title = "Delete"; } <h2>Delete</h2> <h3>Are you sure you want to delete this?</h3> <fieldset> <legend>UserModels</legend> <div class = "display-label"> @Html.DisplayNameFor(model => model.FirstName) </div> <div class = "display-field"> @Html.DisplayFor(model => model.FirstName) </div> <div class = "display-label"> @Html.DisplayNameFor(model => model.LastName) </div> <div class = "display-field"> @Html.DisplayFor(model => model.LastName) </div> <div class = "display-label"> @Html.DisplayNameFor(model => model.Address) </div> <div class = "display-field"> @Html.DisplayFor(model => model.Address) </div> <div class = "display-label"> @Html.DisplayNameFor(model => model.Email) </div> <div class = "display-field"> @Html.DisplayFor(model => model.Email) </div> <div class = "display-label"> @Html.DisplayNameFor(model => model.DOB) </div> <div class = "display-field"> @Html.DisplayFor(model => model.DOB) </div> <div class = "display-label"> @Html.DisplayNameFor(model => model.Salary) </div> <div class = "display-field"> @Html.DisplayFor(model => model.Salary) </div> </fieldset> @using (Html.BeginForm()) { @Html.AntiForgeryToken() <p> <input type = "submit" value = "Delete" /> | @Html.ActionLink("Back to List", "Index") </p> }This View will look like this in our final application:
Step 6: We have already added the Models and Views in our application. Now finally we will add a controller for our view. Right click on the Controllers folder and click Add->Controller. Name it as UserController.
By default, your Controller class will be created with the following code:using System; using System.Collections.Generic; using System.Linq; using System.Web; using System.Web.Mvc; using AdvancedMVCApplication.Models; namespace AdvancedMVCApplication.Controllers { public class UserController : Controller { private static Users _users = new Users(); public ActionResult Index() { return View(_users.UserList); } } }In the above code, the Index method will be used while rendering the list of users on the Index page.
Step 6: Right click on the Index method and select Create View to create a View for our Index page (which will list down all the users and provide options to create new users).
Step 7: Now add the following code in the UserController.cs. In this code, we are creating action methods for different user actions and returning corresponding views that we created earlier.We will add two methods for each operation: GET and POST. HttpGet will be used while fetching the data and rendering it. HttpPost will be used for creating/updating data. For example, when we are adding a new user, we will need a form to add a user which is a GET operation. Once we fill the form and submit those values, we will need the POST method.
//Action for Index View
public ActionResult Index() {
   return View(_users.UserList);
}

//Action for UserAdd View
[HttpGet]
public ActionResult UserAdd() {
   return View();
}

[HttpPost]
public ActionResult UserAdd(UserModels userModel) {
   _users.CreateUser(userModel);
   return View("Index", _users.UserList);
}

//Action for Details View
[HttpGet]
public ActionResult Details(int id) {
   return View(_users.UserList.FirstOrDefault(x => x.Id == id));
}

[HttpPost]
public ActionResult Details() {
   return View("Index", _users.UserList);
}

//Action for Edit View
[HttpGet]
public ActionResult Edit(int id) {
   return View(_users.UserList.FirstOrDefault(x=>x.Id==id));
}

[HttpPost]
public ActionResult Edit(UserModels userModel) {
   _users.UpdateUser(userModel);
   return View("Index", _users.UserList);
}

//Action for Delete View
[HttpGet]
public ActionResult Delete(int id) {
   return View(_users.UserList.FirstOrDefault(x => x.Id == id));
}

[HttpPost]
public ActionResult Delete(UserModels userModel) {
   _users.DeleteUser(userModel);
   return View("Index", _users.UserList);
} sers.UserList);
Step 8: Last thing to do is go to RouteConfig.cs file in App_Start folder and change the default Controller to User.
defaults: new { controller = "User", action = "Index", id = UrlParameter.Optional }Step 9: That's all we need to get our advanced application up and running. Now run the application. You will be able to see an application like this and you can perform all the functionalities of adding, viewing, editing, deleting users as we saw in the earlier screenshots.
No comments:
Post a Comment