
Action Mailer is the Rails component that enables applications
to send and receive e-mail. In this chapter we will see how to send an
email using Rails.
So lets start with creating an emails project using following command.
Here is the way to create database −
Go into config folder of your emails project and open environment.rb file and add the following line at the bottom of this file.
Add the following lines of code to the bottom of your environment.rb as well.
You may also change the default email message format. If you prefer to send email in HTML instead of plain text format, add the following line to config/environment.rb as well −
Next step will be to create a mailer
You are almost done except to prepare a screen from where you will get user information to send email. So let's define one screen method index in controller and then in next section we will define all the required views −
Add following code in emailer_controller.rb file
So just put the following code in app/views/contact.html.erb file
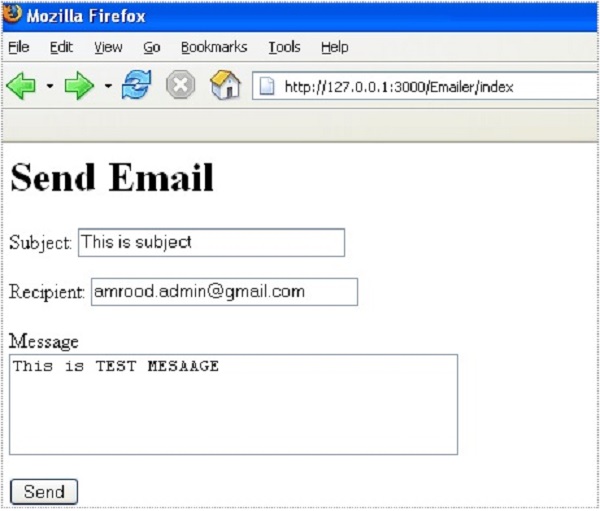
Now test your application by using http://127.0.0.1:3000/Emailer/index. This displays following screen and by using this screen now you will be able to send your message to anybody.
 This will send your message and will display text message that "Message sent successfully"
So lets start with creating an emails project using following command.
C:\ruby> rails -d mysql emailsHere we are using -d mysql option to specify our interest to use MySQL database. We can specify any other database name like oracle or postgress using -d option. By default Rails uses SQLite database.
Setting up the Database
Even though we are not using a database in our application but Rails needs it to proceed. So let's perform these additional steps.Here is the way to create database −
mysql> create database emails;
Query OK, 1 row affected (0.01 sec)

mysql> grant all privileges on emails.*
 to 'root'@'localhost' identified by 'password';
Query OK, 0 rows affected (0.00 sec)

mysql> FLUSH PRIVILEGES;
Query OK, 0 rows affected (0.00 sec)
To tell Rails how to find the database, edit the configuration file ~\upload\config\database.yml and change the database name to cookbook. When you finish, it should look something like −
development:
   adapter: mysql
   encoding: utf8
   database: emails
   username: root
   password: password
   host: localhost
test:
   adapter: mysql
   encoding: utf8
   database: emails
   username: root
   password: password
   host: localhost
production:
   adapter: mysql
   encoding: utf8
   database: emails
   username: root
   password: password
   host: localhost
Action Mailer - Configuration
Following are the steps you have to follow to complete your configuration before proceeding with actual work −Go into config folder of your emails project and open environment.rb file and add the following line at the bottom of this file.
ActionMailer::Base.delivery_method = :smtpThis tells ActionMailer that you want to user SMTP server. You can also set it to be :sendmail if you are using a Unix-based operating system such as Mac OS X or Linux.
Add the following lines of code to the bottom of your environment.rb as well.
ActionMailer::Base.smtp_settings = {
   :address => "smtp.tutorialspoint.com",
   :port => 25,
   :domain => "tutorialspoint.com",
   :authentication => :login,
   :user_name => "username",
   :password => "password",
}
Replace each hash value with proper settings for your Simple Mail Transfer Protocol (SMTP) server. You can take this information from your Internet Service Provider if you already don't know. You don't need to change port number 25 and authentication type if you are using standard SMTP server.
You may also change the default email message format. If you prefer to send email in HTML instead of plain text format, add the following line to config/environment.rb as well −
ActionMailer::Base.default_content_type = "text/html"ActionMailer::Base.default_content_type could be set to "text/plain", "text/html", and "text/enriched". The default value is "text/plain".
Next step will be to create a mailer
Generate a Mailer
Use the following command to generate a mailer as follows −C:\ruby\> cd emails C:\ruby\emails> ruby script/generate mailer EmailerThis will create a file emailer.rb in app/models directory. Check the content of this file is as follows −
class Emailer < ActionMailer::Base
end
Now let's create one method inside ActionMailer::Base class as follows.
class Emailer < ActionMailer::Base
   def contact(recipient, subject, message, sent_at = Time.now)
      @subject = subject
      @recipients = recipient
      @from = 'no-reply@yourdomain.com'
      @sent_on = sent_at
      @body["title"] = 'This is title'
      @body["email"] = 'sender@yourdomain.com'
      @body["message"] = message
      @headers = {}
   end
end
The contact method has four parameters a recipient, subject, message and a sent_at, which defines when the e-mail is sent. The method also defines six standard parameters that are a part of every ActionMailer method −
- @subject defines the e-mail subject.
- @body is a Ruby hash that contains values with which you can populate the mail template. You created three key-value pairs: title, email, and message
- @recipients is a list of the people to whom the message is being sent.
- @from defines who the e-mail is from.
- @sent_on takes the sent_at parameter and sets the timestamp of the e-mail.
- @headers is another hash that enables you to modify the e-mail headers. For example, you can set the MIME type of the e-mail if you want to send either plain text or HTML e-mail.
Creating Controller
Now we will create a controller for this application as follows −C:\ruby\emails> ruby script/generate controller EmailerNow lets define a controller method sendmail in app/controllers/emailer_controller.rb which will call Model method to send actual email as follows −
class EmailerController < ApplicationController
   def sendmail
      recipient = params[:email]
      subject = params[:subject]
      message = params[:message]
      Emailer.deliver_contact(recipient, subject, message)
      return if request.xhr?
      render :text => 'Message sent successfully'
   end
end
To deliver e-mail using the mailer's contact method, you have to add deliver_ to the beginning of the method name. You add a return if request.xhr? so that you can escape to Rails Java Script (RJS) if the browser does not support JavaScript and then tell the method to render a text message.
You are almost done except to prepare a screen from where you will get user information to send email. So let's define one screen method index in controller and then in next section we will define all the required views −
Add following code in emailer_controller.rb file
def index
   render :file => 'app\views\emailer\index.html.erb'
end
Defining Views
Define a view in app\views\emails\index.html.erb. This will be called as the default page for the application and will allow user to enter message and send required email −<h1>Send Email</h1> <% form_tag :action => 'sendmail' do %> <p><label for="email_subject">Subject</label>: <%= text_field 'email', 'subject' %></p> <p><label for="email_recipient">Recipient</label>: <%= text_field 'email', 'recipient' %></p> <p><label for="email_message">Message</label><br/> <%= text_area 'email', 'message' %></p> <%= submit_tag "Send" %> <% end %>Apart from the above view, we need one more template which will be used by the Emailer's contact method while sending message. This is just text with standard Rails <%= %> placeholders scattered throughout.
So just put the following code in app/views/contact.html.erb file
Hi!
You are having one email message from <%= @email %> with a title
<%= @title %>
and following is the message:
<%= @message %>
Thanks
Rest for Testing
Before starting your testing make sure your machine is connected to internet and your Email Server is up and running, Also your Webserver should be up and running well.Now test your application by using http://127.0.0.1:3000/Emailer/index. This displays following screen and by using this screen now you will be able to send your message to anybody.
This will send your message and will display text message that "Message sent successfully"Sending HTML Emails using Rails
To send mail as HTML, make sure your view (the .erb file) generates HTML and set the content type to html in your emails/app/models/emailer.rb file as follows −class Emailer < ActionMailer::Base def contact(recipient, subject, message, sent_at = Time.now) @subject = subject @recipients = recipient @from = 'no-reply@yourdomain.com' @sent_on = sent_at @body["title"] = 'This is title' @body["email"] = 'sender@yourdomain.com' @body["message"] = message @headers = {content_type => 'text/html'} end endFor a complete detail on ActionMailer, please look into the standard Ruby documentation here.
No comments:
Post a Comment