In this tutorial we will show you how to set up environment for
successful React development. Notice that there are many steps involved
but this will help you to speed up development process later. We will
need
NodeJS so if you don't have it installed, check the link from the table below.
| SN |
Software |
Description |
| 1 |
NodeJS and NPM |
NodeJS is the platform needed for the Cordova development. Checkout our NodeJS Environment Setup. |
Step 1 - Install Global Packages
You will need to install several packages for this setup. We will need some of the
babel plugins so let's first install
babel by running the following code in
command prompt window.
C:\Users\username>npm install -g babel
C:\Users\username>npm install -g babel-cli
Step 2 - Create Root Folder
The root folder will be named
reactApp and we will place it on
Desktop. After the folder is created we need to open it and create empty
package.json file inside by running
npm init from the
command prompt and follow the instructions.
C:\Users\username\Desktop>mkdir reactApp
C:\Users\username\Desktop\reactApp>npm init
Step 3 - Add Dependencies and plugins
We will use
webpack bundler in these tutorials so let's install
webpack and
webpack-dev-server.
C:\Users\username>npm install webpack --save
C:\Users\username>npm install webpack-dev-server --save
Since we want to use React, we need to install it first. The
--save command will add these packages to
package.json file.
C:\Users\username\Desktop\reactApp>npm install react --save
C:\Users\username\Desktop\reactApp>npm install react-dom --save
We already mentioned that we will need some
babel plugins so let's install it too.
C:\Users\username\Desktop\reactApp>npm install babel-core
C:\Users\username\Desktop\reactApp>npm install babel-loader
C:\Users\username\Desktop\reactApp>npm install babel-preset-react
C:\Users\username\Desktop\reactApp>npm install babel-preset-es2015
Step 4 - Create files
Let's create several files that we need. You can add it manually or you can use
command prompt.
C:\Users\username\Desktop\reactApp>touch index.html
C:\Users\username\Desktop\reactApp>touch App.jsx
C:\Users\username\Desktop\reactApp>touch main.js
C:\Users\username\Desktop\reactApp>touch webpack.config.js
Step 5 - Set Compiler, Server and Loaders
Open
webpack-config.js file and add the code below. We are setting webpack entry point to be
main.js. Output path is the place where bundled app will be served. We are also setting development server to
8080 port. You can choose any port you want. And lastly, we are setting babel loaders to search for
js files and use
es2015 and
react presets that we installed before.
webpack.config.js
var config = {
   entry: './main.js',

   output: {
      path:'./',
      filename: 'index.js',
   },

   devServer: {
      inline: true,
      port: 8080
   },

   module: {
      loaders: [
         {
            test: /\.jsx?$/,
            exclude: /node_modules/,
            loader: 'babel',

            query: {
               presets: ['es2015', 'react']
            }
         }
      ]
   }
}

module.exports = config;
Open the
package.json and delete
"test" "echo \"Error: no test specified\" && exit 1" inside
"scripts" object. We are deleting this line since we will not do any testing in this tutorials. Let's add the
start command instead.
"start": "webpack-dev-server --hot"
Now we can use
npm start command to start the server.
--hot
command will add live reload after something is changed inside our
files so we don't need to refresh the browser every time we change our
code.
Step 6 - index.html
This is just regular HTML. We are setting
div id = "app" as a root element for our app and adding
index.js script which is our bundled app file.
<!DOCTYPE html>
<html lang = "en">

   <head>
      <meta charset = "UTF-8">
      <title>React App</title>
   </head>

   <body>
      <div id = "app"></div>
      <script src = "index.js"></script>
   </body>

</html>
Step 7 - App.jsx and main.js
This is the first react component. We will explain React components
in depth in one of our later tutorials. This component will render
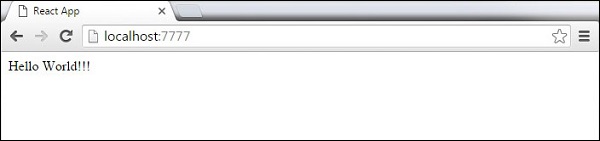
Hello World!!!.
App.jsx
import React from 'react';

class App extends React.Component {
   render() {
      return (
         <div>
            Hello World!!!
         </div>
      );
   }
}

export default App;
We need to import this component and render it to our root
App element so we can see it in browser.
main.js
import React from 'react';
import ReactDOM from 'react-dom';
import App from './App.jsx';

ReactDOM.render(<App />, document.getElementById('app'));
NOTE
Whenever you want to use something, you need to
import it first. If you want to make component usable in other parts of the app, you need to
export it after creation and
import it in the file where you want to use it.
Step 8 - Running the Server
The setup is finished and we can start the server by running:
C:\Users\username\Desktop\reactApp>npm start
It will show you the port we need to open in browser, in our case
http://localhost:8080/. After we open it we will see the following output:

No comments:
Post a Comment