
Model in MVC architecture includes the logic of application. Model is
the core interaction with the database. It should be able to manage
updating, deleting, inserting, and fetching of records as per the user’s
request.
For understanding the model interaction in Phalcon PHP framework, following steps should be followed.
Step 1 − Creation of database.
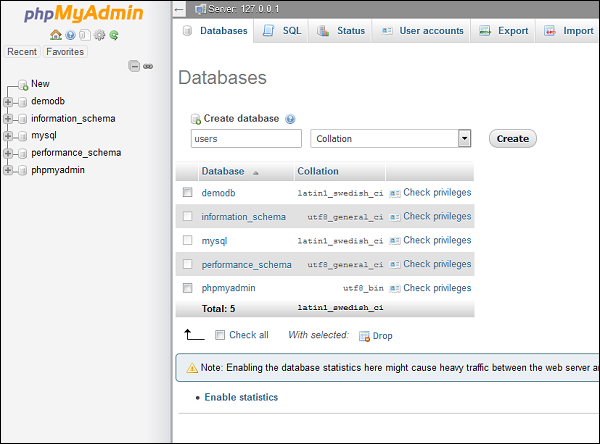
For any LAMP, WAMP, XAMPP software stack, it is quite easy to create a database with the help of phpmyadmin database tool.
Following is the SQL query to create a database.
 Step 3 − Once the database is created successfully, create a
table which will help its association for creating a model in Phalcon
framework.
Step 3 − Once the database is created successfully, create a
table which will help its association for creating a model in Phalcon
framework.
Use the following query to create a new table named “users”.
 Step 4 − To create a model associated with the 'Users' table
which we created in the above step, open command prompt instance. It is
important to redirect to the appropriate project path. Before that, it
is vital to check whether the database configuration has been correctly
set as shown in the following screenshot.
Step 4 − To create a model associated with the 'Users' table
which we created in the above step, open command prompt instance. It is
important to redirect to the appropriate project path. Before that, it
is vital to check whether the database configuration has been correctly
set as shown in the following screenshot.
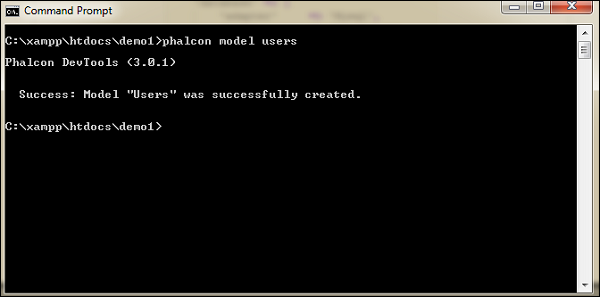
 Step 5 − Use the following command to create any model in Phalcon framework.
 This implies that the model has been created successfully.
Step 6 − Model created successfully is present in the models folder. Use the following path to view where the model is created.
 Following is the code for UserController.php.
For understanding the model interaction in Phalcon PHP framework, following steps should be followed.
Step 1 − Creation of database.
For any LAMP, WAMP, XAMPP software stack, it is quite easy to create a database with the help of phpmyadmin database tool.
Following is the SQL query to create a database.
create database <database-name>Step 2 − In the phpmyadmin section, click the Databases tab, mention the database name and further click the Create button as shown in the following screenshot.
Step 3 − Once the database is created successfully, create a
table which will help its association for creating a model in Phalcon
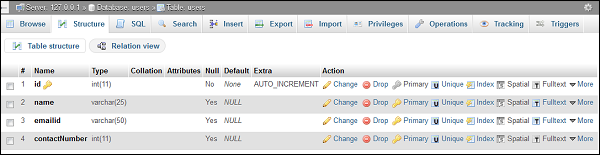
framework.Use the following query to create a new table named “users”.
DROP TABLE IF EXISTS `users`;

CREATE TABLE `users` (
   `id` int(11) NOT NULL AUTO_INCREMENT,
   `name` varchar(25),
   `emailid` varchar(50),
   `contactNumber` number
   PRIMARY KEY (`id`)
)
ENGINE = InnoDB DEFAULT CHARSET = utf8;
Once the table is created, its structure looks like as shown in the following screenshot.
Step 4 − To create a model associated with the 'Users' table
which we created in the above step, open command prompt instance. It is
important to redirect to the appropriate project path. Before that, it
is vital to check whether the database configuration has been correctly
set as shown in the following screenshot.
Step 5 − Use the following command to create any model in Phalcon framework.phalcon model <model-name>Following is the output on execution of the above command.
This implies that the model has been created successfully.Step 6 − Model created successfully is present in the models folder. Use the following path to view where the model is created.
C:\xampp\htdocs\demo1\app\modelsFollowing is the complete code for Users.php.
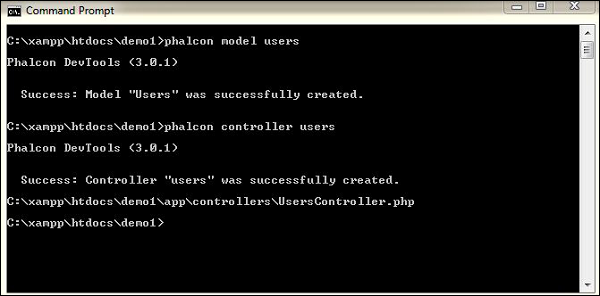
<?php

class Users extends \Phalcon\Mvc\Model {
   /**
      *
      * @var integer
      * @Primary
      * @Identity
      * @Column(type = "integer", length = 11, nullable = false)
   */

   public $id;
   /**
      *
      * @var string
      * @Column(type = "string", length = 25, nullable = true)
   */

   public $name;
   /**
      *
      * @var string
      * @Column(type = "string", length = 50, nullable = true)
   */

   public $emailid;
   /**
      *
      * @var integer
      * @Column(type = "integer", length = 11, nullable = true)
   */

   public $contactNumber;
   /**
      * Returns table name mapped in the model.
      *
      * @return string
   */

   public function getSource() {
      return 'users';
   }
   /**
      * Allows to query a set of records that match the specified conditions
      *
      * @param mixed $parameters
      * @return Users[]
   */

   public static function find($parameters = null) {
      return parent::find($parameters);
   }
   /**
      * Allows to query the first record that match the specified conditions
      *
      * @param mixed $parameters
      * @return Users
   */

   public static function findFirst($parameters = null) {
      return parent::findFirst($parameters);
   }
}
Step 7 − The Controller interacts with the model and the view to get the necessary output. As with the model, use the following command terminal to create a controller.
Phalcon controller <controller-name>On successful execution of the above command, following is the output.
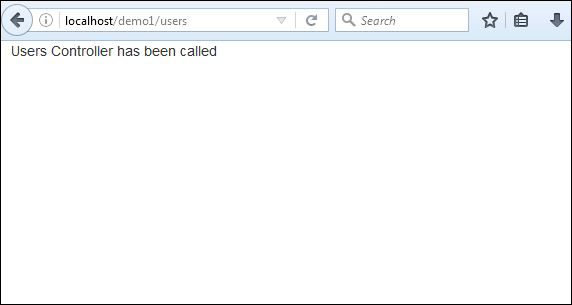
Following is the code for UserController.php.<?php class UsersController extends \Phalcon\Mvc\Controller { public function indexAction() { echo "Users Controller has been called"; } }The output will be displayed if we hit the following URL − http://localhost/demo1/users
No comments:
Post a Comment