
In this chapter let us study about Social Networking in
Drupal. Social media is becoming more important these days, drupal has
many social media modules for this purpose. Let us take ShareThis module as our example, you can choose any other of your choice.
Following are the simple steps used to install ShareThis module.
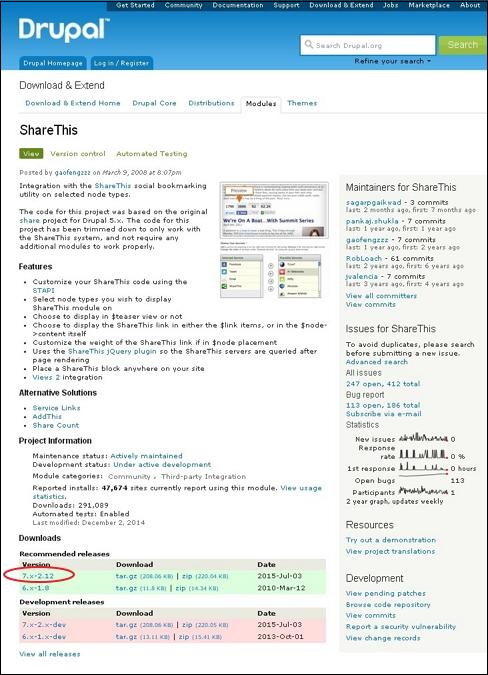
Step(1): Click ShareThis to visit ShareThis module page and click on the Version as shown below.
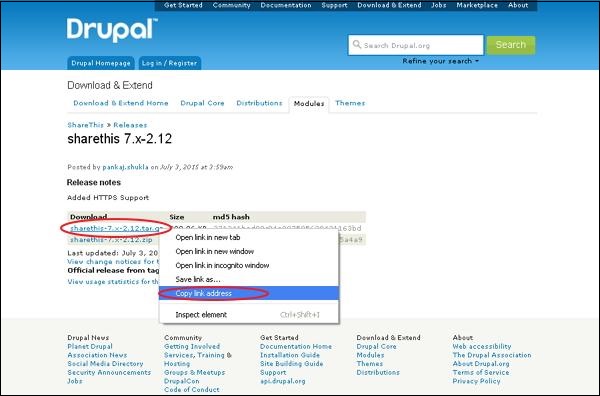
 Step(2): Next, copy the link address of the module as show below.
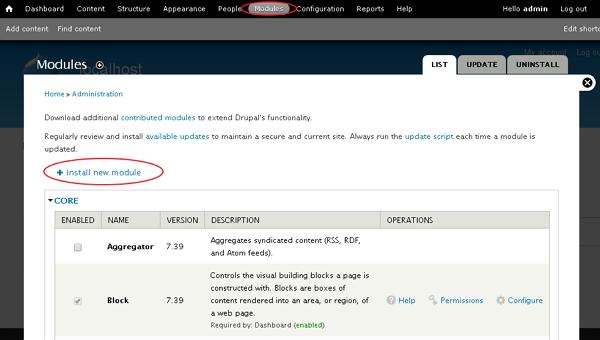
 Step(3): Next, go to Modules and click Install new module as shown below.
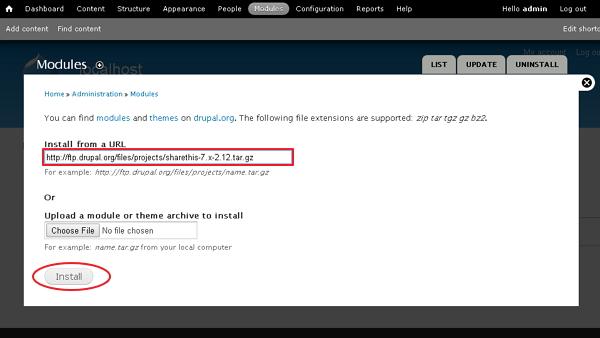
 Step(4): Next, paste the link address that you copied in step(2) and click on Install as shown below.
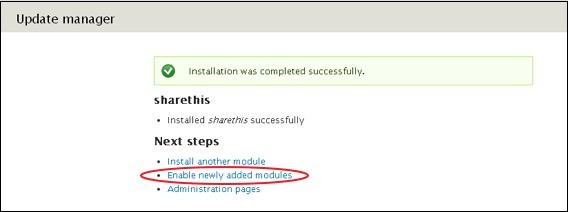
 Step(5): Next, you will see the screen shown below and click Enable newly added modules.
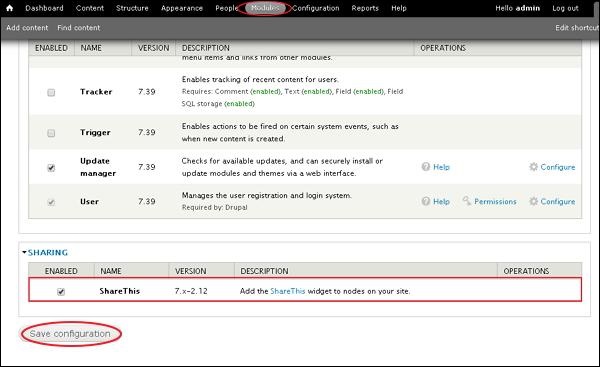
 Step(6): Next, go to Modules. Enable the module and click Save configuration as shown below.
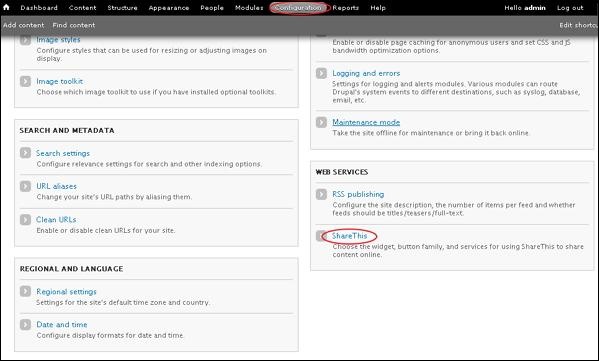
 Step(7): Next, go to Configuration, under WEB SERVICES click on ShareThis as shown below.
 Step(8): Next, you will see below screen.
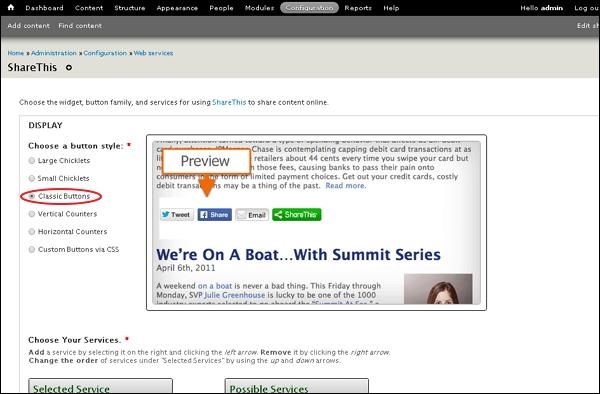
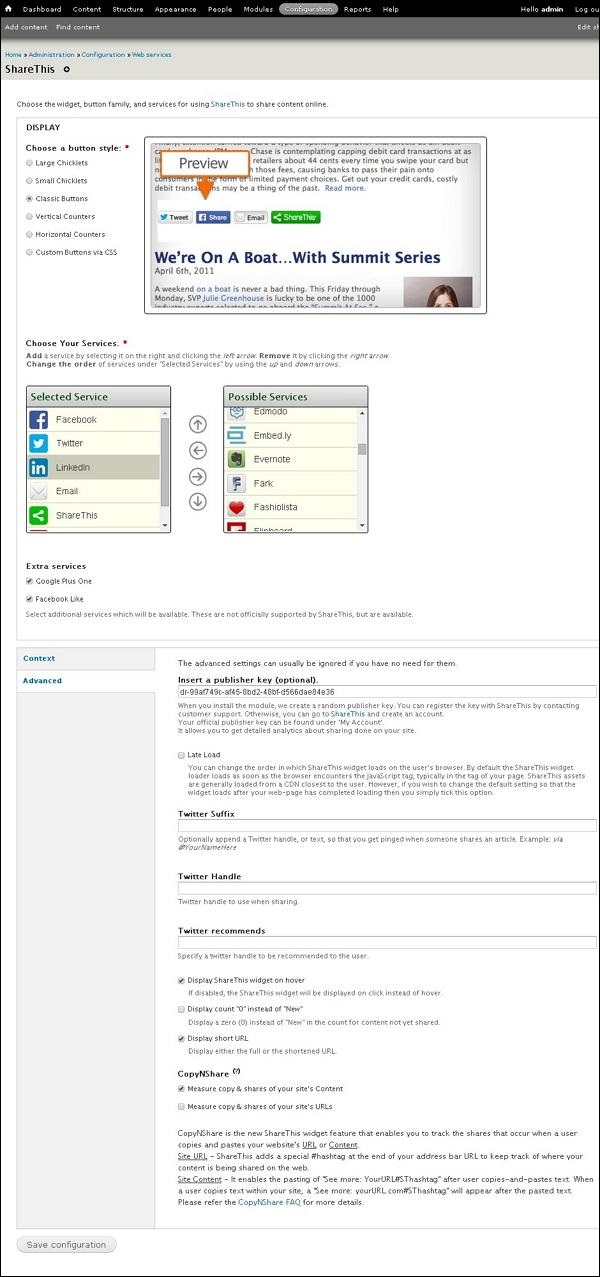 Step(9): Next, you can click any of the button style, under the Display section to share your content online as shown below.
 Step(10): Next, click any of the services you want to remove and click ->. You can also use Extra services like Google Plus One and Facebook Like by checking them as shown below.
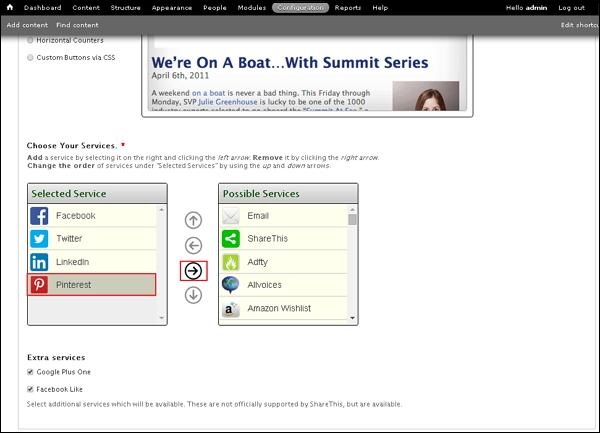 You can choose services from the Possible Services and also you can remove or re-order services from Selected Service.
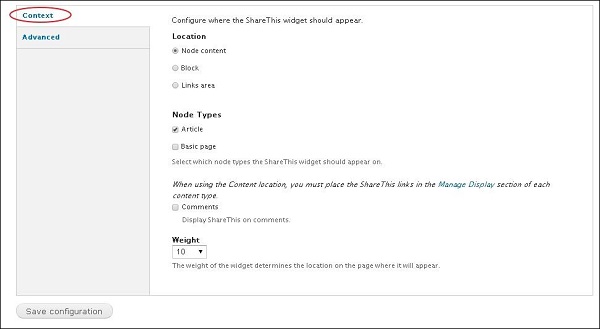
Step(11): Next, click on Context as shown below to configure where the ShareThis widget should appear.
 Below are some breif details about the above screen.
 Below are some breif details about the above screen.
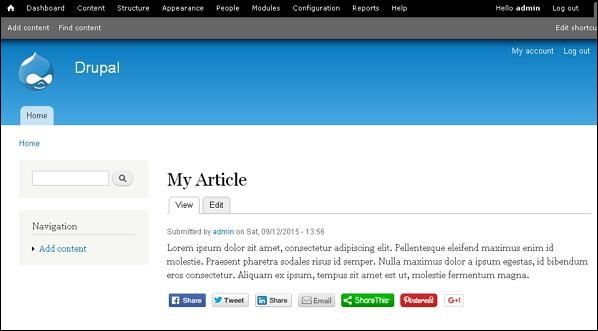
 Step(14): Now you can see the social media buttons appearing on Aritcle
Following are the simple steps used to install ShareThis module.
Step(1): Click ShareThis to visit ShareThis module page and click on the Version as shown below.
Step(2): Next, copy the link address of the module as show below.
Step(3): Next, go to Modules and click Install new module as shown below.
Step(4): Next, paste the link address that you copied in step(2) and click on Install as shown below.
Step(5): Next, you will see the screen shown below and click Enable newly added modules.
Step(6): Next, go to Modules. Enable the module and click Save configuration as shown below.
Step(7): Next, go to Configuration, under WEB SERVICES click on ShareThis as shown below.
Step(8): Next, you will see below screen.
Step(9): Next, you can click any of the button style, under the Display section to share your content online as shown below.
Step(10): Next, click any of the services you want to remove and click ->. You can also use Extra services like Google Plus One and Facebook Like by checking them as shown below.
You can choose services from the Possible Services and also you can remove or re-order services from Selected Service.Step(11): Next, click on Context as shown below to configure where the ShareThis widget should appear.
Below are some breif details about the above screen.- Under Location you can choose any of Node content or Block or Links area.
- Under Node Types you can select Article and Basic page, if you want ShareThis widget to appear on it.
- If you select Comments you can display ShareThis on comments as well.
- The Weight of the widget determines the location on the page where it will appear.
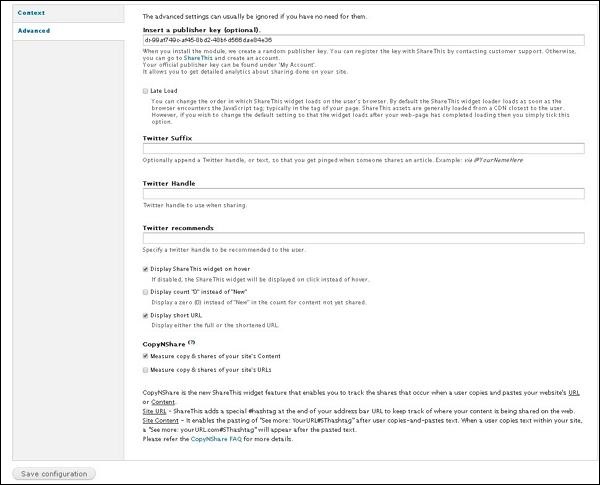
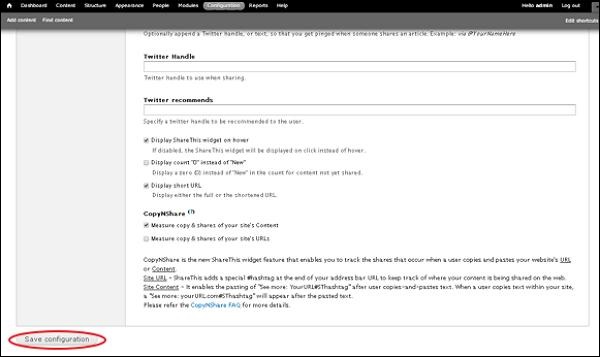
Below are some breif details about the above screen.- When you install the module, a random publisher key will be created.
- Twitter Suffix will optionally append a Twitter handle, or text, so that you get pinged when someone shares an article.
- Twitter Handle will used when sharing on twitter.
- Twitter recommends will specify a twitter handle to be recommended to the user while sharing.
- If Display ShareThis widget on hover is disabled ShareThis widget will be displayed on click instead of hover.
- If checked Display count "0" instead of "New", zero is displayed instead of New in the count for content not yet shared.
- Display short URL will display either the full or the shortened URL.
- CopyNShare will measure copy & shares of your site's Content or URL's if checked respectively.
Step(14): Now you can see the social media buttons appearing on Aritcle
No comments:
Post a Comment