What is ORM (Object Relation Mapping)?
Most programming language platforms are object oriented. Data in RDBMS servers on the other hand is stored as tables. Object relation mapping is a technique of mapping object parameters to the underlying RDBMS table structure. An ORM API provides methods to perform CRUD operations without having to write raw SQL statements.
In this section, we are going to study the ORM techniques of Flask-SQLAlchemy and build a small web application.
Step 1 − Install Flask-SQLAlchemy extension.
pip install flask-sqlalchemyStep 2 − You need to import SQLAlchemy class from this module.
from flask_sqlalchemy import SQLAlchemyStep 3 − Now create a Flask application object and set URI for the database to be used.
app = Flask(__name__)
app.config['SQLALCHEMY_DATABASE_URI'] = 'sqlite:///students.sqlite3'
Step 4 − Then create an object of SQLAlchemy class with application object as the parameter. This object contains helper functions for ORM operations. It also provides a parent Model class using which user defined models are declared. In the snippet below, a students model is created.
db = SQLAlchemy(app)
class students(db.Model):
   id = db.Column('student_id', db.Integer, primary_key = True)
   name = db.Column(db.String(100))
   city = db.Column(db.String(50))
   addr = db.Column(db.String(200))
   pin = db.Column(db.String(10))

def __init__(self, name, city, addr,pin):
   self.name = name
   self.city = city
   self.addr = addr
   self.pin = pin
Step 5 − To create / use database mentioned in URI, run the create_all() method.
db.create_all()The Session object of SQLAlchemy manages all persistence operations of ORM object.
The following session methods perform CRUD operations −
- db.session.add(model object) − inserts a record into mapped table
- db.session.delete(model object) − deletes record from table
- model.query.all() − retrieves all records from table (corresponding to SELECT query).
Students.query.filter_by(city = ’Hyderabad’).all()With this much of background, now we shall provide view functions for our application to add a student data.
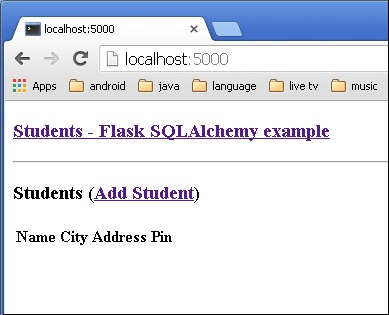
The entry point of the application is show_all() function bound to ‘/’ URL. The Record set of students table is sent as parameter to the HTML template. The Server side code in the template renders the records in HTML table form.
@app.route('/')
def show_all():
   return render_template('show_all.html', students = students.query.all() )
The HTML script of the template (‘show_all.html’) is like this −
<!DOCTYPE html>
<html lang = "en">
   <head></head>
   <body>

      <h3>
         <a href = "{{ url_for('show_all') }}">Comments - Flask
            SQLAlchemy example</a>
      </h3>

      <hr/>
      {%- for message in get_flashed_messages() %}
         {{ message }}
      {%- endfor %}

      <h3>Students (<a href = "{{ url_for('new') }}">Add Student
         </a>)</h3>

      <table>
         <thead>
            <tr>
               <th>Name</th>
               <th>City</th>
               <th>Address</th>
               <th>Pin</th>
            </tr>
         </thead>

         <tbody>
            {% for student in students %}
               <tr>
                  <td>{{ student.name }}</td>
                  <td>{{ student.city }}</td>
                  <td>{{ student.addr }}</td>
                  <td>{{ student.pin }}</td>
               </tr>
            {% endfor %}
         </tbody>
      </table>

   </body>
</html>
The above page contains a hyperlink to ‘/new’ URL mapping new() function. When clicked, it opens a Student Information form. The data is posted to the same URL in POST method.
new.html
<!DOCTYPE html>
<html>
   <body>

      <h3>Students - Flask SQLAlchemy example</h3>
      <hr/>

      {%- for category, message in get_flashed_messages(with_categories = true) %}
         <div class = "alert alert-danger">
            {{ message }}
         </div>
      {%- endfor %}

      <form action = "{{ request.path }}" method = "post">
         <label for = "name">Name</label><br>
         <input type = "text" name = "name" placeholder = "Name" /><br>
         <label for = "email">City</label><br>
         <input type = "text" name = "city" placeholder = "city" /><br>
         <label for = "addr">addr</label><br>
         <textarea name = "addr" placeholder = "addr"></textarea><br>
         <label for = "PIN">City</label><br>
         <input type = "text" name = "pin" placeholder = "pin" /><br>
         <input type = "submit" value = "Submit" />
      </form>

   </body>
</html>
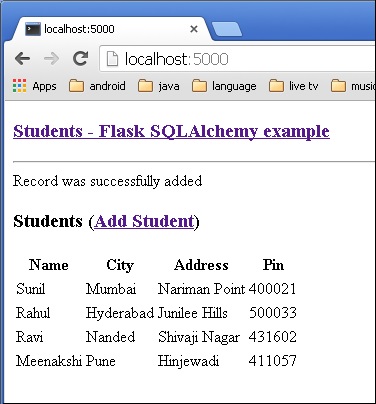
When the http method is detected as POST, the form data is added in the students table and the application returns to homepage showing the added data.
@app.route('/new', methods = ['GET', 'POST'])
def new():
   if request.method == 'POST':
      if not request.form['name'] or not request.form['city'] or not request.form['addr']:
         flash('Please enter all the fields', 'error')
      else:
         student = students(request.form['name'], request.form['city'],
            request.form['addr'], request.form['pin'])

         db.session.add(student)
         db.session.commit()

         flash('Record was successfully added')
         return redirect(url_for('show_all'))
   return render_template('new.html')
Given below is the complete code of application (app.py).
from flask import Flask, request, flash, url_for, redirect, render_template
from flask_sqlalchemy import SQLAlchemy

app = Flask(__name__)
app.config['SQLALCHEMY_DATABASE_URI'] = 'sqlite:///students.sqlite3'
app.config['SECRET_KEY'] = "random string"

db = SQLAlchemy(app)

class students(db.Model):
   id = db.Column('student_id', db.Integer, primary_key = True)
   name = db.Column(db.String(100))
   city = db.Column(db.String(50))
   addr = db.Column(db.String(200))
   pin = db.Column(db.String(10))

def __init__(self, name, city, addr,pin):
   self.name = name
   self.city = city
   self.addr = addr
   self.pin = pin

@app.route('/')
def show_all():
   return render_template('show_all.html', students = students.query.all() )

@app.route('/new', methods = ['GET', 'POST'])
def new():
   if request.method == 'POST':
      if not request.form['name'] or not request.form['city'] or not request.form['addr']:
         flash('Please enter all the fields', 'error')
      else:
         student = students(request.form['name'], request.form['city'],
            request.form['addr'], request.form['pin'])

         db.session.add(student)
         db.session.commit()
         flash('Record was successfully added')
         return redirect(url_for('show_all'))
   return render_template('new.html')

if __name__ == '__main__':
   db.create_all()
   app.run(debug = True)
Run the script from Python shell and enter http://localhost:5000/ in the browser.
 Click the ‘Add Student’ link to open Student information form.
 Fill the form and submit. The home page reappears with the submitted data.
We can see the output as shown below.


No comments:
Post a Comment