- Managed Bean is a regular Java Bean class registered with JSF. In
other words, Managed Beans is a java bean managed by JSF framework.
- The managed bean contains the getter and setter methods, business
logic or even a backing bean (a bean contains all the HTML form value).
- Managed beans works as Model for UI component.
- Managed Bean can be accessed from JSF page.
- In JSF 1.2,a managed bean had to register it in JSF configuration file such as faces-config.xml.
- From JSF 2.0 onwards, Managed beans can be easily registered
using annotations. This approach keeps beans and there registration at
one place and it becomes easier to manage.
Using XML Configuration
<managed-bean>
  <managed-bean-name>helloWorld</managed-bean-name>
  <managed-bean-class>com.tutorialspoint.test.HelloWorld</managed-bean-class>
  <managed-bean-scope>request</managed-bean-scope>
</managed-bean>
<managed-bean>
  <managed-bean-name>message</managed-bean-name>
  <managed-bean-class>com.tutorialspoint.test.Message</managed-bean-class>
  <managed-bean-scope>request</managed-bean-scope>
</managed-bean>
Using Annotation
@ManagedBean(name = "helloWorld", eager = true)
@RequestScoped
public class HelloWorld {

   @ManagedProperty(value="#{message}")
   private Message message;
   ...
}
@ManagedBean Annotation
@ManagedBean marks a bean to be a managed bean with the name specified in
name
attribute. If the name attribute is not specified, then the managed
bean name will default to class name portion of the fully qualified
class name. In our case it would be helloWorld.
Another important attribute is
eager. If eager="true" then
managed bean is created before it is requested for the first time
otherwise "lazy" initialization is used in which bean will be created
only when it is requested.
Scope Annotations
Scope annotations set the scope into which the managed bean will be
placed. If scope is not specified then bean will default to request
scope. Each scope is briefly discussed below
| Scope | Description |
|---|
| @RequestScoped | Bean lives as long as the HTTP
request-response lives. It get created upon a HTTP request and get
destroyed when the HTTP response associated with the HTTP request is
finished. |
| @NoneScoped | Bean lives as long as a single EL
evaluation. It get created upon an EL evaluation and get destroyed
immediately after the EL evaluation. |
| @ViewScoped | Bean lives as long as user is interacting
with the same JSF view in the browser window/tab. It get created upon a
HTTP request and get destroyed once user postback to a different view. |
| @SessionScoped | Bean lives as long as the HTTP session
lives. It get created upon the first HTTP request involving this bean in
the session and get destroyed when the HTTP session is invalidated. |
| @ApplicationScoped | Bean lives as long as the web
application lives. It get created upon the first HTTP request involving
this bean in the application (or when the web application starts up and
the eager=true attribute is set in @ManagedBean) and get destroyed when
the web application shuts down. |
| @CustomScoped | Bean lives as long as the bean's entry in the custom Map which is created for this scope lives. |
@ManagedProperty Annotation
JSF is a simple static Dependency Injection(DI) framework.Using
@ManagedProperty annotation a managed bean's property can be injected in another managed bean.
Example Application
Let us create a test JSF application to test the above annotations for managed beans.
| Step | Description |
|---|
| 1 | Create a project with a name helloworld under a package com.tutorialspoint.test as explained in the JSF - Create Application chapter. |
| 2 | Modify HelloWorld.java as explained below. Keep rest of the files unchanged. |
| 3 | Create Message.java under a package com.tutorialspoint.test as explained below. |
| 4 | Compile and run the application to make sure business logic is working as per the requirements. |
| 5 | Finally, build the application in the form of war file and deploy it in Apache Tomcat Webserver. |
| 6 | Launch your web application using appropriate URL as explained below in the last step. |
HelloWorld.java
package com.tutorialspoint.test;

import javax.faces.bean.ManagedBean;
import javax.faces.bean.ManagedProperty;
import javax.faces.bean.RequestScoped;

@ManagedBean(name = "helloWorld", eager = true)
@RequestScoped
public class HelloWorld {

   @ManagedProperty(value="#{message}")
   private Message messageBean;

   private String message;

   public HelloWorld() {
      System.out.println("HelloWorld started!");
   }
   public String getMessage() {
      if(messageBean != null){
         message = messageBean.getMessage();
      }
      return message;
   }
   public void setMessageBean(Message message) {
      this.messageBean = message;
   }
}
Message.java
package com.tutorialspoint.test;

import javax.faces.bean.ManagedBean;
import javax.faces.bean.RequestScoped;

@ManagedBean(name = "message", eager = true)
@RequestScoped
public class Message {

 private String message = "Hello World!";

 public String getMessage() {
        return message;
    }
    public void setMessage(String message) {
        this.message = message;
    }
}
home.xhtml
<!DOCTYPE html PUBLIC "-//W3C//DTD XHTML 1.0 Transitional//EN"
   "http://www.w3.org/TR/xhtml1/DTD/xhtml1-transitional.dtd">
<html xmlns="http://www.w3.org/1999/xhtml">
<head>
   <title>JSF Tutorial!</title>
</head>
<body>
   #{helloWorld.message}
</body>
</html>
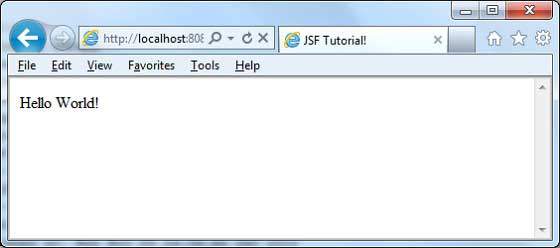
Once you are ready with all the changes done, let us compile and run
the application as we did in JSF - Create Application chapter. If
everything is fine with your application, this will produce following
result:

No comments:
Post a Comment