
It is necessary to record customer accounts and customer registration
process in Magento. This chapter describes the customer settings as
shown in the following steps.
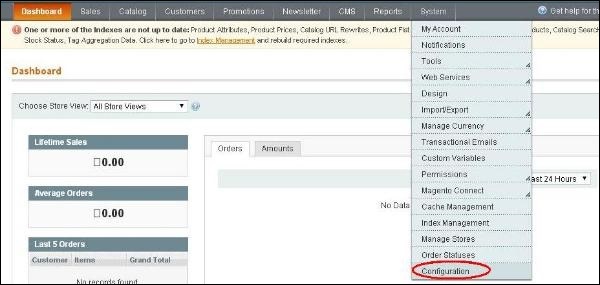
Step (1): Login to your Magento Admin Panel.
Step (2): Go to System menu and click on the Configuration option.
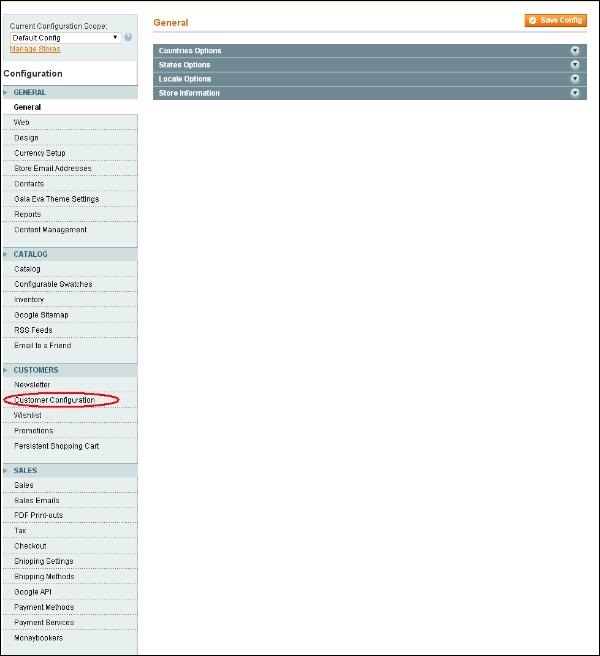
 Step (3): Click on the Customer Configuration option under CUSTOMERS section on the left side navigation.
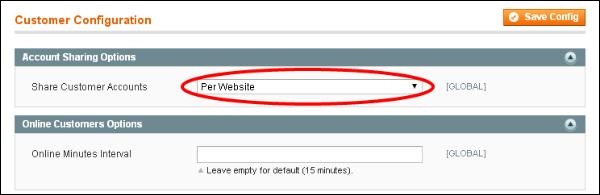
 Step (4): Expand the Account Sharing Options panel includes field Share Customer Accounts option which is set to Per Website value. It determines customer can use this account to login only on particular website. Next expand the Online Customers Options panel and set the interval time for Online Minutes Interval option. By default, it is empty and value is set to 15 minutes.
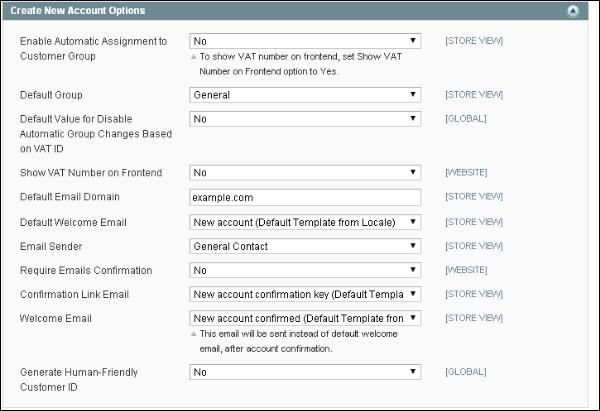
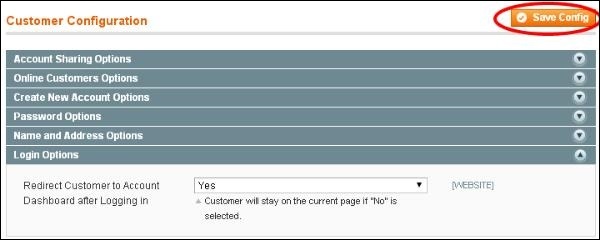
 Step (5): The Create New Account Options panel contains following fields. Fill up all the fields as provided in the screen and click on Save Config button to save your changes.
 Step (6): The Password Options panel has some settings:
Step (1): Login to your Magento Admin Panel.
Step (2): Go to System menu and click on the Configuration option.
Step (3): Click on the Customer Configuration option under CUSTOMERS section on the left side navigation.
Step (4): Expand the Account Sharing Options panel includes field Share Customer Accounts option which is set to Per Website value. It determines customer can use this account to login only on particular website. Next expand the Online Customers Options panel and set the interval time for Online Minutes Interval option. By default, it is empty and value is set to 15 minutes.
Step (5): The Create New Account Options panel contains following fields. Fill up all the fields as provided in the screen and click on Save Config button to save your changes.
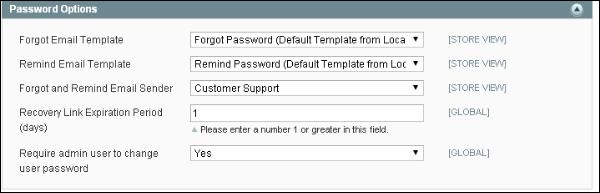
Step (6): The Password Options panel has some settings:
- Forget Email Template: It helps to reset the customer's password, if the customer forgot their password.
- Remind Email Template: It changes the template for particular email transaction.
- Forgot and Remind Email Sender: It selects an email address which sends password message to the customer which are displayed from the fields of Forgot and Remind mail Template.
- Recovery Link Expiration Period: It specifies for how many days the recovery link will be in active for resetting password.
No comments:
Post a Comment