
It's very easy to use KnockoutJS. Simply refer the Javascript file using <script > tag in HTML pages.
Knockout.js can be accessed in the following ways:
 Modify strings to "Hello" and "TutorialsPoint" and the output changes as below:
Knockout.js can be accessed in the following ways:
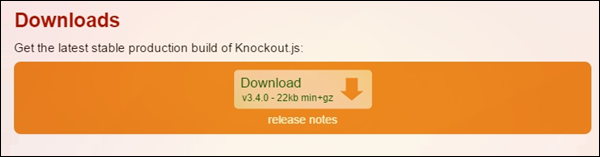
- You can download production build of Knockout.js from its official website:
A page as in the following image will be displayed. Click on download link and you will get the latest knockout.js file.
 Now refer this file as below in your code:
<script type='text/javascript' src='knockout-3.3.0.js'></script>
And obviously update the src attribute to match the location where you kept the downloaded file.
- You can refer to the KnockoutJS library from CDNs:
- You can refer KnockoutJS library from Microsoft Ajax CDN in your code as below:
<script src="https://ajax.aspnetcdn.com/ajax/knockout/knockout-3.1.0.js" type="text/javascript"></script>
- Alternatively you can refer to a minified version of KnockoutJS library from CDNJS as below:
<script src="https://cdnjs.cloudflare.com/ajax/libs/knockout/3.3.0/knockout-min.js" type="text/javascript"></script>
- You can refer KnockoutJS library from Microsoft Ajax CDN in your code as below:
In all the chapters for this tutorial we have referred to CDN version of the KnockoutJS library.
Example
KnockoutJS is based on Model-View-ViewModel (MVVM) pattern. We will study this pattern in depth in chapter KnockoutJS - MVVM Framework. First let's try out a simple example of KnockoutJS:<!DOCTYPE html> <head> <title>KnockoutJS Simple Example</title> <script src="https://ajax.aspnetcdn.com/ajax/knockout/knockout-3.1.0.js" type="text/javascript"></script> </head> <body> <!-- This is called "view" of HTML markup that defines the appearance of UI --> <p>First String: <input data-bind="value: firstString" /></p> <p>Second String: <input data-bind="value: secondString" /></p> <p>First String: <strong data-bind="text: firstString">Hi</strong></p> <p>Second String: <strong data-bind="text: secondString">There</strong></p> <p>Derived String: <strong data-bind="text: thirdString"></strong></p> <script> <!-- This is called "viewmodel". This javascript section defines the data and behavior of UI --> function AppViewModel() { this.firstString = ko.observable("Enter First String"); this.secondString = ko.observable("Enter Second String"); this.thirdString = ko.computed(function() { return this.firstString() + " " + this.secondString(); }, this); } // Activates knockout.js ko.applyBindings(new AppViewModel()); </script> </body> </html>
-
<script src="https://ajax.aspnetcdn.com/ajax/knockout/knockout-3.1.0.js" type="text/javascript"> </script>
This line refers KnockoutJS library.
- We have two input boxes : First String and Second String. These 2 variables are initialized with values Enter First String and Enter Second String respectively in ViewModel.
-
<p>First String: < input data-bind="value: firstString" /> </p>
This is how we are binding values from ViewModel to HTML elements using 'data-bind' attribute in the body section.
Here 'firstString' refers to ViewModel variable. -
this.firstString = ko.observable("Enter First String");
ko.observable is a concept which keeps an eye on value changes so that it can update underlying ViewModel data.
To understand this better, let's update first input box to "Hello" and Second input box to "TutorialsPoint". You will see values are updated simultaneously. We will study more about this concept in KnockoutJS - Observables chapter. -
 this.thirdString = ko.computed(function() {
    return this.firstString() + " " + this.secondString();
 }, this);
Next we have computed function in viewmodel. This function derives third string based on 2 strings mentioned earlier. So any updates made to these strings automatically get reflected in this derived string. There is no need of writing extra code to accomplish this. This is just a simple example. We will study about this concept in KnockoutJS - Computed Observables chapter.
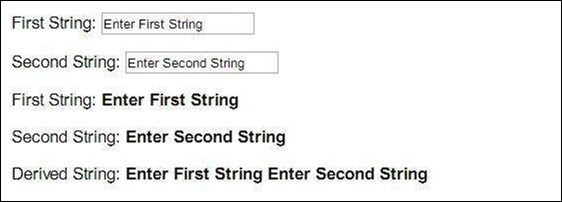
Output
Save the above code as my_first_knockoutjs_program.html. Open this file in your browser and you will see an output as below:
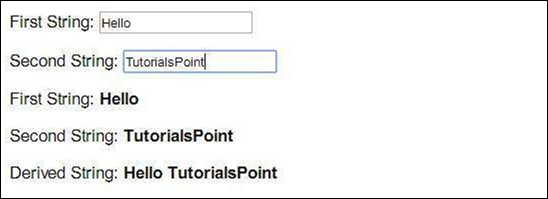
Modify strings to "Hello" and "TutorialsPoint" and the output changes as below:
No comments:
Post a Comment