
In this chapter, we will learn how to create a Test Plan to test a
WebService. For our test purpose, we have created a simple webservice
project and deployed it on the Tomcat server locally.
Next, create the implementation class HelloWorldImpl.java under the package com.tutorialspoint.ws.
The publish method takes two parameters −

We will add SOAP/XML-RPC Request element −

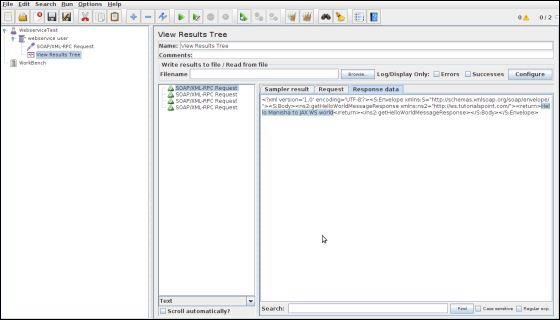 In the last image, you can see the response message "Hello Manisha to JAX WS world".
Create Webservice Project
To create a webservice project, we have used Eclipse IDE. First write the Service Endpoint Interface HelloWorld under the package com.tutorialspoint.ws. The contents of the HelloWorld.java are as follows −package com.tutorialspoint.ws; import javax.jws.WebMethod; import javax.jws.WebService; import javax.jws.soap.SOAPBinding; import javax.jws.soap.SOAPBinding.Style; //Service Endpoint Interface @WebService @SOAPBinding(style = Style.RPC) public interface HelloWorld{ @WebMethod String getHelloWorldMessage(String string); }This service has a method getHelloWorldMessage which takes a String parameter.
Next, create the implementation class HelloWorldImpl.java under the package com.tutorialspoint.ws.
package com.tutorialspoint.ws;

import javax.jws.WebService;

@WebService(endpointInterface="com.tutorialspoint.ws.HelloWorld")
public class HelloWorldImpl  implements HelloWorld  {
   @Override

   public String getHelloWorldMessage(String myName){
      return("Hello "+myName+" to JAX WS world");
   }
}
Let us now publish this web service locally by creating the Endpoint publisher and expose the service on the server.
The publish method takes two parameters −
- Endpoint URL String.
- Implementor object, in this case the HelloWorld implementation class, which is exposed as a Web Service at the endpoint identified by the URL mentioned in the parameter above.
package com.tutorialspoint.endpoint;

import javax.xml.ws.Endpoint;

import com.tutorialspoint.ws.HelloWorldImpl;

public class HelloWorldPublisher {

   public static void main(String[] args){
      Endpoint.publish("http://localhost:9000/ws/hello", new HelloWorldImpl());
   }
}
Modify the web.xml contents as shown below −
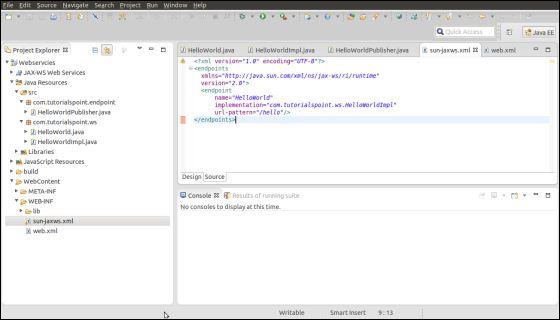
<?xml version="1.0" encoding="UTF-8"?>
<!DOCTYPE web-app PUBLIC "-//Sun Microsystems, Inc.//DTD Web Application 2.3//EN" "http://java.sun.com/j2ee/dtds/web-app_2_3.dtd">

<web-app>

   <listener>
      <listener-class>
         com.sun.xml.ws.transport.http.servlet.WSServletContextListener
      </listener-class>
   </listener>

   <servlet>
      <servlet-name>hello</servlet-name>
      <servlet-class>
         com.sun.xml.ws.transport.http.servlet.WSServlet
      </servlet-class>
      <load-on-startup>1</load-on-startup>
   </servlet>

   <servlet-mapping>
      <servlet-name>hello</servlet-name>
      <url-pattern>/hello</url-pattern>
   </servlet-mapping>

   <session-config>
      <session-timeout>120</session-timeout>
   </session-config>

</web-app>
To deploy this application as a webservice, we would need another configuration file sun-jaxws.xml. The contents of this file are as follows −
<?xml version="1.0" encoding="UTF-8"?>
<endpoints xmlns="http://java.sun.com/xml/ns/jax-ws/ri/runtime" version="2.0">

   <endpoint name="HelloWorld" implementation="com.tutorialspoint.ws.HelloWorldImpl" url-pattern="/hello"/>

</endpoints>
Now that all the files are ready, the directory structure would look as shown in the following screenshot −
- Now create a WAR file of this application.
- Choose the project > right click > Export > WAR file.
- Save this as hello.war file under the webapps folder of Tomcat server.
- Now start the Tomcat server.
- Once the server is started, you should be able to access the webservice with the URL − http://localhost:8080/hello/hello
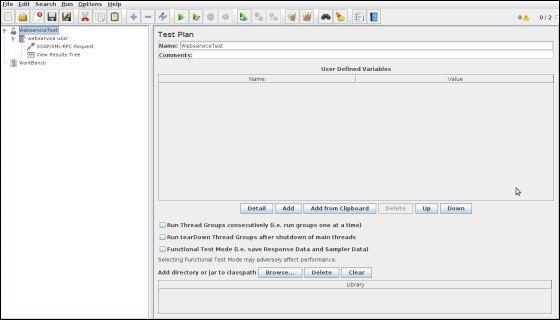
Create JMeter Test plan
Now let us create a test plan to test the above webservice.Rename the Test Plan
- Open the JMeter window by clicking /home/manisha/apache-jmeter2.9/bin/jmeter.sh.
- Click the Test Plan node.
- Rename this Test Plan node as WebserviceTest.
Add Thread Group
Add one Thread Group, which is placeholder for all other elements like Samplers, Controllers, and Listeners.- Right click on WebserviceTest (our Test Plan) > Add > Threads (Users) > Thread Group. Thread Group will get added under the Test Plan (WebserviceTest) node.
- Next, let us modify the default properties of the Thread Group to suit our testing. Following properties are changed −
- Name − webservice user
- Number of Threads (Users) − 2
- Ramp-Up Period − leave the the default value of 0 seconds.
- Loop Count − 2
Add Sampler - SOAP/XML-RPC Request
Now that we have defined the users, it is time to define the tasks that they will be performing.We will add SOAP/XML-RPC Request element −
- Right-click mouse button to get the Add menu.
- Select Add > Sampler > SOAP/XML-RPC Request.
- Select the SOAP/XML-RPC Request element in the tree
- Edit the following properties as in the image below −
- The following details are entered in this element −
- Name − SOAP/XML-RPC Request
- URL − http://localhost:8080/hello/hello?wsdl
- Soap/XML-RPC Data − Enter the below contents
<soapenv:Envelope xmlns:soapenv="http://schemas.xmlsoap.org/soap/envelope/" xmlns:web="http://ws.tutorialspoint.com/">

   <soapenv:Header/>

   <soapenv:Body>

      <web:getHelloWorldMessage>
         <arg0>Manisha</arg0>
      </web:getHelloWorldMessage>

   </soapenv:Body>

</soapenv:Envelope>
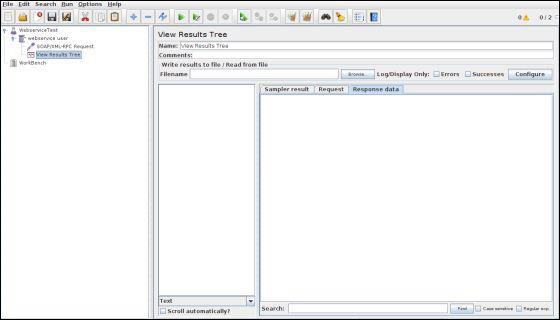
Add Listener
The final element you need to add to your Test Plan is a Listener. This element is responsible for storing all of the results of your HTTP requests in a file and presenting a visual model of the data.- Select the webservice user element.
- Add a View Results Tree listener by selecting Add > Listener > View Results Tree.
Run the Test Plan
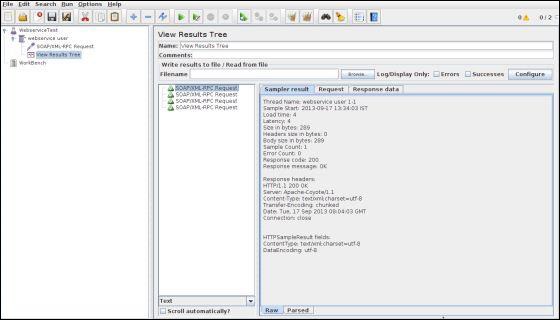
Now save the above test plan as test_webservice.jmx. Execute this test plan using Run > Start option.View the Output
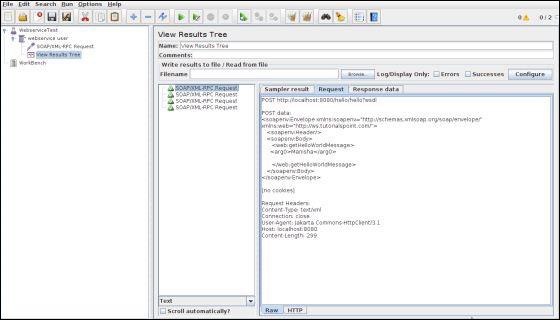
The following output can be seen in the listener.
In the last image, you can see the response message "Hello Manisha to JAX WS world".
No comments:
Post a Comment