
To set up JUnit with eclipse, follow the steps given below.
Assume you have copied the above JAR file onto the folder C:\>JUnit.
 We assume that your Eclipse has inbuilt JUnit plugin. If it is not
available in C:\>eclipse\plugins directory, then you can download it
from JUnit Plugin. Unzip the downloaded zip file in the plugin folder of the Eclipse. Finally restart Eclipse.
We assume that your Eclipse has inbuilt JUnit plugin. If it is not
available in C:\>eclipse\plugins directory, then you can download it
from JUnit Plugin. Unzip the downloaded zip file in the plugin folder of the Eclipse. Finally restart Eclipse.
Now your Eclipse is ready for the development of JUnit test cases.
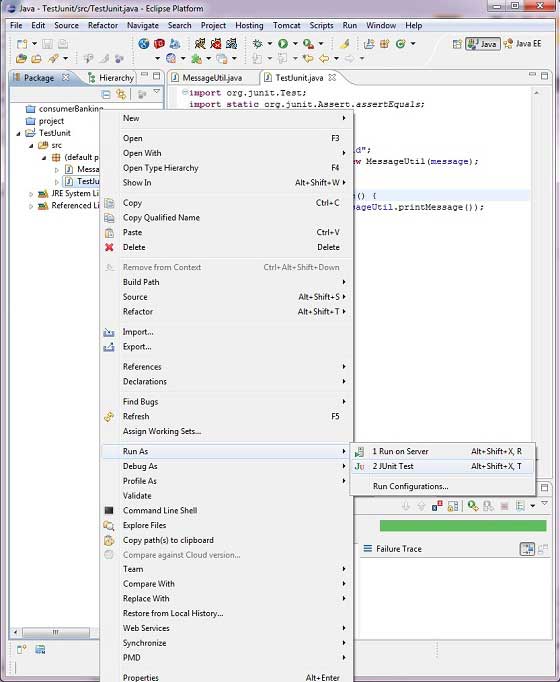
 Finally, right click the program and run as JUnit to verify the output of the program.
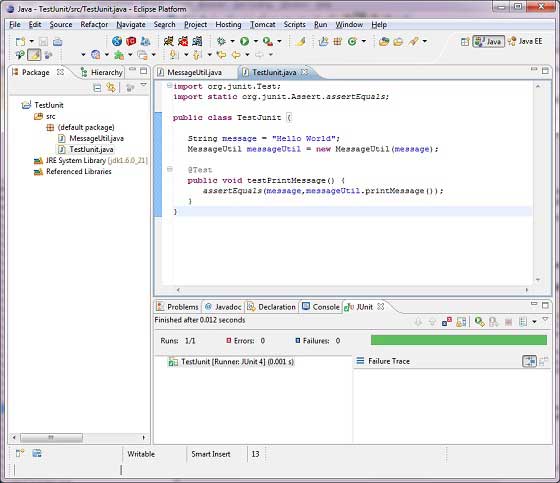
 Verify the result.
Step 1: Download JUnit Archive
Download a JUnit jar based on the operating system you have on your system.| OS | Archive Name |
|---|---|
| Windows | junit4.10.jar |
| Linux | junit4.10.jar |
| Mac | junit4.10.jar |
Step 2: Set Eclipse Environment
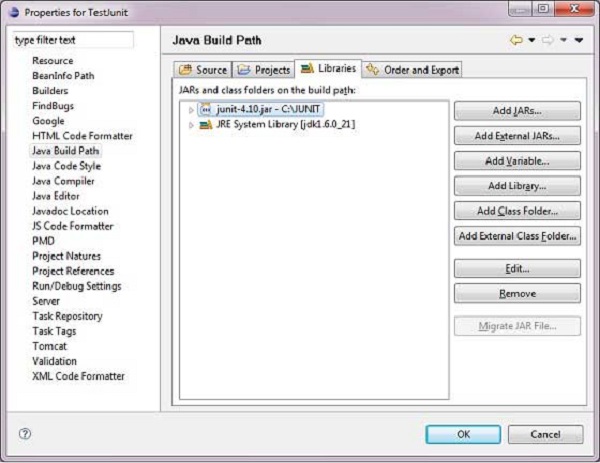
Open eclipse → right click on project and click on property > Build Path > Configure Build Path and add the junit-4.10.jar in the libraries using the button Add External Jar.
We assume that your Eclipse has inbuilt JUnit plugin. If it is not
available in C:\>eclipse\plugins directory, then you can download it
from JUnit Plugin. Unzip the downloaded zip file in the plugin folder of the Eclipse. Finally restart Eclipse.Now your Eclipse is ready for the development of JUnit test cases.
Step 3: Verify JUnit installation in Eclipse
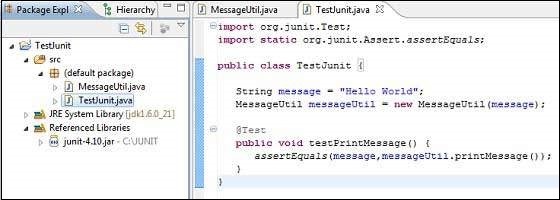
Create a project TestJunit in Eclipse at any location. Then create a class MessageUtil to test in the project./* * This class prints the given message on console. */ public class MessageUtil { private String message; //Constructor //@param message to be printed public MessageUtil(String message){ this.message = message; } // prints the message public String printMessage(){ System.out.println(message); return message; } }Create a test class TestJunit in the project.
import org.junit.Test;
import static org.junit.Assert.assertEquals;

public class TestJunit {

   String message = "Hello World";
   MessageUtil messageUtil = new MessageUtil(message);

   @Test
   public void testPrintMessage() {
      assertEquals(message,messageUtil.printMessage());
   }
}
Following should be the project structure −
Finally, right click the program and run as JUnit to verify the output of the program.
Verify the result.
No comments:
Post a Comment