
MySQL Database Wizard is a step by step process to create a MySQL
database and user and finally adding the user to access the database.
To use this interface, we will need to open MySQL Database Wizard, which can be found in the database section of cPanel Home, as shown below.
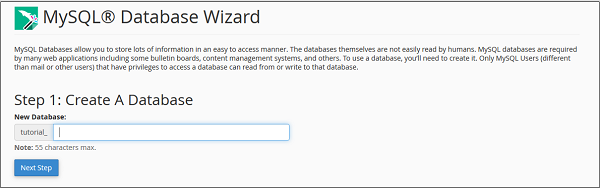
 Step 1 − Create a New Database by providing a Database Name in the text input, once filled, click Next Step.
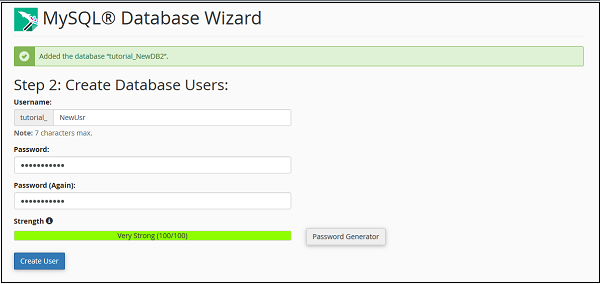
 Step 2 − Create Database user by providing a username and Password. Click Create User when done.
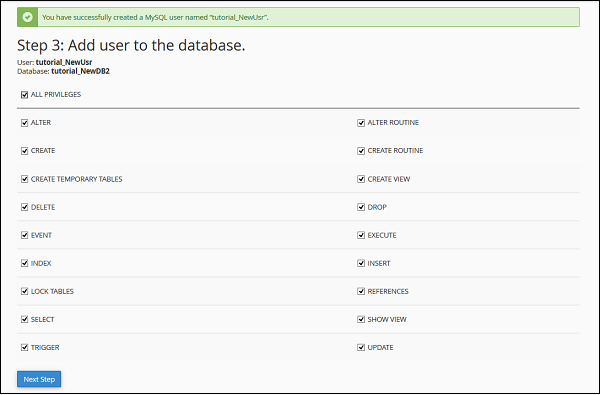
 Step 3 − Add user to the database by granting all the
privileges to the user for accessing and modifying the data. Select ALL
PRIVILEGES checkbox and click Next Step, when done.
Step 3 − Add user to the database by granting all the
privileges to the user for accessing and modifying the data. Select ALL
PRIVILEGES checkbox and click Next Step, when done.
 Step 4 − You will get a success message if everything works fine.
To modify the database created using MySQL Database Wizard, you can always use MySQL Databases interface.
To use this interface, we will need to open MySQL Database Wizard, which can be found in the database section of cPanel Home, as shown below.
Step 1 − Create a New Database by providing a Database Name in the text input, once filled, click Next Step.
Step 2 − Create Database user by providing a username and Password. Click Create User when done.
Step 3 − Add user to the database by granting all the
privileges to the user for accessing and modifying the data. Select ALL
PRIVILEGES checkbox and click Next Step, when done.
Step 4 − You will get a success message if everything works fine.To modify the database created using MySQL Database Wizard, you can always use MySQL Databases interface.
No comments:
Post a Comment