
Apache Tapestry - Overview
Apache Tapestry is an open source web framework written in Java. It is a component based web framework. Tapestry components are Java Classes. They are neither inherited from a framework specific base class nor implementation of an interface and they are just plain POJOs (Plain old Java Objects).The important feature of the Java used by tapestry is Annotation. Tapestry web pages are constructed by using one or more components, each having a XML based template and component class decorated with a lot of Tapestry's Annotations. Tapestry can create anything ranging from a tiny, single-page web application to a massive one consisting of hundreds of pages.
Benefits of Tapestry
Some of the benefits provided by tapestry are −- Highly scalable web applications.
- Adaptive API.
- Fast and mature framework.
- Persistent state storage management.
- Build-in Inversion of Control.
Features of Tapestry
Tapestry has the following features −- Live class reloading
- Clear and detailed exception reporting
- Static structure, dynamic behaviors.
- Extensive use of Plain Old Java Objects (POJOs)
- Code less, deliver more.
Why Tapestry?
Already Java has a lot of web frameworks like JSP, Struts, etc., Then, why do we need another framework? Most of the today's Java Web Frameworks are complex and have a steep learning curve. They are old fashioned and requires compile, test and deploy cycle for every update.On the other hand, Tapestry provides a modern approach to web application programming by providing live class reloading. While other frameworks are introducing lots of interfaces, abstract & base classes, Tapestry just introduces a small set of annotations and still provides the ability to write large application with rich AJAX support.
Apache Tapestry - Architecture
Tapestry tries to use the available features of Java as much as possible. For example, all Tapestry pages are simply POJOs. It does not enforce any custom interfaces or base class to write the application. Instead, it uses Annotation (a light weight option to extend the functionality of a Java class) to provide features. It is based on battle-tested Java Servlet API and is implemented as a Servlet Filter. It provides a new dimension to the web application and the programming is quite Simple, Flexible, Understandable and Robust.Workflow
Let us discuss the sequence of action taking place when a tapestry page is requested.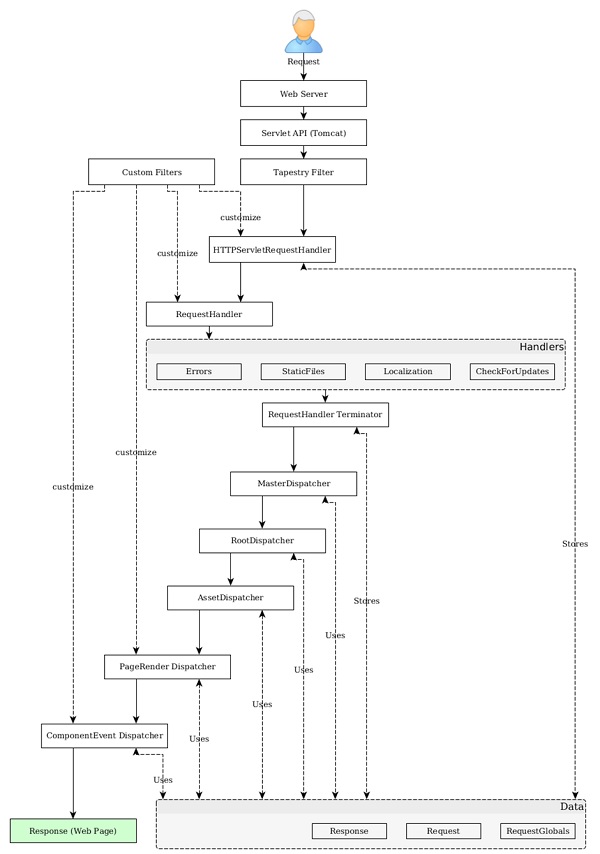 Step 1 − The Java Servlet receives the page
request. This Java Servlet is the configured in such a way that the
incoming request will be forwarded to tapestry. The configuration is
done in the web.xml as specified in the following program. Filter and Filter Mapping tag redirects all the request to Tapestry Filter.
Step 1 − The Java Servlet receives the page
request. This Java Servlet is the configured in such a way that the
incoming request will be forwarded to tapestry. The configuration is
done in the web.xml as specified in the following program. Filter and Filter Mapping tag redirects all the request to Tapestry Filter.<!DOCTYPE web-app PUBLIC "-//Sun Microsystems, Inc.//DTD Web Application 2.3//EN" "http://java.sun.com/dtd/web-app_2_3.dtd"> <web-app> <display-name>My Tapestry Application</display-name> <context-param> <param-name>tapestry.app-package</param-name> <param-value>org.example.myapp</param-value> </context-param> <filter> <filter-name>app</filter-name> <filter-class>org.apache.tapestry5.TapestryFilter</filter-class> </filter> <filter-mapping> <filter-name>app</filter-name> <url-pattern>/*</url-pattern> </filter-mapping> </web-app>Step 2 − The Tapestry Filter calls the HttpServletRequestHandler Service by its Service() method.
Step 3 − HttpServletRequestHandler stores the request and response in RequestGlobals. It also wraps the request and response as a Request and Response object and sends it to the RequestHandler.
Step 4 − The RequestHandler is an abstraction on top of HttpServletRequest of Servlet API. Some of the salient feature of the tapestry is done in RequestHandler section. The feature of tapestry can be extended by writing a filter in RequestHandler. RequestHandler provides several build-in filters, which include −
- CheckForUpdates Filter − Responsible for live class reloading. This filter checks the java classes for changes and update the application as necessary.
- Localization Filter − Identify the location of the user and provide localization support for the application.
- StaticFiles Filter − Identify the static request and aborts the process. Once the process is aborted, Java Servlet takes control and process the request.
- Error Filter − Catches the uncaught exception and presents the exception report page.
Step 5 − The MasterDispatcher is responsible for rendering the page by calling several dispatchers is a specific order. The four-main dispatchers called by MasterDispatcher is as follows −
- RootPath Dispatcher − It recognizes the root path “/” of the request and render the same as Start page.
- Asset Dispatcher − It recognized the asset (Java assets) request by checking the url pattern /assets/ and sends the requested assets as byte streams.
- PageRender Dispatcher − Bulk of the tapestry operations are done in PageRender Dispatcher and the next dispatcher Component Dispatcher. This dispatcher recognizes the particular page of that request and its activation context (extra information). It then renders that particular page and sends it to the client. For example, if the request url is /product/12123434, the dispatcher will check if any class with name product/12123434 is available. If found, it calls product/12123434 class, generate the response and send it to the client. If not, it checks for product class. If found, it calls product class with extra information 121234434, generates the response and sends it to the client. This extra information is called Activation Context. If no class is found, it simply forwards the request to Component Dispatcher.
- Component Dispatcher − Component Dispatcher matches the URL of the page with the pattern – /<class_name>/<component_id>:<event_type>/<activation_context>. For example, /product/grid:sort/asc represents the product class, grid component, sortevent type and asc activation context. Here, event_type is optional and if none is provided, the default event type action will be triggered. Usually, the response of the component dispatcher is to send a redirect to the client. Mostly, the redirect will match PageRender Dispatcher in the next request and proper response will be send to the client.
Apache Tapestry - Installation
In this chapter, we will discuss how to install Tapestry on our machine.Prerequisite
Tapestry's only dependency is Core Java. Tapestry is developed independently without using any third party library / framework. Even the IoC library used by tapestry is developed from the scratch. Web application written in tapestry can be built and deployed from console itself.We can use Maven, Eclipse and Jetty to improve the development experience. Maven provides quick start application templates and options to host application in Jetty, Java's de-facto development server. Eclipse provides extensive project management features and integrates well with maven.
An ideal tapestry application development needs the following −
- Java 1.6 or later
- Apache Maven
- Eclipse IDE
- Jetty Server
Verify Maven Installation
Hopefully, you have installed Maven on your machine. To verify the Maven installation, type the command given below −mvn --versionYou could see the response as shown below −
Apache Maven 3.3.9 (bb52d8502b132ec0a5a3f4c09453c07478323dc5; 2015-1110T22:11:47+05:30)
Maven home: /Users/workspace/maven/apache-maven-3.3.9
Java version: 1.8.0_92, vendor: Oracle Corporation
Java home: /Library/Java/JavaVirtualMachines/jdk1.8.0_92.jdk/Contents/Home/jre
Default locale: en_US, platform encoding: UTF-8
OS name: "mac os x", version: "10.11.4", arch: "x86_64", family: "mac"
If Maven is not installed, then download and install the latest version of maven by visiting the Maven website.
Download Tapestry
The latest version of tapestry is 5.4 and can be downloaded from the Tapestry website. It is enough to download the binary package. If we use the Maven Quick Start Template, then it is not necessary to download Tapestry separately. Maven automatically downloads the necessary Tapestry Jars and configures the application. We will discuss how to create a basic Tapestry Application using Maven in the next chapter.Apache Tapestry - Quick Start
After Tapestry installation, let us create a new initial project using Maven as shown below −$ mvn archetype:generate -DarchetypeCatalog=http://tapestry.apache.orgYou could see the response as shown below −
[INFO] Scanning for projects...
[INFO]
[INFO] ---------------------------------------------------------------------------------
[INFO] Building Maven Stub Project (No POM) 1
[INFO] ---------------------------------------------------------------------------------
[INFO]
[INFO] >>> maven-archetype-plugin:2.4:generate (default-cli) >
generatesources @ standalone-pom >>>
[INFO]
[INFO] <<< maven-archetype-plugin:2.4:generate (default-cli)
< generatesources @ standalone-pom <<<
[INFO]
[INFO] --- maven-archetype-plugin:2.4:generate (default-cli) @ standalone-pom ---
[INFO] Generating project in Interactive mode
[INFO] No archetype defined. Using maven-archetype-quickstart
(org.apache.maven.archetypes:maven-archetype-quickstart:1.0)
After Maven building all the operations, choose archetype to create Tapestry 5 QuickStart project as follows −
Choose archetype −
- https://tapestry.apache.org → org.apache.tapestry:quickstart (Tapestry 5 Quickstart Project)
- https://tapestry.apache.org → org.apache.tapestry:tapestry-archetype (Tapestry 4.1.6 Archetype)
Now you will get a response like what is shown below −
Choose org.apache.tapestry:quickstart version:
1: 5.0.19
2: 5.1.0.5
3: 5.2.6
4: 5.3.7
5: 5.4.1
Extract the QuickStart version number as follows −
Choose a number: 5: 5Here, the QuickStart project takes the version for the option 5, “5.4.1”. Now, Tapestry archetype asks the following information one by one as follows −
- 5.1 groupId − Define value for property 'groupId': : com.example
- 5.2 artifactId − Define value for property 'artifactId': : Myapp
- 5.3 version − Define value for property 'version': 1.0-SNAPSHOT: :
- 5.4 package name − Define value for property 'package': com.example: : com.example.Myapp
Confirm properties configuration −
- groupId − com.example
- artifactId − Myapp
- version − 1.0-SNAPSHOT
- package − com.example.Myapp
Y: : YYou would see the screen like the one shown below.
[INFO] ---------------------------------------------------------------------------------
[INFO] Using following parameters for creating project from Archetype: quickstart:5.4.1
[INFO] ---------------------------------------------------------------------------------
[INFO] Parameter: groupId, Value: com.example
[INFO] Parameter: artifactId, Value: Myapp
[INFO] Parameter: version, Value: 1.0-SNAPSHOT
[INFO] Parameter: package, Value: com.example.Myapp
[INFO] Parameter: packageInPathFormat, Value: com/example/Myapp
[INFO] Parameter: package, Value: com.example.Myapp
[INFO] Parameter: version, Value: 1.0-SNAPSHOT
[INFO] Parameter: groupId, Value: com.example
[INFO] Parameter: artifactId, Value: Myapp
[WARNING] Don't override file /Users/workspace/tapestry/Myapp/src/test/java
[WARNING] Don't override file /Users/workspace/tapestry/Myapp/src/main/webapp
[WARNING] Don't override file /Users/workspace/tapestry/Myapp/src/main/resources/com/
example/Myapp
[WARNING] Don't override file /Users/workspace/tapestry/Myapp/src/test/resource
[WARNING] Don't override file /Users/workspace/tapestry/Myapp/src/test/conf
[WARNING] Don't override file /Users/workspace/tapestry/Myapp/src/site
[INFO] project created from Archetype in dir: /Users/workspace/tapestry/Myapp
[INFO] ---------------------------------------------------------------------------------
[INFO] BUILD SUCCESS
[INFO] ---------------------------------------------------------------------------------
[INFO] Total time: 11:28 min
[INFO] Finished at: 2016-09-14T00:47:23+05:30
[INFO] Final Memory: 14M/142M
[INFO] ---------------------------------------------------------------------------------
Here, you have successfully built the Tapestry Quick Start project. Move to the location of the newly created Myapp directory with the following command and start coding.
cd Myapp
Run Application
To run the skeleton project, use the following command.mvn jetty:run -Dtapestry.execution-mode=developmentYou get a screen like this,
[INFO] Scanning for projects...
[INFO]
[INFO] ---------------------------------------------------------------------------------
[INFO] Building Myapp Tapestry 5 Application 1.0-SNAPSHOT
[INFO] ---------------------------------------------------------------------------------
........
........
........
Application 'app' (version 1.0-SNAPSHOT-DEV) startup time: 346 ms to build IoC
Registry, 1,246 ms overall.
 ______                  __             ____
/_  __/__ ____  ___ ___ / /_______ __  / __/
 / / / _ `/ _ \/ -_|_-</ __/ __/ // / /__ \
/_/  \_,_/ .__/\__/___/\__/_/  \_, / /____/
        /_/                   /___/  5.4.1 (development mode)
[INFO] Started SelectChannelConnector@0.0.0.0:8080
[INFO] Started Jetty Server
As of now, we have created a basic Quick Start project in Tapestry.
To view the running application in the web browser, just type the
following URL in the address bar and press enter −https://localhost:8080/myapp
Here, myapp is the name of the application and the default port of the application in development mode is 8080.
Using Eclipse
In the previous chapter, we discussed about how to create a Tapestry Quick Start application in CLI. This chapter explains about creating a skeleton application in Eclipse IDE.Let us use a Maven archetype to create skeleton application. To configure a new application, you can follow the steps given below.
Step 1: Open Eclipse IDE
Open your Eclipse and choose File → New → Project… → option as shown in the following screenshot.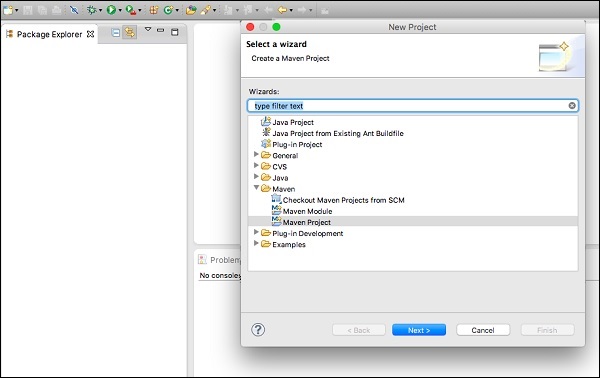 Now, choose Maven → Maven project option.
Note − If Maven is not configured then configure and create a project.
After selecting the Maven project, click Next and again click the Next button.
 After that, you will get a screen where you should choose the
configure option. Once it is configured, you will get the following
screen.
After that, you will get a screen where you should choose the
configure option. Once it is configured, you will get the following
screen.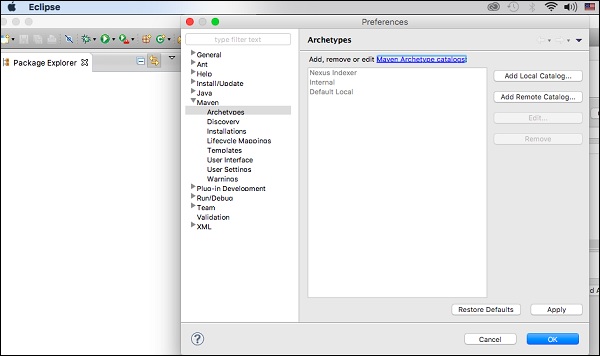
Step 2: Catalog Configuration
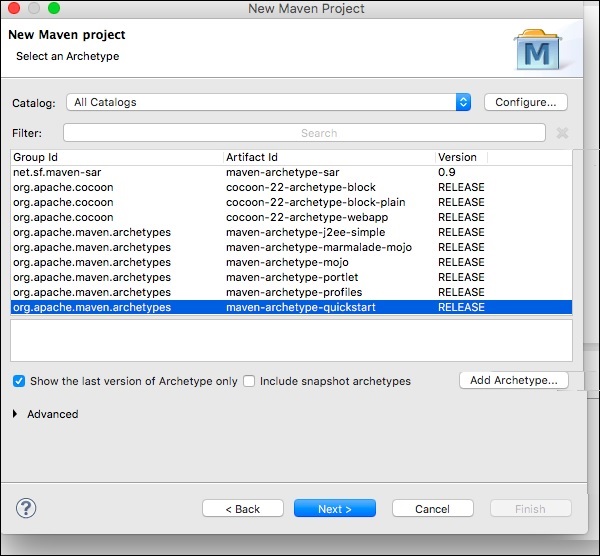
After the first step is done, you should click on Add Remote Catalog. Then add the following changes as shown in the following screenshot.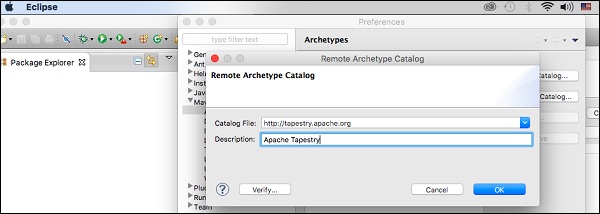 Now, Apache Tapestry Catalog is added. Then, choose filter option org.apache.tapestry quickstart 5.4.1 as shown below.
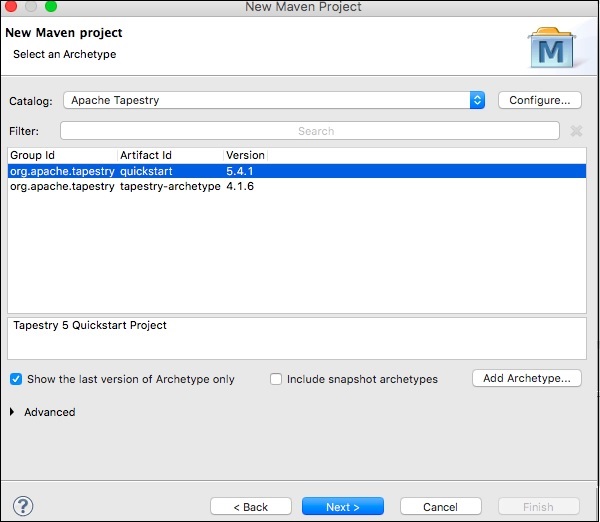 Then click Next and the following screen will appear.
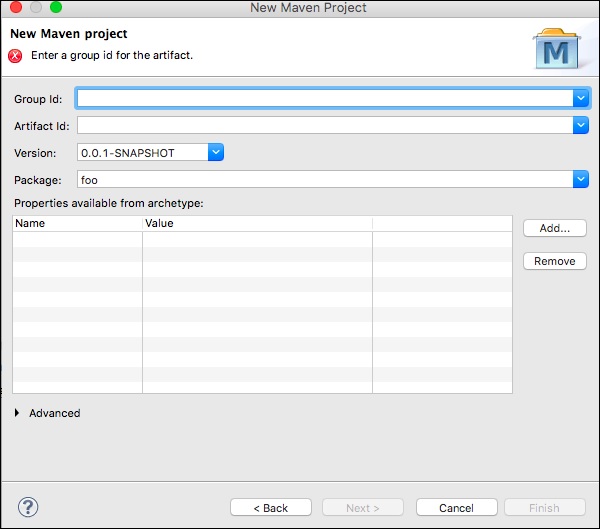
Step 3: Configure GroupId, ArtifactId, version and package
Add the following changes to the Tapestry Catalog configuration.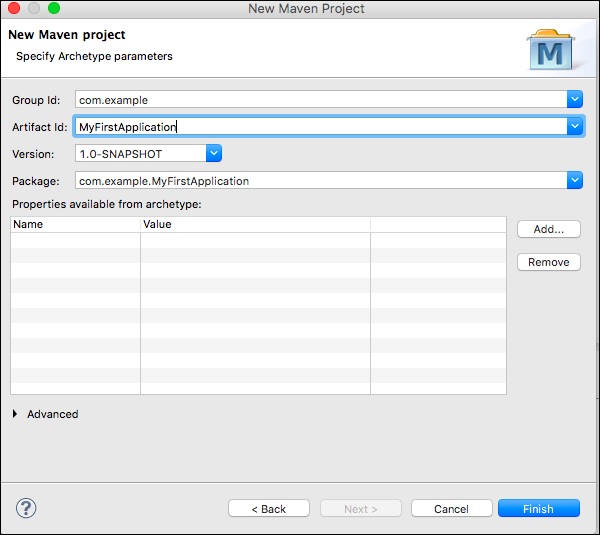 Then click Finish button, now we have created the first skeleton
application. The first time you use Maven, project creation may take a
while as Maven downloads many JAR dependencies for Maven, Jetty and
Tapestry. After Maven finishes, you'll see a new directory,
MyFirstApplication in your Package Explorer view.
Then click Finish button, now we have created the first skeleton
application. The first time you use Maven, project creation may take a
while as Maven downloads many JAR dependencies for Maven, Jetty and
Tapestry. After Maven finishes, you'll see a new directory,
MyFirstApplication in your Package Explorer view.Step 4: Run the application using Jetty server
You can use Maven to run Jetty directly. Right-click on the MyFirstApplication project in your Package Explorer view and select Run As → Maven Build… you will the screen shown below.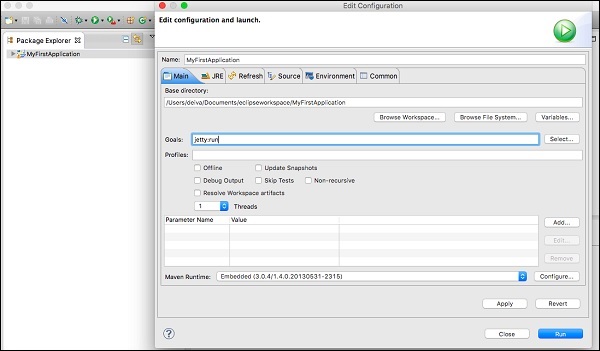 In the configuration dialog box, enter goals option as “jetty:run” then click Run button.
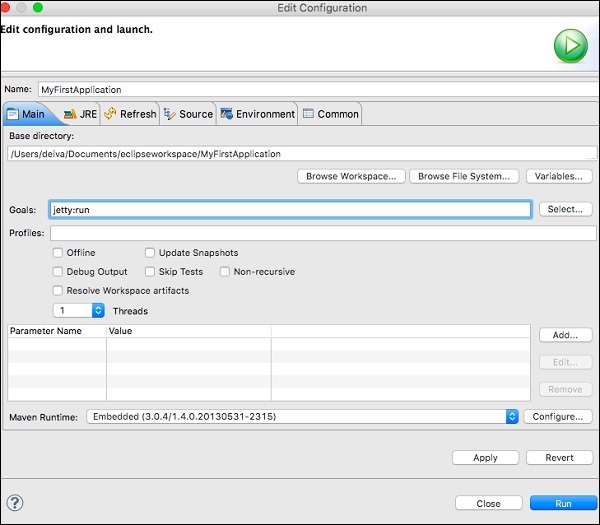 Once Jetty is initialized, you'll see the following screen in your console.
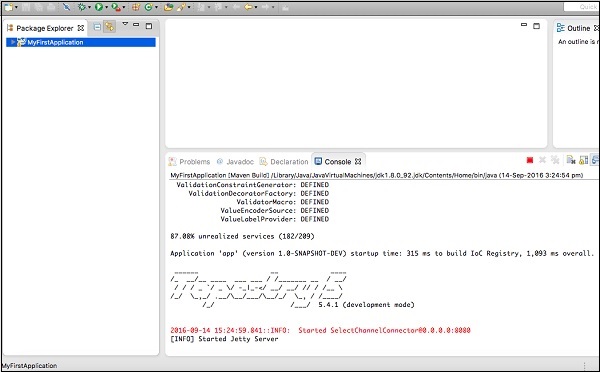
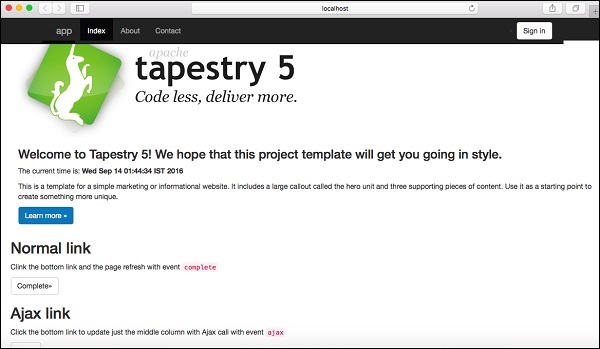
Step 5: Run in the web browser
Type the following URL to run the application in a web browser –https://loclhost:8080/MyFirstApplication
Step 6: Stop the Jetty server
To stop the Jetty server, click the red square icon in your console as shown below.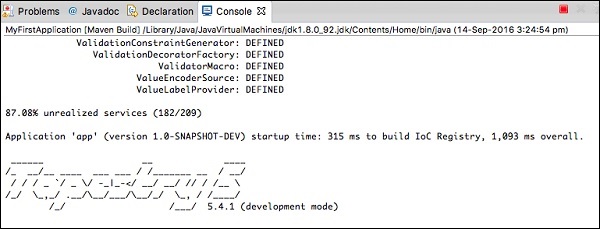
No comments:
Post a Comment