
You can directly install WordPress in your website by making a few clicks through the Softaculous Apps Installer. WordPress is a very popular content management software as more than a million websites are powered by it.
It’s secure, reliable, easy to use and totally customizable. To install WordPress using Softaculous Apps Installer, follow these steps.
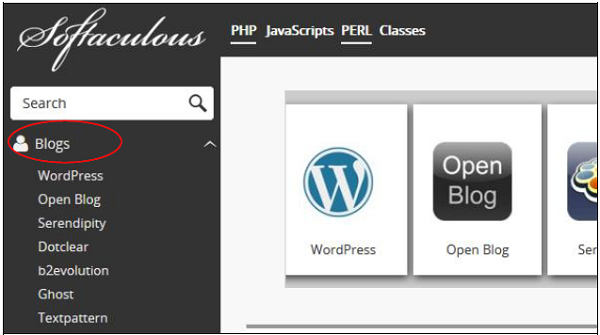
Step 1 − In the left menu click Blogs and you will find WordPress. Click on that and follow the instructions.
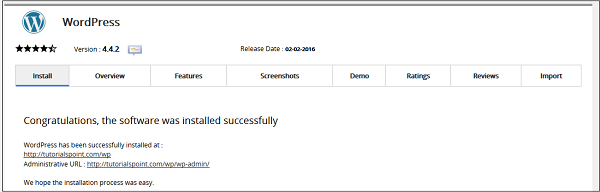
 Step 2 − It will take you to the WordPress overview. Click Install and it will take you to the installer interface.
 Step 3 − You will be asked for some configuration, which are explained below.

 Plugins − You can select to install these 3rd Party Plugins, this is optional.
It’s secure, reliable, easy to use and totally customizable. To install WordPress using Softaculous Apps Installer, follow these steps.
Step 1 − In the left menu click Blogs and you will find WordPress. Click on that and follow the instructions.
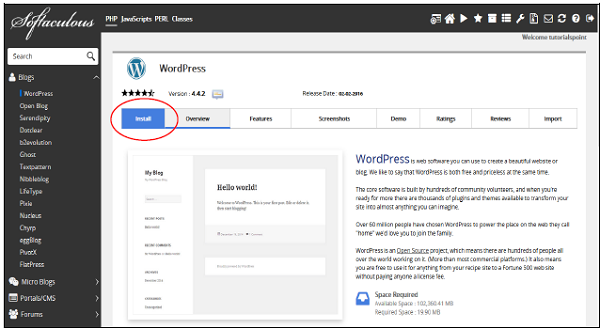
Step 2 − It will take you to the WordPress overview. Click Install and it will take you to the installer interface.
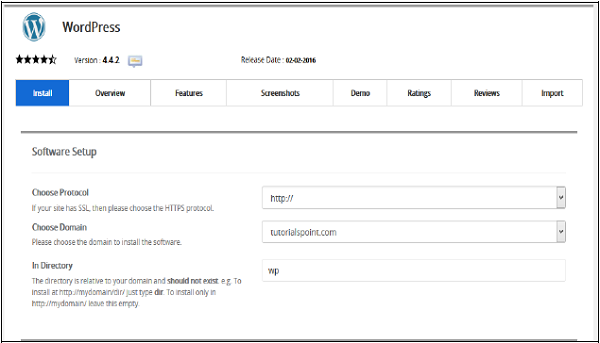
Step 3 − You will be asked for some configuration, which are explained below.
- Choose Protocol − Choose protocol of your WordPress website. You can use http or https with or without www. If you choose https, then a SSL certificate must be installed in your website. You can change this setting later in WordPress setting, if required.
- Choose Domain − You can install your WordPress in the root domain or any subdomain you created, choose from the dropdown menu.
- In Directory − Choose the folder in which you wish to install the WordPress. If you want to install in your root website, make this field empty.
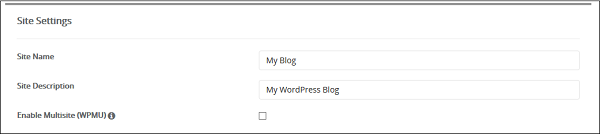
- Site Name − Give a name to your website in this field.
- Site Description − Provide a short description of your website.
- Enable Multisite − If Checked, then it will install a WordPress network installation.
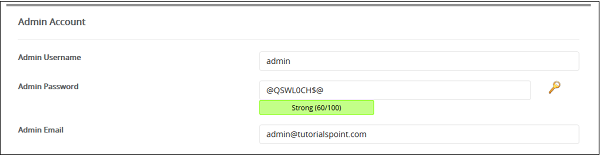
- Admin Username/Password − Enter your administrator username and password, you will need these to login to your admin panel later.
- Admin Ema − Enter the email address on which you want to receive the important notification of your WordPress.
- Select Language − Choose a language for your WordPress Installation
Plugins − You can select to install these 3rd Party Plugins, this is optional.
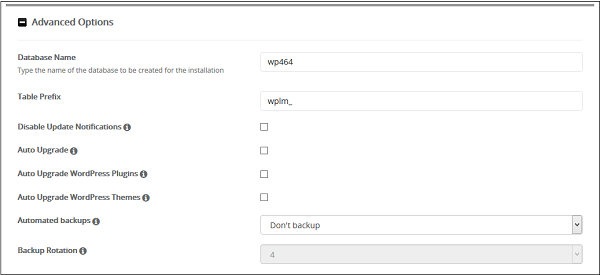
- Database Name − You can specify a custom database name for your WordPress database, or you can leave this setting as it is.
- Table Prefix − If you are going to use the same database for more than one installation, you can specify table prefix here. All the tables that will be created will have this prefix before them.
- Disable Update Notifications − You can choose not to receive update notification on your admin email by selecting this checkbox.
- Upgrade Options − You can choose to auto upgrade your WordPress CMS, Installed theme or Installed plugins. Select appropriate options.
- Automated backups − You can choose to create a backup of your WordPress automatically using Softaculous Apps Installer, if selected you can choose a backup rotation for your system.
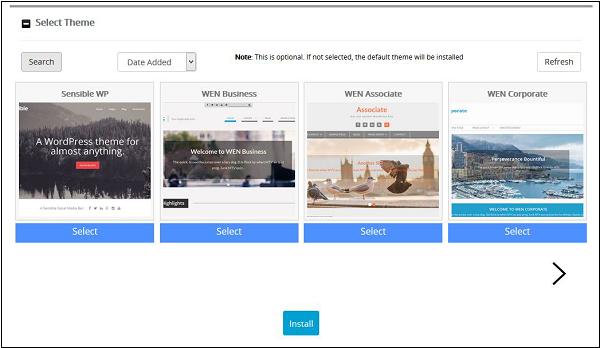
- Select Theme − If you select any theme here, then Softaculous Apps Installer will make an auto install of that theme. If you do not choose any theme then a clean WordPress Installation will be done.
No comments:
Post a Comment