
What is a Test Plan?
A Test Plan can be viewed as a container for running tests. It defines what to test and how to go about it. A complete test plan consists of one or more elements such as thread groups, logic controllers, sample-generating controllers, listeners, timers, assertions, and configuration elements. A test plan must have at least one thread group.Writing a Test Plan
Follow the steps given below to write a test plan −Step 1 − Start the JMeter Window
Open the JMeter window by clicking /home/manisha/apache-jmeter-2.9/bin/jmeter.sh. The JMeter window will appear as below −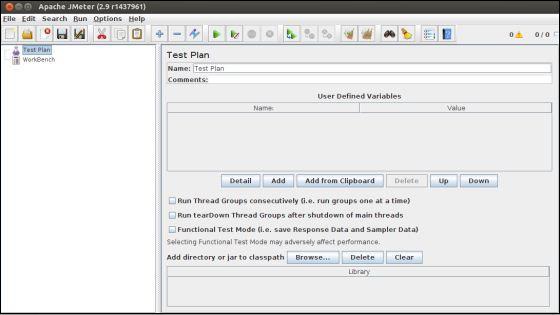 This is a plain and blank JMeter window without any additional elements added to it. It contains two nodes −
- Test Plan node − is where the real test plan is kept.
- Workbench node − It simply provides a place to temporarily store test elements while not in use, for copy/paste purposes. When you save your test plan, Workbench items are not saved with it.
Step 2 − Add/Remove Elements
Elements (which will be discussed in the next chapter Test Plan Elements) can be added to a test plan by right-clicking on the Test Plan node and choosing a new element from the "add" list.Alternatively, you can load an element from a file and add it by choosing the "merge" or "open" option.
For example, let us add a Thread Group element to a Test Plan as shown below −
 To remove an element, make sure the element is selected, right-click on the element, and choose the "remove" option.
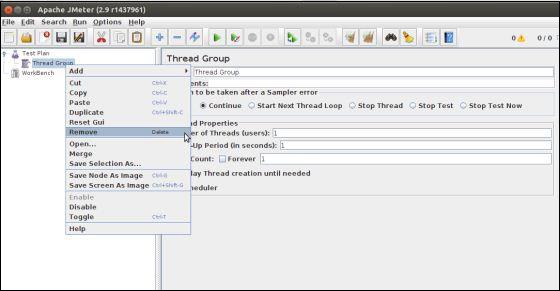
Step 3 − Load and Save the Elements
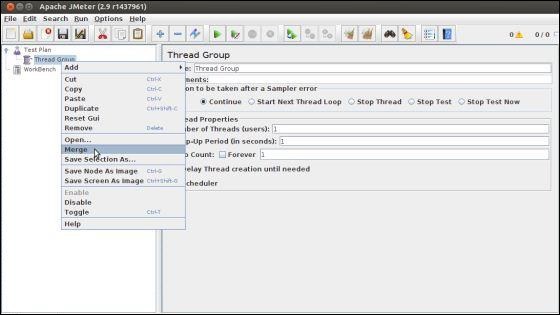
To load an element from file −- Right-click on the existing tree element to which you want to add the loaded element.
- Select Merge.
- Choose the file where you saved the elements.
- JMeter will merge the elements into the tree.
 To save tree elements −
- Right-click on the element.
- Choose the Save Selection As ... option.
Step 4 − Configuring the Tree Elements
Any element in the Test Plan can be configured using the controls present in JMeter's right-hand side frame. These controls allow you to configure the behavior of that particular test element. For example, the Thread Group can be configured for a number of users, ramp up periods, etc., as shown below −
Step 5 − Saving the Test Plan
You can save an entire Test Plan by using either Save or "Save Test Plan As ..." from the File menu.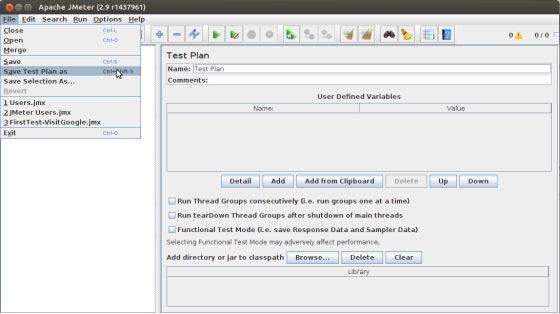
Step 6 − Run the Test Plan
You can run the Test Plan by clicking Start(Control + r) from the Run menu item. When JMeter starts running, it shows a small green box at the right-hand end of the section just under the menubar.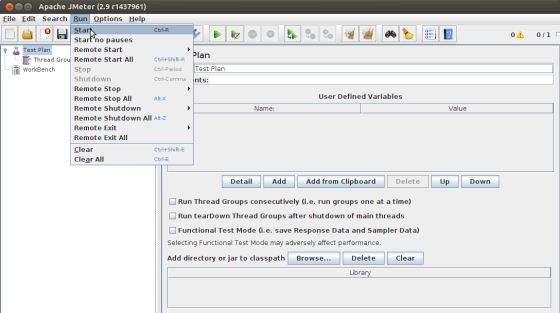 The numbers to the left of the green box are the number of active
threads / total number of threads. These only apply to a locally run
test; they do not include any threads started on remote systems when
using client-server mode.
The numbers to the left of the green box are the number of active
threads / total number of threads. These only apply to a locally run
test; they do not include any threads started on remote systems when
using client-server mode.Step 7 − Stop the Test Plan
You can stop your test in two ways −- Using Stop (Control + '.'). It stops the threads immediately if possible.
- Using Shutdown (Control + ','). It requests the threads to stop at the end of any current work.
No comments:
Post a Comment