
A module is an entity that has its own models, views, controllers,
and possibly other modules. It is practically an application inside the
application.
Step 1 − Create a folder called modules inside your project root. Inside the modules folder, create a folder named hello. This will be the basic folder for our Hello module.
Step 2 − Inside the hello folder, create a file Hello.php with the following code.
Step 3 − Now, add two more directories inside the hello folder − controllers and views. Add a CustomController.php file to the controller’s folder.
Views in the module should be put in the views folder of the module's base path. If views are rendered by a controller, they should be located in the folder corresponding to the controllerID. Add custom folder to the views folder.
Step 4 − Inside the custom directory, create a file called greet.php with the following code.
Step 5 − Modify the config/web.php file.
Step 6 − To run the actionGreet in our application, we should use the following route.
Step 7 − Now, type http://localhost:8080/index.php?r=hello/custom/greet and you will see the following output.
Step 1 − Create a folder called modules inside your project root. Inside the modules folder, create a folder named hello. This will be the basic folder for our Hello module.
Step 2 − Inside the hello folder, create a file Hello.php with the following code.
<?php
   namespace app\modules\hello;
   class Hello extends \yii\base\Module {
      public function init() {
         parent::init();
      }
   }
?>
We have just created a module class. This should be located under the module's base path. Every time a module is accessed, an instance of the correspondent module class is created. The init() function is for initializing the module's properties.
Step 3 − Now, add two more directories inside the hello folder − controllers and views. Add a CustomController.php file to the controller’s folder.
<?php
   namespace app\modules\hello\controllers;
   use yii\web\Controller;
   class CustomController extends Controller {
      public function actionGreet() {
         return $this->render('greet');
      }
   }
?>
When creating a module, a convention is to put the controller classes into the controller’s directory of the module's base path. We have just defined the actionGreet function, that just returns a greet view.
Views in the module should be put in the views folder of the module's base path. If views are rendered by a controller, they should be located in the folder corresponding to the controllerID. Add custom folder to the views folder.
Step 4 − Inside the custom directory, create a file called greet.php with the following code.
<h1>Hello world from custom module!</h1>We have just created a View for our actionGreet. To use this newly created module, we should configure the application. We should add our module to the modules property of the application.
Step 5 − Modify the config/web.php file.
<?php
   $params = require(__DIR__ . '/params.php');
   $config = [
      'id' => 'basic',
      'basePath' => dirname(__DIR__),
      'bootstrap' => ['log'],
      'components' => [
         'request' => [
            // !!! insert a secret key in the following (if it is empty) - this is
               //required by cookie validation
            'cookieValidationKey' => 'ymoaYrebZHa8gURuolioHGlK8fLXCKjO',
         ],
         'cache' => [
            'class' => 'yii\caching\FileCache',
         ],
         'user' => [
            'identityClass' => 'app\models\User',
            'enableAutoLogin' => true,
         ],
         'errorHandler' => [
            'errorAction' => 'site/error',
         ],
         'mailer' => [
            'class' => 'yii\swiftmailer\Mailer',
            // send all mails to a file by default. You have to set
            // 'useFileTransport' to false and configure a transport
            // for the mailer to send real emails.
            'useFileTransport' => true,
         ],
         'log' => [
            'traceLevel' => YII_DEBUG ? 3 : 0,
            'targets' => [
               [
                  'class' => 'yii\log\FileTarget',
                  'levels' => ['error', 'warning'],
               ],
            ],
         ],
         'db' => require(__DIR__ . '/db.php'),
      ],
      'modules' => [
         'hello' => [
            'class' => 'app\modules\hello\Hello',
         ],
      ],
      'params' => $params,
   ];
   if (YII_ENV_DEV) {
      // configuration adjustments for 'dev' environment
      $config['bootstrap'][] = 'debug';
      $config['modules']['debug'] = [
         'class' => 'yii\debug\Module',
      ];
      $config['bootstrap'][] = 'gii';
      $config['modules']['gii'] = [
         'class' => 'yii\gii\Module',
      ];
   }
   return $config;
?>
A route for a module's controller must begin with the module ID followed by the controller ID and action ID.
Step 6 − To run the actionGreet in our application, we should use the following route.
hello/custom/greetWhere hello is a module ID, custom is a controller ID and greet is an action ID.
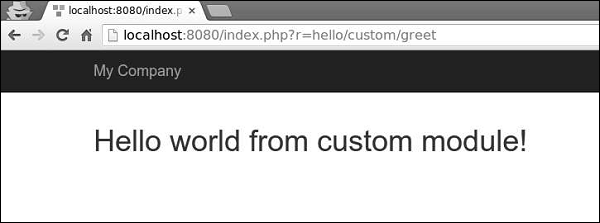
Step 7 − Now, type http://localhost:8080/index.php?r=hello/custom/greet and you will see the following output.
Important Points
Modules should −- Be used in large applications. You should divide its features into several groups. Each feature group can be developed as a module.
- Be reusable. Some commonly used features, as SEO management or blog management, can be developed as modules, so that you can easily reuse them in future projects.
No comments:
Post a Comment