
The GridView widget takes data from a data provider and presents data
in the form of a table. Each row of the table represents a single data
item, and a column represents an attribute of the item.
Step 1 − Modify the datawidget view this way.
 The columns of the DataGrid widget are configured in terms of the yii\grid\Column class. It represents a model attribute and can be filtered and sorted.
Step 3 − To add a custom column to the grid, modify the datawidget view this way.
 Grid columns can be customized by using different column classes,
like yii\grid\SerialColumn, yii\grid\ActionColumn, and
yii\grid\CheckboxColumn.
Grid columns can be customized by using different column classes,
like yii\grid\SerialColumn, yii\grid\ActionColumn, and
yii\grid\CheckboxColumn.
Step 5 − Modify the datawidget view in the following way.

Step 1 − Modify the datawidget view this way.
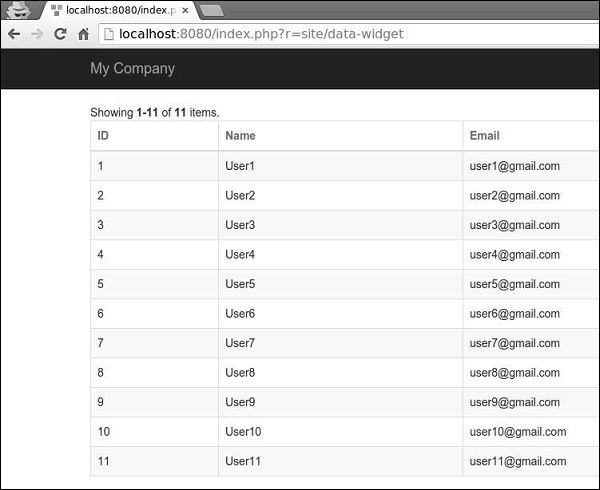
<?php
   use yii\grid\GridView;
   echo GridView::widget([
      'dataProvider' => $dataProvider,
   ]);
?>
Step 2 − Go to http://localhost:8080/index.php?r=site/data-widget, you will see a typical usage of the DataGrid widget.
The columns of the DataGrid widget are configured in terms of the yii\grid\Column class. It represents a model attribute and can be filtered and sorted.Step 3 − To add a custom column to the grid, modify the datawidget view this way.
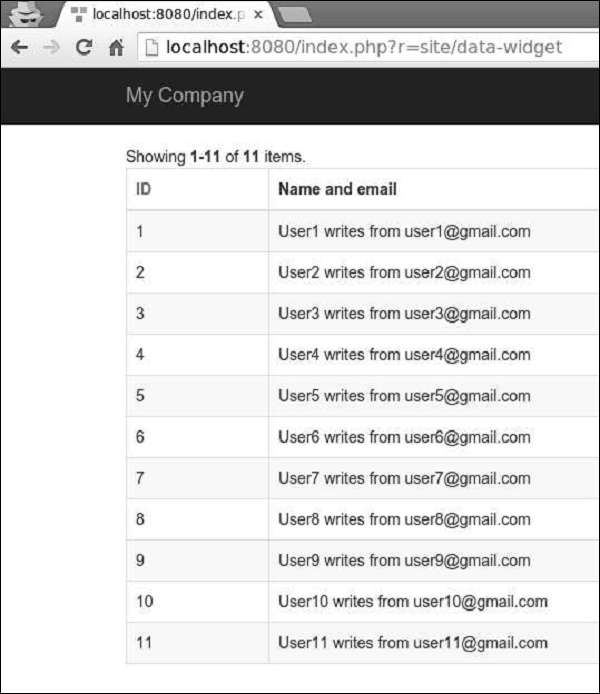
<?php
   yii\grid\GridView;
   echo GridView::widget([
      'dataProvider' => $dataProvider,
      'columns' => [
         'id',
         [
            'class' => 'yii\grid\DataColumn', // can be omitted, as it is the default
            'label' => 'Name and email',
            'value' => function ($data) {
               return $data->name . " writes from " . $data->email;
            },
         ],
      ],
   ]);
?>
Step 4 − If you go to the address http://localhost:8080/index.php?r=site/data-widget, you will see the output as shown in the following image.
Grid columns can be customized by using different column classes,
like yii\grid\SerialColumn, yii\grid\ActionColumn, and
yii\grid\CheckboxColumn.Step 5 − Modify the datawidget view in the following way.
<?php
   use yii\grid\GridView;
   echo GridView::widget([
      'dataProvider' => $dataProvider,
      'columns' => [
         ['class' => 'yii\grid\SerialColumn'], 'name',
         ['class' => 'yii\grid\ActionColumn'],
         ['class' => 'yii\grid\CheckboxColumn'],
      ],
   ]);
?>
Step 6 −Go to http://localhost:8080/index.php?r=site/data-widget, you will see the following.
No comments:
Post a Comment