
Groovy - Overview
Groovy is an object oriented language which is based on Java platform. Groovy 1.0 was released in January 2, 2007 with Groovy 2.4 as the current major release. Groovy is distributed via the Apache License v 2.0.Features of Groovy
Groovy has the following features −- Support for both static and dynamic typing.
- Support for operator overloading.
- Native syntax for lists and associative arrays.
- Native support for regular expressions.
- Native support for various markup languages such as XML and HTML.
- Groovy is simple for Java developers since the syntax for Java and Groovy are very similar.
- You can use existing Java libraries.
- Groovy extends the java.lang.Object.

Groovy - Environment
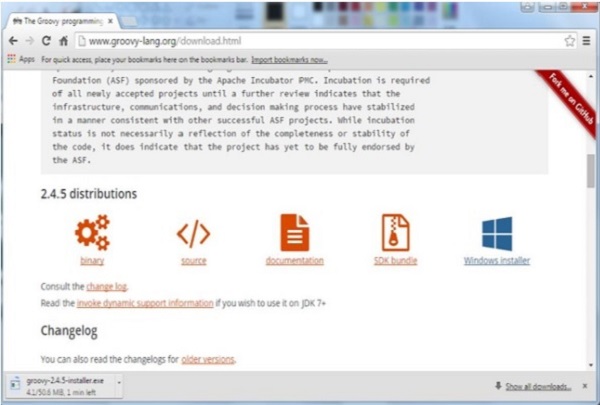
There are a variety of ways to get the Groovy environment setup.Binary download and installation − Go to the link www.groovy-lang.org/download.html to get the Windows Installer section. Click on this option to start the download of the Groovy installer.
 Once you launch the installer, follow the steps given below to complete the installation.
Step 1 − Select the language installer.
 Step 2 − Click the Next button in the next screen.
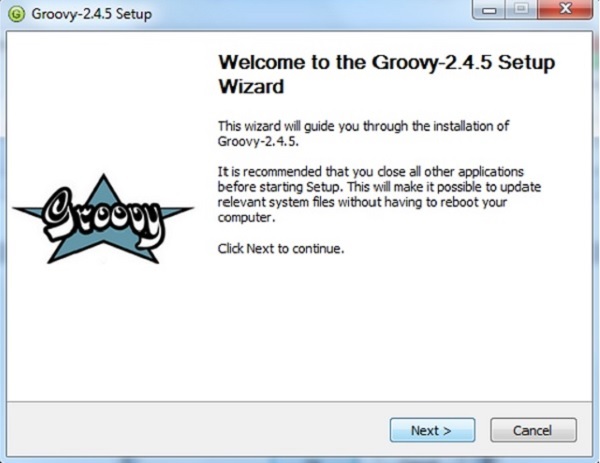 Step 3 − Click the ‘I Agree’ button.
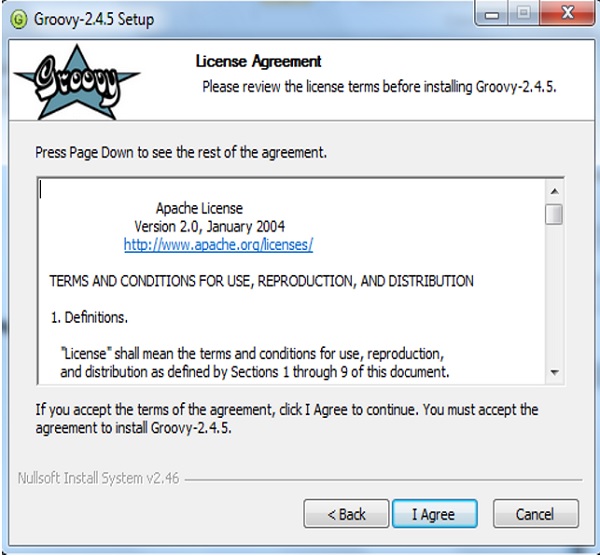 Step 4 − Accept the default components and click the Next button.
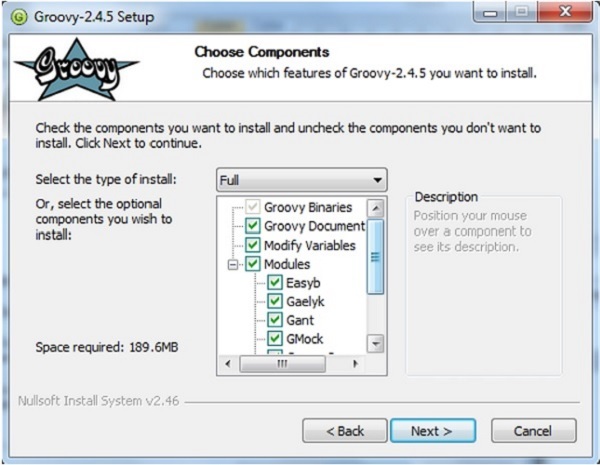 Step 5 − Choose the appropriate destination folder and then click the Next button.
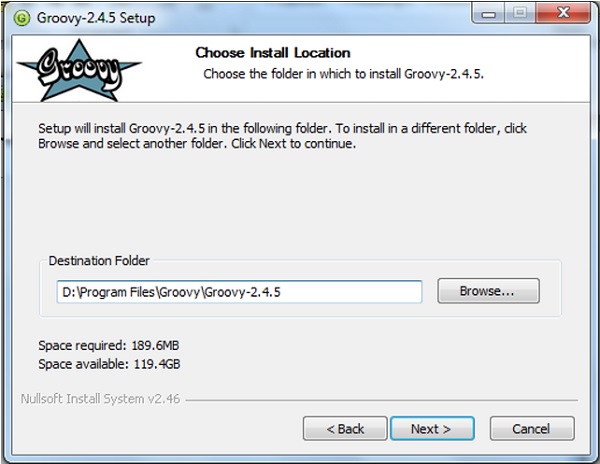 Step 6 − Click the Install button to start the installation.
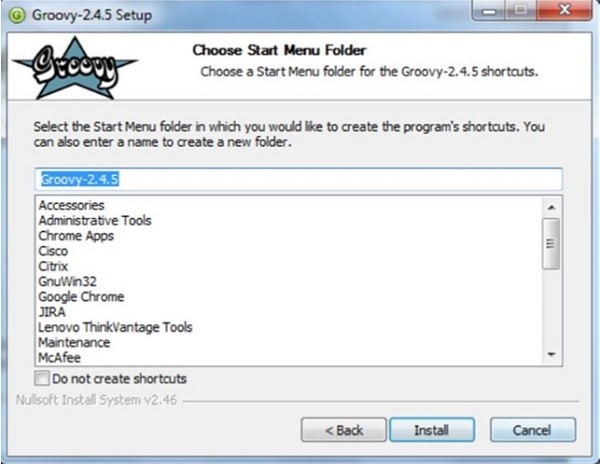 Step 7 − Once the installation is complete, click the Next button to start the configuration.
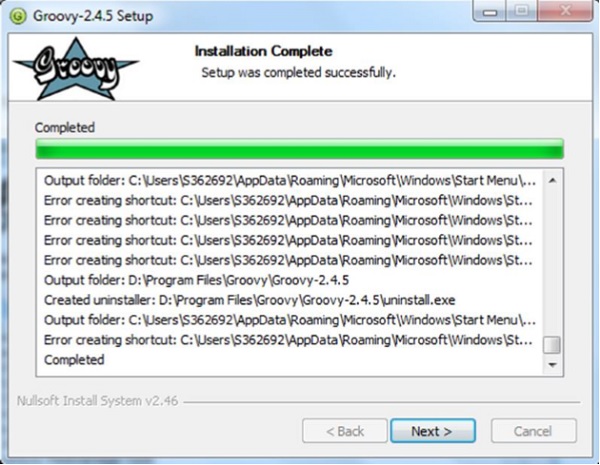 Step 8 − Choose the default options and click the Next button.
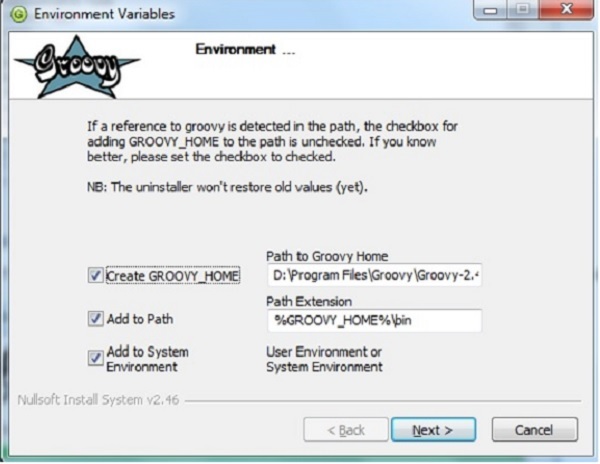 Step 9 − Accept the default file associations and click the Next button.
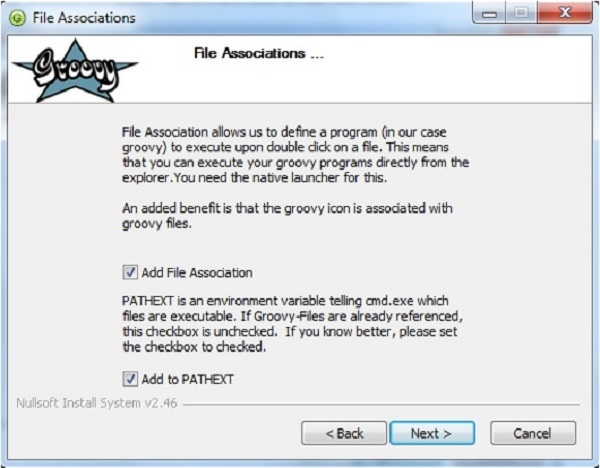 Step 10 − Click the Finish button to complete the installation.
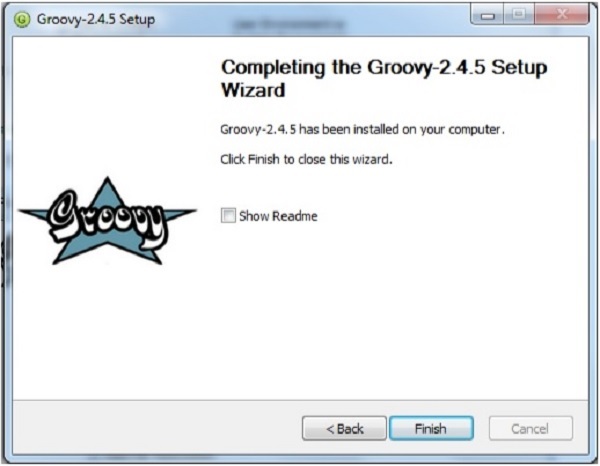 Once the above steps are followed, you can then start the groovy
shell which is part of the Groovy installation that helps in testing our
different aspects of the Groovy language without the need of having a
full-fledged integrated development environment for Groovy. This can be
done by running the command groovysh from the command prompt.
Once the above steps are followed, you can then start the groovy
shell which is part of the Groovy installation that helps in testing our
different aspects of the Groovy language without the need of having a
full-fledged integrated development environment for Groovy. This can be
done by running the command groovysh from the command prompt.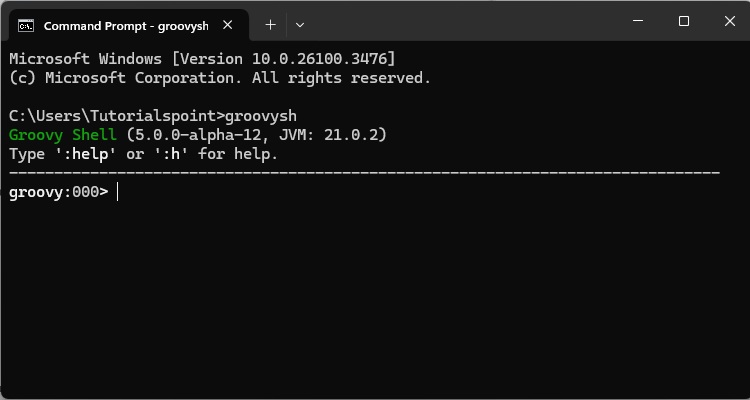 If you want to include the groovy binaries as part of you maven or gradle build, you can add the following lines
Gradle
'org.codehaus.groovy:groovy:2.4.5'
Maven
<groupId>org.codehaus.groovy</groupId>
<artifactId>groovy</artifactId>
<version>2.4.5</version>
Groovy - Basic Syntax
In order to understand the basic syntax of Groovy, let’s first look at a simple Hello World program.Creating Your First Hello World Program
Creating your first hello world program is as simple as just entering the following code line −class Example { static void main(String[] args) { // Using a simple println statement to print output to the console println('Hello World'); } }When we run the above program, we will get the following result −
Hello World
Import Statement in Groovy
The import statement can be used to import the functionality of other libraries which can be used in your code. This is done by using the import keyword.The following example shows how to use a simple import of the MarkupBuilder class which is probably one of the most used classes for creating HTML or XML markup.
import groovy.xml.MarkupBuilder def xml = new MarkupBuilder()By default, Groovy includes the following libraries in your code, so you don’t need to explicitly import them.
import java.lang.* import java.util.* import java.io.* import java.net.* import groovy.lang.* import groovy.util.* import java.math.BigInteger import java.math.BigDecimal
Tokens in Groovy
A token is either a keyword, an identifier, a constant, a string literal, or a symbol.println(“Hello World”);In the above code line, there are two tokens, the first is the keyword println and the next is the string literal of “Hello World”.
Comments in Groovy
Comments are used to document your code. Comments in Groovy can be single line or multiline.Single line comments are identified by using the // at any position in the line. An example is shown below −
class Example { static void main(String[] args) { // Using a simple println statement to print output to the console println('Hello World'); } }Multiline comments are identified with /* in the beginning and */ to identify the end of the multiline comment.
class Example {
   static void main(String[] args) {
      /* This program is the first program
      This program shows how to display hello world */
      println('Hello World');
   }
}
Semicolons
Just like the Java programming language, it is required to have semicolons to distinguish between multiple statements defined in Groovy.class Example { static void main(String[] args) { // One can see the use of a semi-colon after each statement def x = 5; println('Hello World'); } }The above example shows semicolons are used to distinguish between different lines of code statements.
Identifiers
Identifiers are used to define variables, functions or other user defined variables. Identifiers start with a letter, a dollar or an underscore. They cannot start with a number. Here are some examples of valid identifiers −def employeename def student1 def student_namewhere def is a keyword used in Groovy to define an identifier.
Here is a code example of how an identifier can be used in our Hello World program.
class Example { static void main(String[] args) { // One can see the use of a semi-colon after each statement def x = 5; println('Hello World'); } }In the above example, the variable x is used as an identifier.
Keywords
Keywords as the name suggest are special words which are reserved in the Groovy Programming language. The following table lists the keywords which are defined in Groovy.| as | assert | break | case |
| catch | class | const | continue |
| def | default | do | else |
| enum | extends | false | Finally |
| for | goto | if | implements |
| import | in | instanceof | interface |
| new | pull | package | return |
| super | switch | this | throw |
| throws | trait | true | try |
| while |
Whitespaces
Whitespace is the term used in a programming language such as Java and Groovy to describe blanks, tabs, newline characters and comments. Whitespace separates one part of a statement from another and enables the compiler to identify where one element in a statement.For example, in the following code example, there is a white space between the keyword def and the variable x. This is so that the compiler knows that def is the keyword which needs to be used and that x should be the variable name that needs to be defined.
def x = 5;
Literals
A literal is a notation for representing a fixed value in groovy. The groovy language has notations for integers, floating-point numbers, characters and strings. Here are some of the examples of literals in the Groovy programming language −12 1.45 ‘a’ “aa”
Groovy - Data Types
In any programming language, you need to use various variables to store various types of information. Variables are nothing but reserved memory locations to store values. This means that when you create a variable you reserve some space in memory to store the value associated with the variable.You may like to store information of various data types like string, character, wide character, integer, floating point, Boolean, etc. Based on the data type of a variable, the operating system allocates memory and decides what can be stored in the reserved memory.
Built-in Data Types
Groovy offers a wide variety of built-in data types. Following is a list of data types which are defined in Groovy −- byte − This is used to represent a byte value. An example is 2.
- short − This is used to represent a short number. An example is 10.
- int − This is used to represent whole numbers. An example is 1234.
- long − This is used to represent a long number. An example is 10000090.
- float − This is used to represent 32-bit floating point numbers. An example is 12.34.
- double − This is used to represent 64-bit floating point numbers which are longer decimal number representations which may be required at times. An example is 12.3456565.
- char − This defines a single character literal. An example is ‘a’.
- Boolean − This represents a Boolean value which can either be true or false.
- String − These are text literals which are represented in the form of chain of characters. For example “Hello World”.
Bound values
The following table shows the maximum allowed values for the numerical and decimal literals.| byte | -128 to 127 |
| short | -32,768 to 32,767 |
| int | -2,147,483,648 to 2,147,483,647 |
| long | -9,223,372,036,854,775,808 to +9,223,372,036,854,775,807 |
| float | 1.40129846432481707e-45 to 3.40282346638528860e+38 |
| double | 4.94065645841246544e-324d to 1.79769313486231570e+308d |
Class Numeric
Types In addition to the primitive types, the following object types (sometimes referred to as wrapper types) are allowed −- java.lang.Byte
- java.lang.Short
- java.lang.Integer
- java.lang.Long
- java.lang.Float
- java.lang.Double
| Name | Description | Example |
|---|---|---|
| java.math.BigInteger | Immutable arbitrary-precision signed integral numbers | 30g |
| java.math.BigDecimal | Immutable arbitrary-precision signed decimal numbers | 3.5g |
class Example {
   static void main(String[] args) {
      //Example of a int datatype
      int x = 5;

      //Example of a long datatype
      long y = 100L;

      //Example of a floating point datatype
      float a = 10.56f;

      //Example of a double datatype
      double b = 10.5e40;

      //Example of a BigInteger datatype
      BigInteger bi = 30g;

      //Example of a BigDecimal datatype
      BigDecimal bd = 3.5g;

      println(x);
      println(y);
      println(a);
      println(b);
      println(bi);
      println(bd);
   }
}
When we run the above program, we will get the following result −
5
100
10.56
1.05E41
30
3.5
Groovy - Variables
Variables in Groovy can be defined in two ways − using the native syntax for the data type or the next is by using the def keyword. For variable definitions it is mandatory to either provide a type name explicitly or to use "def" in replacement. This is required by the Groovy parser.There are following basic types of variable in Groovy as explained in the previous chapter −
- byte − This is used to represent a byte value. An example is 2.
- short − This is used to represent a short number. An example is 10.
- int − This is used to represent whole numbers. An example is 1234.
- long − This is used to represent a long number. An example is 10000090.
- float − This is used to represent 32-bit floating point numbers. An example is 12.34.
- double − This is used to represent 64-bit floating point numbers which are longer decimal number representations which may be required at times. An example is 12.3456565.
- char − This defines a single character literal. An example is ‘a’.
- Boolean − This represents a Boolean value which can either be true or false.
- String − These are text literals which are represented in the form of chain of characters. For example “Hello World”.
Variable Declarations
A variable declaration tells the compiler where and how much to create the storage for the variable.Following is an example of variable declaration −
class Example {
   static void main(String[] args) {
      // x is defined as a variable
      String x = "Hello";

      // The value of the variable is printed to the console
      println(x);
   }
}
When we run the above program, we will get the following result −
Hello
Naming Variables
The name of a variable can be composed of letters, digits, and the underscore character. It must begin with either a letter or an underscore. Upper and lowercase letters are distinct because Groovy, just like Java is a case-sensitive programming language.class Example { static void main(String[] args) { // Defining a variable in lowercase int x = 5; // Defining a variable in uppercase int X = 6; // Defining a variable with the underscore in it's name def _Name = "Joe"; println(x); println(X); println(_Name); } }When we run the above program, we will get the following result −
5
6
Joe
We can see that x and X are two different variables because of case sensitivity and in the third case, we can see that _Name begins with an underscore.
Printing Variables
You can print the current value of a variable with the println function. The following example shows how this can be achieved.class Example { static void main(String[] args) { //Initializing 2 variables int x = 5; int X = 6; //Printing the value of the variables to the console println("The value of x is " + x + "The value of X is " + X); } }When we run the above program, we will get the following result −
The value of x is 5 The value of X is 6
Groovy - Operators
An operator is a symbol that tells the compiler to perform specific mathematical or logical manipulations.Groovy has the following types of operators −
- Arithmetic operators
- Relational operators
- Logical operators
- Bitwise operators
- Assignment operators
Arithmetic Operators
The Groovy language supports the normal Arithmetic operators as any the language. Following are the Arithmetic operators available in Groovy −Show Example
| Operator | Description | Example |
|---|---|---|
| + | Addition of two operands | 1 + 2 will give 3 |
| − | Subtracts second operand from the first | 2 − 1 will give 1 |
| * | Multiplication of both operands | 2 * 2 will give 4 |
| / | Division of numerator by denominator | 3 / 2 will give 1.5 |
| % | Modulus Operator and remainder of after an integer/float division | 3 % 2 will give 1 |
| ++ | Incremental operators used to increment the value of an operand by 1 | int x = 5; x++; x will give 6 |
| -- | Incremental operators used to decrement the value of an operand by 1 | int x = 5; x--; x will give 4 |
Relational operators
Relational operators allow of the comparison of objects. Following are the relational operators available in Groovy −Show Example
| Operator | Description | Example |
|---|---|---|
| == | Tests the equality between two objects | 2 == 2 will give true |
| != | Tests the difference between two objects | 3 != 2 will give true |
| < | Checks to see if the left objects is less than the right operand. | 2 < 3 will give true |
| <= | Checks to see if the left objects is less than or equal to the right operand. | 2 <= 3 will give true |
| > | Checks to see if the left objects is greater than the right operand. | 3 > 2 will give true |
| >= | Checks to see if the left objects is greater than or equal to the right operand. | 3 >= 2 will give true |
Logical Operators
Logical operators are used to evaluate Boolean expressions. Following are the logical operators available in Groovy −Show Example
| Operator | Description | Example |
|---|---|---|
| && | This is the logical “and” operator | true && true will give true |
| || | This is the logical “or” operator | true || true will give true |
| ! | This is the logical “not” operator | !false will give true |
Bitwise Operators
Groovy provides four bitwise operators. Following are the bitwise operators available in Groovy −Show Example
| Operator | Description |
|---|---|
| & | This is the bitwise “and” operator |
| | | This is the bitwise “or” operator |
| ^ | This is the bitwise “xor” or Exclusive or operator |
| ~ | This is the bitwise negation operator |
| p | q | p & q | p | q | p ^ q |
|---|---|---|---|---|
| 0 | 0 | 0 | 0 | 0 |
| 0 | 1 | 0 | 1 | 1 |
| 1 | 1 | 1 | 1 | 0 |
| 1 | 0 | 0 | 1 | 1 |
Assignment operators
The Groovy language also provides assignment operators. Following are the assignment operators available in Groovy −Show Example
| Operator | Description | Example |
|---|---|---|
| += | This adds right operand to the left operand and assigns the result to left operand. | def A = 5 A+=3 Output will be 8 |
| -= | This subtracts right operand from the left operand and assigns the result to left operand | def A = 5 A-=3 Output will be 2 |
| *= | This multiplies right operand with the left operand and assigns the result to left operand | def A = 5 A*=3 Output will be 15 |
| /= | This divides left operand with the right operand and assigns the result to left operand | def A = 6 A/=3 Output will be 2 |
| %= | This takes modulus using two operands and assigns the result to left operand | def A = 5 A%=3 Output will be 2 |
No comments:
Post a Comment