
In this chapter, we will study how to transfer WordPress to a new hosting platform.
Here, we have used Hostinger web hosting to transfer the WordPress site to another host.
Just follow the simple steps given below to transfer your WordPress site to another host.
Step (1) − Keep the backup of WordPress files and export the database. We will study about this in detail in the chapter WordPress - Backup & Restore
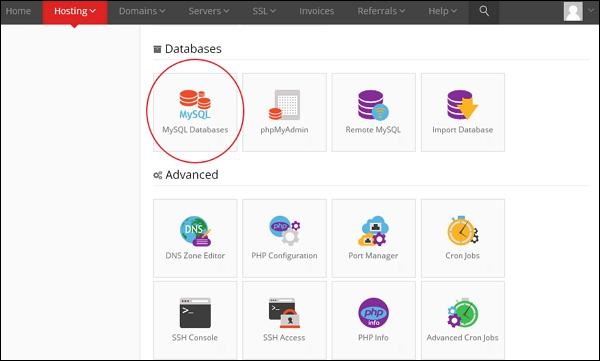
Step (2) − Login to your cPanel and click on MySQL Databases as shown in the following screen.
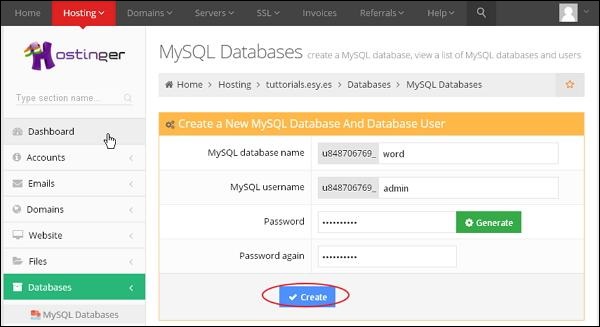
 Step (3) − Create a new database and MySQL user as shown in the following screen. The page has the following fields −
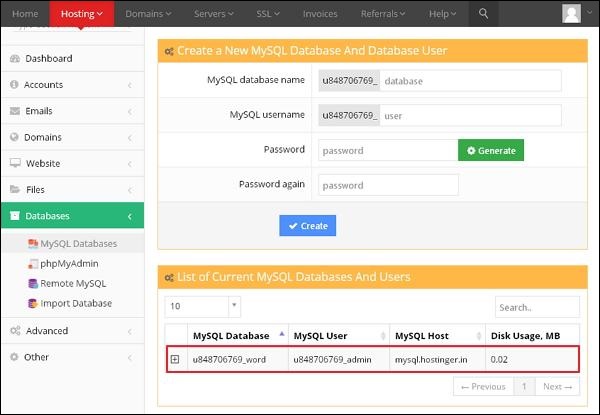
Step (4) − You can view your created MySQL database, User and Host as shown in the following screen.
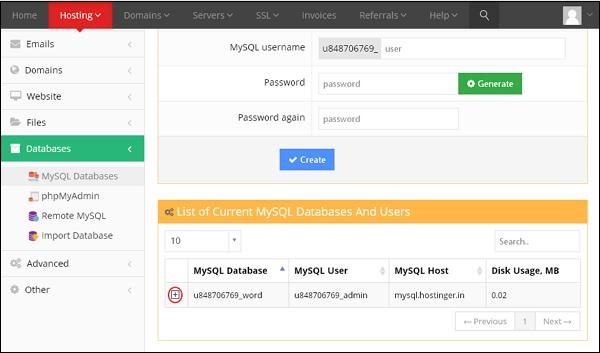
 Step (5) − Click on + symbol.
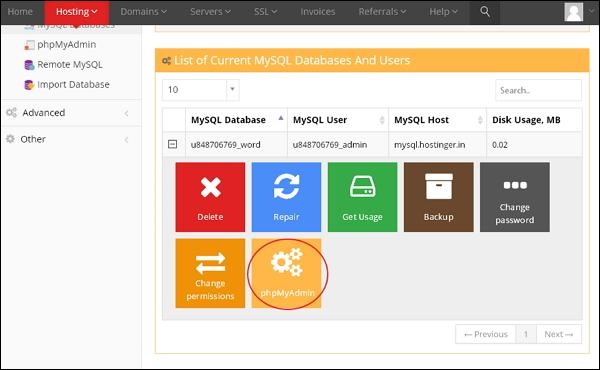
 Step (6) − Click on phpMyAdmin.
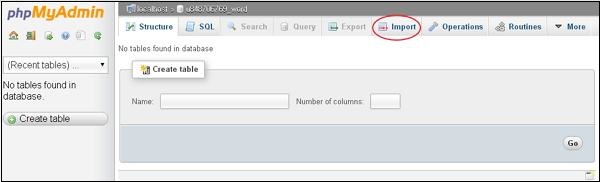
 Step (7) − Click on Import tab on the phpMyAdmin page.
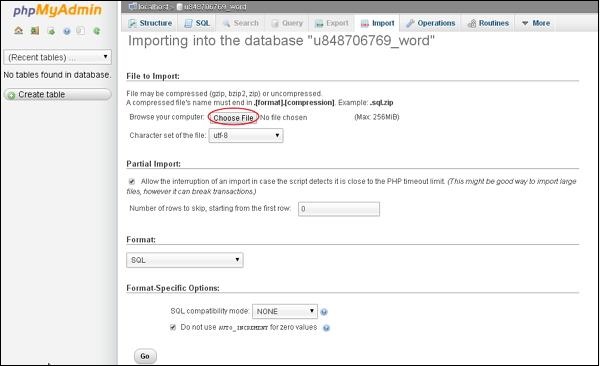
 Step (8) − Click on Choose File button to select the backup file from your system and click on Go button.
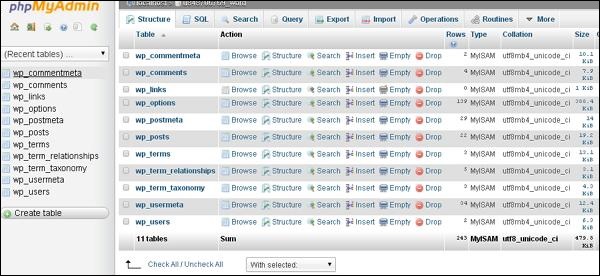
 Step (9) − You can view the tables of database uploaded as shown in the following screen.
 Step (10) − Upload your WordPress files by using file transfer protocol(FileZilla) as shown in the chapter WordPress - Backup & Restore in Restoring WordPress Files section.
Step (11) − Edit wp-config.php file as mentioned in the Restoring WordPress Files section in chapter WordPress - Backup & Restore.
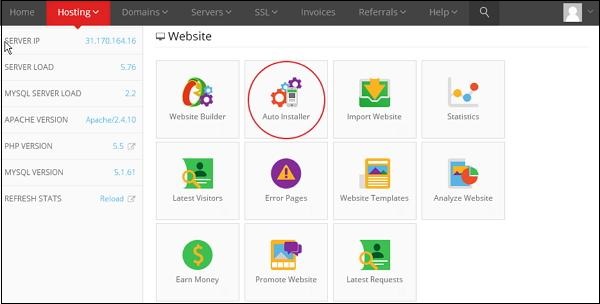
Step (12) − Inside the Website section of hostinger, Click on Auto Installer.
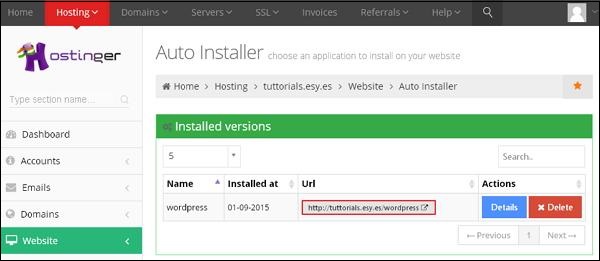
 Step (13) − You can view the uploaded file of the WordPress. Click on the URL link as shown in the following screen.
 Step (14) − You can view the login page of WordPress.

Here, we have used Hostinger web hosting to transfer the WordPress site to another host.
Just follow the simple steps given below to transfer your WordPress site to another host.
Step (1) − Keep the backup of WordPress files and export the database. We will study about this in detail in the chapter WordPress - Backup & Restore
Step (2) − Login to your cPanel and click on MySQL Databases as shown in the following screen.
Step (3) − Create a new database and MySQL user as shown in the following screen. The page has the following fields −
- MySQL Database Name − Enter your database name.
- MySQL Username − Enter your username.
- Password − Set password for your database.
- Password again − Once again set the same password as previous for authentication.
Step (4) − You can view your created MySQL database, User and Host as shown in the following screen.
Step (5) − Click on + symbol.
Step (6) − Click on phpMyAdmin.
Step (7) − Click on Import tab on the phpMyAdmin page.
Step (8) − Click on Choose File button to select the backup file from your system and click on Go button.
Step (9) − You can view the tables of database uploaded as shown in the following screen.
Step (10) − Upload your WordPress files by using file transfer protocol(FileZilla) as shown in the chapter WordPress - Backup & Restore in Restoring WordPress Files section.Step (11) − Edit wp-config.php file as mentioned in the Restoring WordPress Files section in chapter WordPress - Backup & Restore.
Step (12) − Inside the Website section of hostinger, Click on Auto Installer.
Step (13) − You can view the uploaded file of the WordPress. Click on the URL link as shown in the following screen.
Step (14) − You can view the login page of WordPress.
No comments:
Post a Comment