
In this chapter, we will learn how to customize themes. Customizing
themes help you to give a new look to your website. Here you can change
background images/colors, add titles, and do much more.
Following are the steps of Customize theme.
Step (1) − Click on Appearance → Customize.
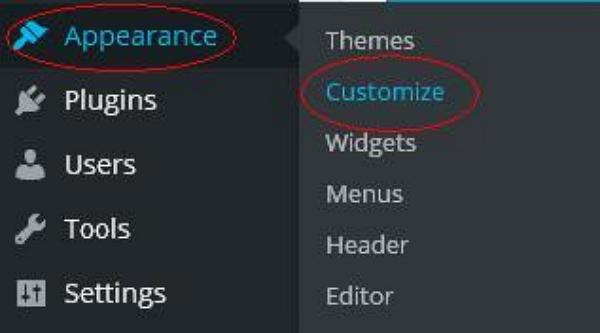 Step (2) − The following screen will be displayed.
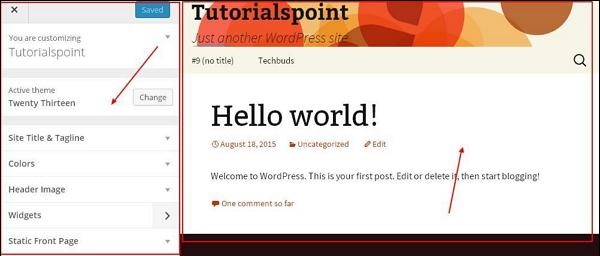 As can be seen, on the left side we have the customizing section, and
on the right side we have the theme you have chosen. So any changes you
make on the left side will be displayed on the right side of the page.
Here are a few options you must know −
As can be seen, on the left side we have the customizing section, and
on the right side we have the theme you have chosen. So any changes you
make on the left side will be displayed on the right side of the page.
Here are a few options you must know −
Active theme − In this section, you can change the current theme just by clicking on ‘Change’.
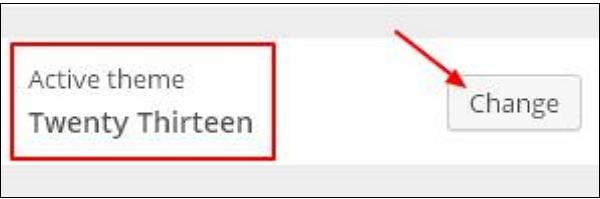 When you click on ‘Change’ you get a list of themes, click on any of the themes, and then click ‘Save & Continue’. Your theme will be saved.
 Site Title & Tagline − In this section, you can add the site title and tagline you want to add to your website.
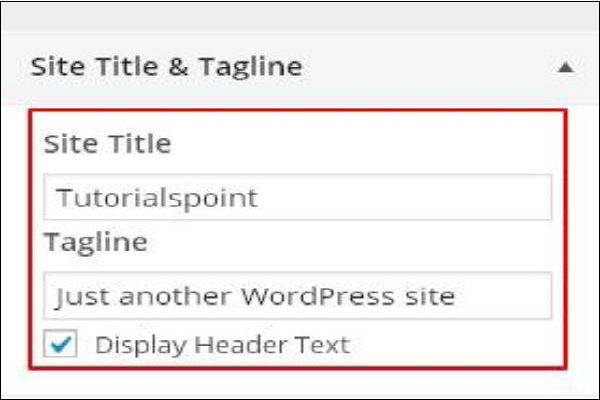 Add your title name in the ‘Site Title’ section. And your tagline in the ‘Tagline’ box.
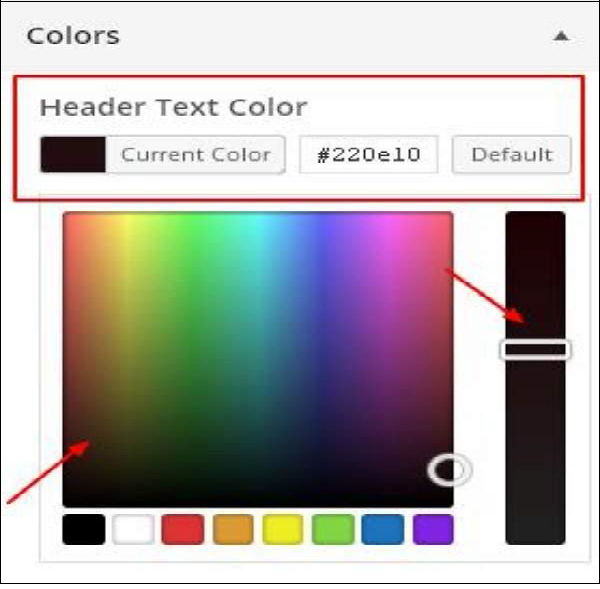
Colors − You can change your header text color using this section. As you scroll through the colors you find changes happening on the right side of your page. You can even add a color of your own into the box that is situated in between ‘Current color’ and ‘Default’.
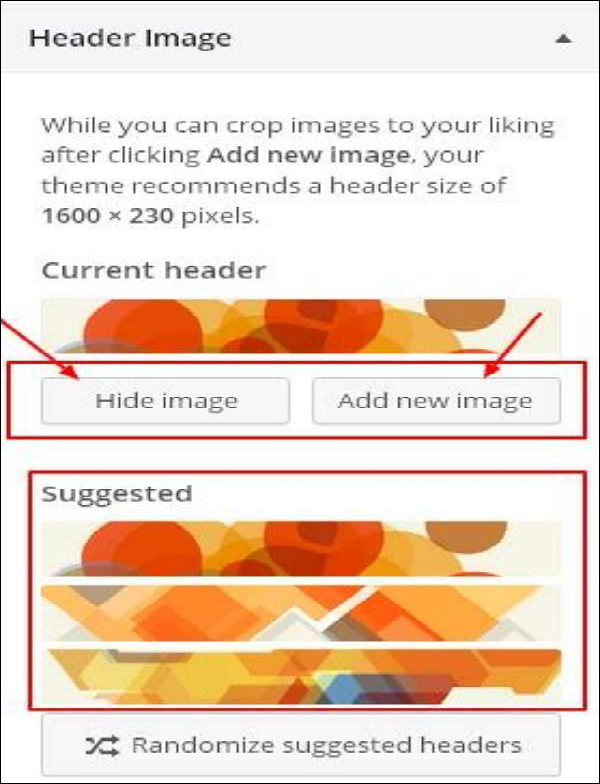
 Header Image − Add a header image either by selecting from the suggestions or you can add an image of your own by clicking on ‘Add new image’.
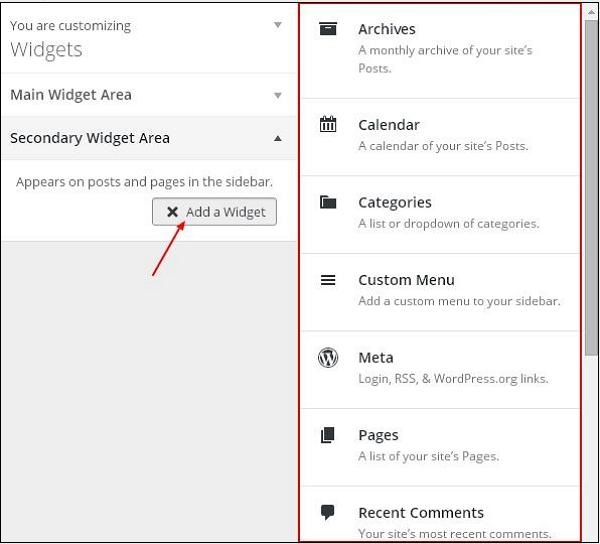
 Widgets − Add widgets to your site from here.
 When you click on the arrow mark the following image appears.
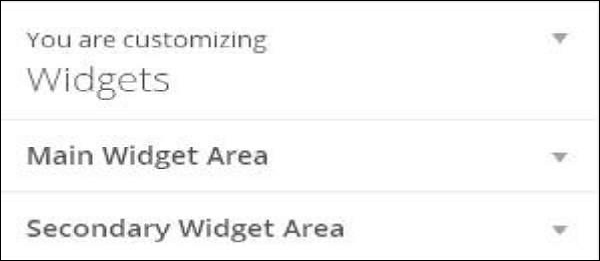 Here, there are two options −
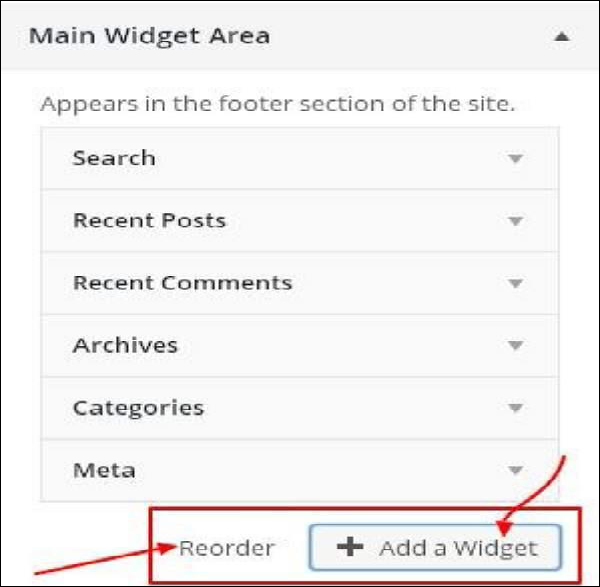
First is the ‘Main Widget Area’, when you click on this you get another list of widgets that are to be displayed in the footer area.
 When you click on any of the widgets a dropdown appears where you can
edit more or add more. For example − If you want to add categories then
the following image appears.
When you click on any of the widgets a dropdown appears where you can
edit more or add more. For example − If you want to add categories then
the following image appears.
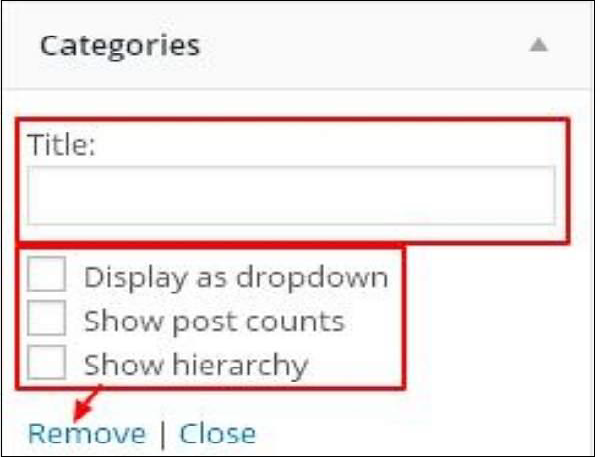 In this image, as you can see, you can add your category in the ‘Title’ section. Check any of the required boxes. If you do not want to add any, then say ‘Remove’. Same goes for other widgets too.
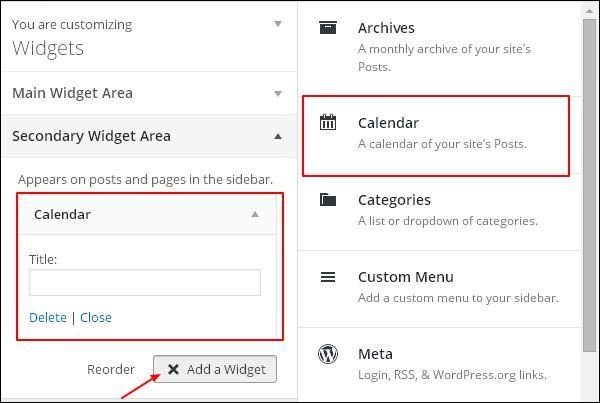
Secondary Widget − Here you must click on ‘Add a widget’ and you get a side bar with a list of different widgets. Click on any and it adds up to your widget list.
 If you want to add more widgets then click on ‘Add a widget’ again and you can add as many widgets as you want.
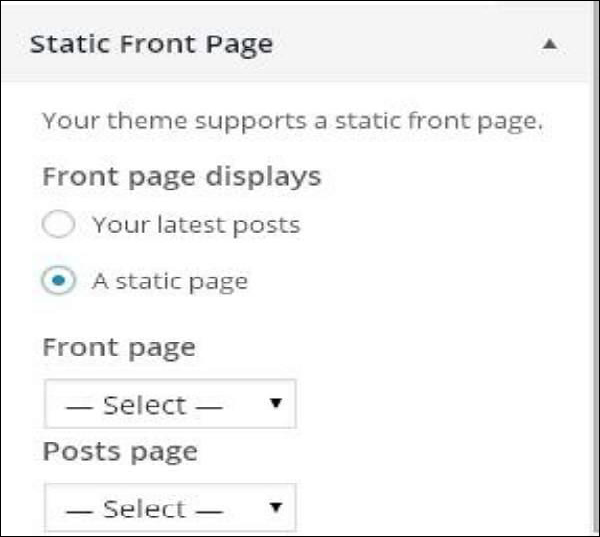
 Static Front − Select either latest posts or static front page for your site.
Following are the steps of Customize theme.
Step (1) − Click on Appearance → Customize.
Step (2) − The following screen will be displayed.
As can be seen, on the left side we have the customizing section, and
on the right side we have the theme you have chosen. So any changes you
make on the left side will be displayed on the right side of the page.
Here are a few options you must know −Active theme − In this section, you can change the current theme just by clicking on ‘Change’.
When you click on ‘Change’ you get a list of themes, click on any of the themes, and then click ‘Save & Continue’. Your theme will be saved.
Site Title & Tagline − In this section, you can add the site title and tagline you want to add to your website.
Add your title name in the ‘Site Title’ section. And your tagline in the ‘Tagline’ box.Colors − You can change your header text color using this section. As you scroll through the colors you find changes happening on the right side of your page. You can even add a color of your own into the box that is situated in between ‘Current color’ and ‘Default’.
Header Image − Add a header image either by selecting from the suggestions or you can add an image of your own by clicking on ‘Add new image’.
Widgets − Add widgets to your site from here.
When you click on the arrow mark the following image appears.
Here, there are two options −First is the ‘Main Widget Area’, when you click on this you get another list of widgets that are to be displayed in the footer area.
When you click on any of the widgets a dropdown appears where you can
edit more or add more. For example − If you want to add categories then
the following image appears.
In this image, as you can see, you can add your category in the ‘Title’ section. Check any of the required boxes. If you do not want to add any, then say ‘Remove’. Same goes for other widgets too.Secondary Widget − Here you must click on ‘Add a widget’ and you get a side bar with a list of different widgets. Click on any and it adds up to your widget list.
If you want to add more widgets then click on ‘Add a widget’ again and you can add as many widgets as you want.
Static Front − Select either latest posts or static front page for your site.
No comments:
Post a Comment