
Struts2 is popular and mature web application framework based on the
MVC design pattern. Struts2 is not just the next version of Struts 1,
but it is a complete rewrite of the Struts architecture.
The WebWork framework started off with Struts framework as the basis and its goal was to offer an enhanced and improved framework built on Struts to make web development easier for the developers.
After some time, the Webwork framework and the Struts community joined hands to create the famous Struts2 framework.
If you are running Windows and installed the SDK in C:\jdk1.5.0_20, you would have to put the following line in your C:\autoexec.bat file.
On Unix (Solaris, Linux, etc.), if the SDK is installed in /usr/local/jdk1.5.0_20 and you use the C shell, you would put the following into your .cshrc file.
Tomcat can be started by executing the following commands on windows machine, or you can simply double click on startup.bat
Further information about configuring and running Tomcat can be found
in the documentation included here, as well as on the Tomcat web site:
http://tomcat.apache.org
Tomcat can be stopped by executing the following commands on windows machine:
The WebWork framework started off with Struts framework as the basis and its goal was to offer an enhanced and improved framework built on Struts to make web development easier for the developers.
After some time, the Webwork framework and the Struts community joined hands to create the famous Struts2 framework.
Struts 2 framework features:
Here are some of the great features that may force you to consider Struts2:- POJO forms and POJO actions - Struts2 has done away with the Action Forms that were an integral part of the Struts framework. With Struts2, you can use any POJO to receive the form input. Similarly, you can now see any POJO as an Action class.
- Tag support - Struts2 has improved the form tags and the new tags allow the developers to write less code.
- AJAX support - Struts2 has recognised the take over by Web2.0 technologies, and has integrated AJAX support into the product by creating AJAX tags, that function very similar to the standard Struts2 tags.
- Easy Integration - Integration with other frameworks like Spring, Tiles and SiteMesh is now easier with a variety of integration available with Struts2.
- Template Support - Support for generating views using templates.
- Plugin Support - The core Struts2 behaviour can be enhanced and augmented by the use of plugins. A number of plugins are available for Struts2.
- Profiling - Struts2 offers integrated profiling to debug and profile the application. In addition to this, Struts also offers integrated debugging with the help of built in debugging tools.
- Easy to modify tags - Tag markups in Struts2 can be tweaked using Freemarker templates. This does not require JSP or java knowledge. Basic HTML, XML and CSS knowledge is enough to modify the tags.
- Promote less configuration - Struts2 promotes less configuration with the help of using default values for various settings. You don't have to configure something unless it deviates from the default settings set by Struts2.
Struts 2 Environment Setup:
Our first task is to get a minimal Struts 2 application running. This chapter will guide you on how to prepare a development environment to start your work with Struts 2. I assume that you already have have JDK (5+), Tomcat and Eclipse installed on your machine. If you do not have these components installed then follow the given steps on fast track:Step 1 - Setup Java Development Kit (JDK):
You can download the latest version of SDK from Oracle's Java site: Java SE Downloads. You will find instructions for installing JDK in downloaded files, follow the given instructions to install and configure the setup. Finally set PATH and JAVA_HOME environment variables to refer to the directory that contains java and javac, typically java_install_dir/bin and java_install_dir respectively.If you are running Windows and installed the SDK in C:\jdk1.5.0_20, you would have to put the following line in your C:\autoexec.bat file.
set PATH=C:\jdk1.5.0_20\bin;%PATH%
set JAVA_HOME=C:\jdk1.5.0_20
Alternatively, on Windows NT/2000/XP, you could also right-click on My Computer, select Properties, then Advanced, then Environment Variables. Then, you would update the PATH value and press the OK button.
On Unix (Solaris, Linux, etc.), if the SDK is installed in /usr/local/jdk1.5.0_20 and you use the C shell, you would put the following into your .cshrc file.
setenv PATH /usr/local/jdk1.5.0_20/bin:$PATH
setenv JAVA_HOME /usr/local/jdk1.5.0_20
Alternatively, if you use an Integrated Development Environment (IDE) like Borland JBuilder, Eclipse, IntelliJ IDEA, or Sun ONE Studio, compile and run a simple program to confirm that the IDE knows where you installed Java, otherwise do proper setup as given document of the IDE.
Step 2 - Setup Apache Tomcat:
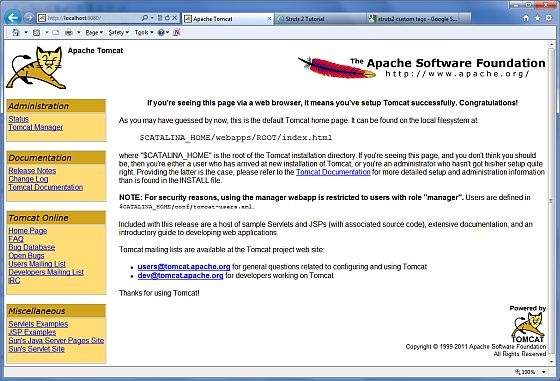
You can download the latest version of Tomcat from http://tomcat.apache.org/. Once you downloaded the installation, unpack the binary distribution into a convenient location. For example in C:\apache-tomcat-6.0.33 on windows, or /usr/local/apache-tomcat-6.0.33 on Linux/Unix and create CATALINA_HOME environment variable pointing to these locations.Tomcat can be started by executing the following commands on windows machine, or you can simply double click on startup.bat
 %CATALINA_HOME%\bin\startup.bat

 or

 C:\apache-tomcat-6.0.33\bin\startup.bat
Tomcat can be started by executing the following commands on Unix (Solaris, Linux, etc.) machine:
$CATALINA_HOME/bin/startup.sh

or

/usr/local/apache-tomcat-6.0.33/bin/startup.sh
After a successful startup, the default web applications included with Tomcat will be available by visiting http://localhost:8080/. If everything is fine then it should display following result:
Tomcat can be stopped by executing the following commands on windows machine:
%CATALINA_HOME%\bin\shutdown
or

C:\apache-tomcat-5.5.29\bin\shutdown
Tomcat can be stopped by executing the following commands on Unix (Solaris, Linux, etc.) machine:
$CATALINA_HOME/bin/shutdown.sh

or

/usr/local/apache-tomcat-5.5.29/bin/shutdown.sh
No comments:
Post a Comment