
Extensions are packages specifically designed to be used in Yii
applications. You can share your own code as an extension or use
third-party extensions to add features to your application.
To install a third-party extension, you should −
Step 1 − Modify the composer.json file of the basic application template this way.
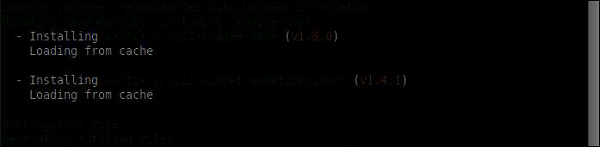
Step 2 − Now, inside the project root, run the composer update to update all the dependencies.
 We have just installed the extension. You will find it inside the vendor/kartik-v/yii2widget-datetimepicker folder.
Step 3 − To display the newly installed widget in the page, modify the About view of the actionAbout method of the SiteController.
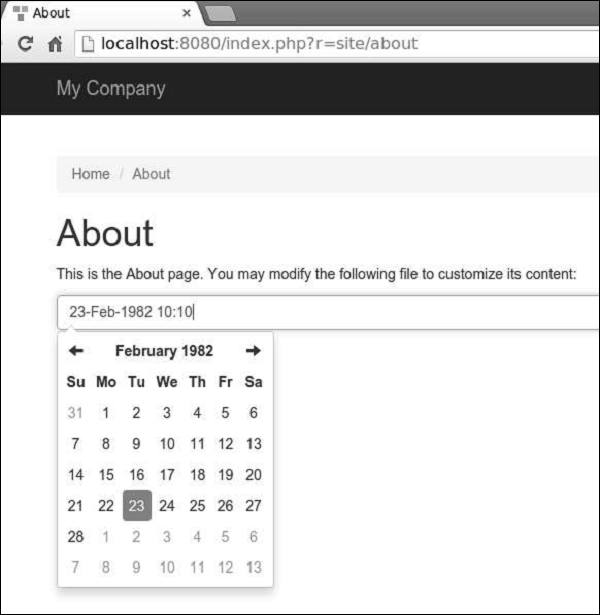
Step 5 − Go to http://localhost:8080/index.php?r=site/about. You will see a neat datetime picker as shown in the following screenshot.
Using Extensions
Most extensions are distributed as Composer packages. Composer installs packages from Packagist – the repository for Composer packages.To install a third-party extension, you should −
- Add the extension to a composer.json file.
- Run composer install.
Adding Date and Time Widget
Let us add a neat datetime widget to our project.Step 1 − Modify the composer.json file of the basic application template this way.
{
   "name": "yiisoft/yii2-app-basic",
   "description": "Yii 2 Basic Project Template",
   "keywords": ["yii2", "framework", "basic", "project template"],
   "homepage": "http://www.yiiframework.com/",
   "type": "project",
   "license": "BSD-3-Clause",
   "support": {
      "issues": "https://github.com/yiisoft/yii2/issues?state=open",
      "forum": "http://www.yiiframework.com/forum/",
      "wiki": "http://www.yiiframework.com/wiki/",
      "irc": "irc://irc.freenode.net/yii",
      "source": "https://github.com/yiisoft/yii2"
   },
   "minimum-stability": "stable",
   "require": {
      "php": ">=5.4.0",
      "yiisoft/yii2": ">=2.0.5",
      "yiisoft/yii2-bootstrap": "*",
      "yiisoft/yii2-swiftmailer": "*",
      "kartik-v/yii2-widget-datetimepicker": "*"
   },
   "require-dev": {
      "yiisoft/yii2-codeception": "*",
      "yiisoft/yii2-debug": "*",
      "yiisoft/yii2-gii": "*",
      "yiisoft/yii2-faker": "*"
   },
   "config": {
      "process-timeout": 1800
   },
   "scripts": {
      "post-create-project-cmd": [
         "yii\\composer\\Installer::postCreateProject"
      ]
   },
   "extra": {
      "yii\\composer\\Installer::postCreateProject": {
         "setPermission": [
            {
               "runtime": "0777",
               "web/assets": "0777",
               "yii": "0755"
            }
         ],
         "generateCookieValidationKey": [
            "config/web.php"
         ]
      },
      "asset-installer-paths": {
         "npm-asset-library": "vendor/npm",
         "bower-asset-library": "vendor/bower"
      }
   }
}
We have added the dependency "kartik-v/yii2-widget-datetimepicker": "*" to the required section.
Step 2 − Now, inside the project root, run the composer update to update all the dependencies.
We have just installed the extension. You will find it inside the vendor/kartik-v/yii2widget-datetimepicker folder.Step 3 − To display the newly installed widget in the page, modify the About view of the actionAbout method of the SiteController.
<?php
   /* @var $this yii\web\View */
   use kartik\datetime\DateTimePicker;
   use yii\helpers\Html;
   $this->title = 'About';
   $this->params['breadcrumbs'][] = $this->title;
   $this->registerMetaTag(['name' => 'keywords', 'content' => 'yii, developing, views,
      meta, tags']);
   $this->registerMetaTag(['name' => 'description',
      'content' => 'This is the description of this page!'], 'description');
?>
<div class="site-about">
   <h1><?= Html::encode($this->title) ?></h1>
   <p>
      This is the About page. You may modify the following file to customize its content:
   </p>
   <?php
      echo DateTimePicker::widget([
         'name' => 'dp_1',
         'type' => DateTimePicker::TYPE_INPUT,
         'value' => '23-Feb-1982 10:10',
         'pluginOptions' => [
            'autoclose'=>true,
            'format' => 'dd-M-yyyy hh:ii'
         ]
      ]);
   ?>
</div>
Step 4 − Now, run the built-in php server from the project root via the php -S localhost:8080t web command.
Step 5 − Go to http://localhost:8080/index.php?r=site/about. You will see a neat datetime picker as shown in the following screenshot.
No comments:
Post a Comment