In this chapter, we will study about User Photo in WordPress. To add user photo in WordPress, you must install plugin User Photo from WordPress plugins. It helps you add a photo of your own to your WordPress profile.
Following are the simple steps to add a User photo.
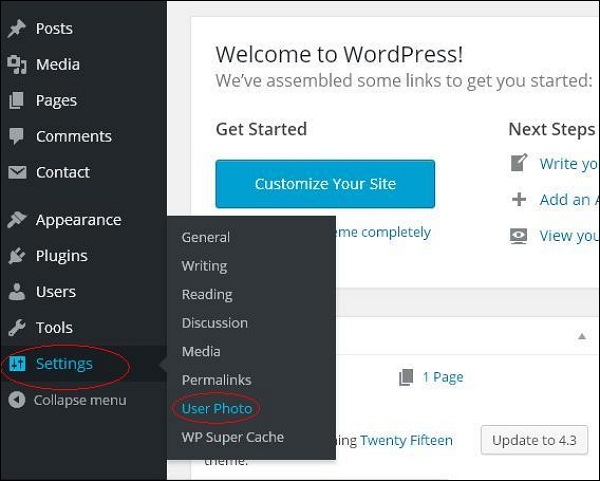
Step (1) − Click on Settings → User Photo.
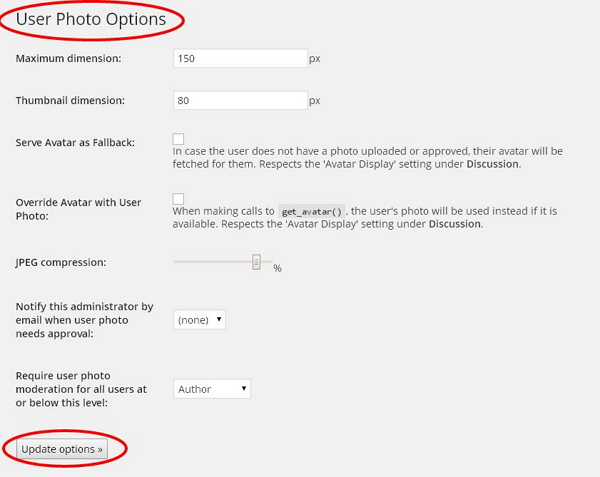
 Step (2) − The User Photo Options page gets displayed.
 Set the dimension for your thumbnails and make the required changes and then click on Update Options button.
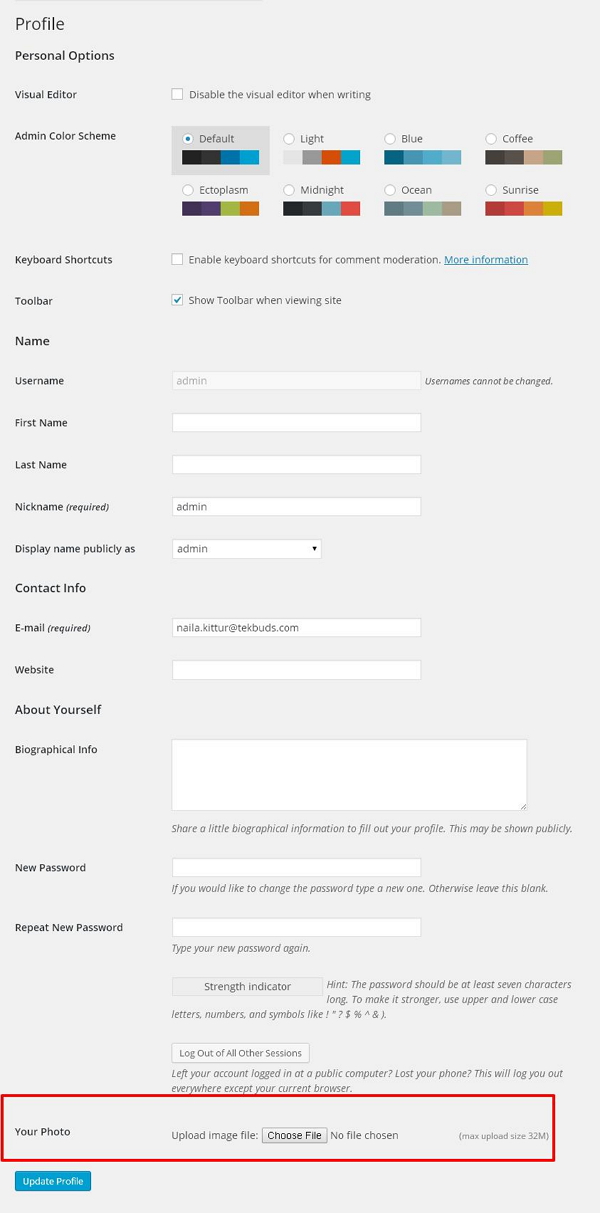
Step (3) − To view the plugin User Photo is activated, go to Users → Your Profile. In your Profile page you can see Your Photo section is added. Here you can upload your photo to display as profile image.

Following are the simple steps to add a User photo.
Step (1) − Click on Settings → User Photo.
 Step (2) − The User Photo Options page gets displayed.
 Set the dimension for your thumbnails and make the required changes and then click on Update Options button.
Step (3) − To view the plugin User Photo is activated, go to Users → Your Profile. In your Profile page you can see Your Photo section is added. Here you can upload your photo to display as profile image.


No comments:
Post a Comment