
What is GWT?
- Google Web Toolkit (GWT) is a development toolkit to create RICH Internet Application(RIA).
- GWT provides developers option to write client side application in JAVA.
- GWT compiles the code written in JAVA to JavaScript code.
- Application written in GWT is cross-browser compliant. GWT automatically generates javascript code suitable for each browser.
- GWT is open source, completely free, and used by thousands of developers around the world. It is licensed under the Apache License version 2.0.
Why to use GWT?
- Being Java based, you can use JAVA IDEs like Eclipse to develop GWT applcation. Developers can use code auto-complete/refactoring/navigation/project management and all features of IDEs.
- GWT provides full debugging capability. Developers can debug the client side application just as an Java Application.
- GWT provides easy integration with Junit and Maven.
- Again being Java based, GWT has a low learning curve for Java Developers.
- GWT generates optimized javascript code, produces browser's specific javascript code by self.
- GWT provides Widgets library provides most of tasks required in an application.
- GWT is extensible and custom widget can be created to cater to application needs.
Disadvantages of GWT
Though GWT comes with lots of plus points but same time we should consider the following points:- Not indexable : Web pages generated by GWT would not be indexed by search engines because these applications are generated dynamically.
- Not degradable: If your application user disables Javascript then user will just see the basic page and nothing more.
- Not designer's friendly: GWT is not suitable for web designers who prefer using plain HTML with placeholders for inserting dynamic content at later point in time.
The GWT Components
The GWT framework can be divided into following three major parts:- GWT Java to JavaScript compiler : This is the most important part of GWT which makes it a powerful tool for building RIAs. The GWT compiler is used to translate all the application code written in Java into JavaScript.
- JRE Emulation library : Google Web Toolkit includes a library that emulates a subset of the Java runtime library. The list includes java.lang, java.lang.annotation, java.math, java.io, java.sql, java.util and java.util.logging
- GWT UI building library : This part of GWT consists of many subparts which includes the actual UI components, RPC support, History management, and much more.
GWT - Environment Setup
This tutorial will guide you on how to prepare a development environment to start your work with GWT Framework. This tutorial will also teach you how to setup JDK, Tomcat and Eclipse on your machine before you setup GWT Framework:System Requirement
GWT requires JDK 1.6 or higher so the very first requirement is to have JDK installed in your machine.| JDK | 1.6 or above. |
|---|---|
| Memory | no minimum requirement. |
| Disk Space | no minimum requirement. |
| Operating System | no minimum requirement. |
Step 1 - Verify Java installation on your machine
Now open console and execute the following java command.| OS | Task | Command |
|---|---|---|
| Windows | Open Command Console | c:\> java -version |
| Linux | Open Command Terminal | $ java -version |
| Mac | Open Terminal | machine:~ joseph$ java -version |
| OS | Generated Output |
|---|---|
| Windows |
java version "1.6.0_21" Java(TM) SE Runtime Environment (build 1.6.0_21-b07) Java HotSpot(TM) Client VM (build 17.0-b17, mixed mode, sharing) |
| Linux |
java version "1.6.0_21" Java(TM) SE Runtime Environment (build 1.6.0_21-b07) Java HotSpot(TM) Client VM (build 17.0-b17, mixed mode, sharing) |
| Mac |
java version "1.6.0_21" Java(TM) SE Runtime Environment (build 1.6.0_21-b07) Java HotSpot(TM)64-Bit Server VM (build 17.0-b17, mixed mode, sharing) |
Step 2 - Setup Java Development Kit (JDK):
If you do not have Java installed then you can install the Java Software Development Kit (SDK) from Oracle's Java site: Java SE Downloads. You will find instructions for installing JDK in downloaded files, follow the given instructions to install and configure the setup. Finally set PATH and JAVA_HOME environment variables to refer to the directory that contains java and javac, typically java_install_dir/bin and java_install_dir respectively.Set the JAVA_HOME environment variable to point to the base directory location where Java is installed on your machine. For example
| OS | Output |
|---|---|
| Windows | Set the environment variable JAVA_HOME to C:\Program Files\Java\jdk1.6.0_21 |
| Linux | export JAVA_HOME=/usr/local/java-current |
| Mac | export JAVA_HOME=/Library/Java/Home |
| OS | Output |
|---|---|
| Windows | Append the string ;%JAVA_HOME%\bin to the end of the system variable, Path. |
| Linux | export PATH=$PATH:$JAVA_HOME/bin/ |
| Mac | not required |
Step 3 - Setup Eclipse IDE
All the examples in this tutorial have been written using Eclipse IDE. So I would suggest you should have latest version of Eclipse installed on your machine based on your operating system.To install Eclipse IDE, download the latest Eclipse binaries from http://www.eclipse.org/downloads/. Once you downloaded the installation, unpack the binary distribution into a convenient location. For example in C:\eclipse on windows, or /usr/local/eclipse on Linux/Unix and finally set PATH variable appropriately.
Eclipse can be started by executing the following commands on windows machine, or you can simply double click on eclipse.exe
%C:\eclipse\eclipse.exeEclipse can be started by executing the following commands on Unix (Solaris, Linux, etc.) machine:
$/usr/local/eclipse/eclipseAfter a successful startup, if everything is fine then it should display following result:

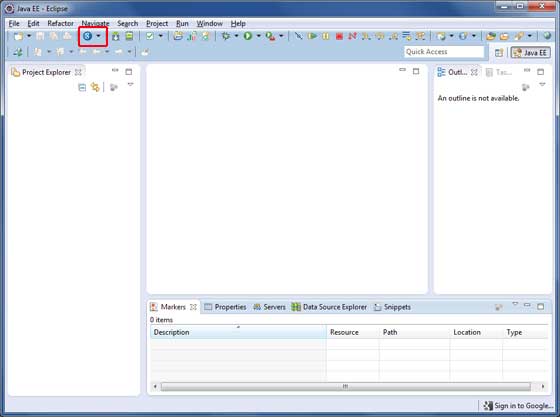
Step 4: Install GWT SDK & Plugin for Eclipse
Follow the instructions given at the link Plugin for Eclipse (incl. SDKs) to install GWT SDK & Plugin for Eclipse version installed on your machine.After a successful setup for the GWT plugin, if everything is fine then it should display following screen with google icon marked with red rectangle:
Step 5: Setup Apache Tomcat:
You can download the latest version of Tomcat from http://tomcat.apache.org/. Once you downloaded the installation, unpack the binary distribution into a convenient location. For example in C:\apache-tomcat-6.0.33 on windows, or /usr/local/apache-tomcat-6.0.33 on Linux/Unix and set CATALINA_HOME environment variable pointing to the installation locations.Tomcat can be started by executing the following commands on windows machine, or you can simply double click on startup.bat
 %CATALINA_HOME%\bin\startup.bat

 or

 C:\apache-tomcat-6.0.33\bin\startup.bat
Tomcat can be started by executing the following commands on Unix (Solaris, Linux, etc.) machine:
$CATALINA_HOME/bin/startup.sh

or

/usr/local/apache-tomcat-6.0.33/bin/startup.sh
After a successful startup, the default web applications included with Tomcat will be available by visiting http://localhost:8080/. If everything is fine then it should display following result:
 Further information about configuring and running Tomcat can be found
in the documentation included here, as well as on the Tomcat web site:
http://tomcat.apache.org
Further information about configuring and running Tomcat can be found
in the documentation included here, as well as on the Tomcat web site:
http://tomcat.apache.orgTomcat can be stopped by executing the following commands on windows machine:
%CATALINA_HOME%\bin\shutdown

or

C:\apache-tomcat-5.5.29\bin\shutdown
Tomcat can be stopped by executing the following commands on Unix (Solaris, Linux, etc.) machine:
$CATALINA_HOME/bin/shutdown.sh

or

/usr/local/apache-tomcat-5.5.29/bin/shutdown.sh
GWT - Applications
Before we start with creating actual HelloWorld application using GWT, let us see what are the actual parts of a GWT application. A GWT application consists of following four important parts out of which last part is optional but first three parts are mandatory:- Module descriptors
- Public resources
- Client-side code
- Server-side code
| Name | Location |
|---|---|
| Project root | HelloWorld/ |
| Module descriptor | src/com/tutorialspoint/HelloWorld.gwt.xml |
| Public resources | src/com/tutorialspoint/war/ |
| Client-side code | src/com/tutorialspoint/client/ |
| Server-side code | src/com/tutorialspoint/server/ |
Module Descriptors
A module descriptor is the configuration file in the form of XML which is used to configure a GWT application. A module descriptor file extension is *.gwt.xml, where * is the name of the application and this file should reside in the project's root. Following will be a default module descriptor HelloWorld.gwt.xml for a HelloWorld application:<?xml version="1.0" encoding="utf-8"?> <module rename-to='helloworld'> <!-- inherit the core web toolkit stuff. --> <inherits name='com.google.gwt.user.user'/> <!-- inherit the default gwt style sheet. --> <inherits name='com.google.gwt.user.theme.clean.Clean'/> <!-- specify the app entry point class. --> <entry-point class='com.tutorialspoint.client.HelloWorld'/> <!-- specify the paths for translatable code --> <source path='...'/> <source path='...'/> <!-- specify the paths for static files like html, css etc. --> <public path='...'/> <public path='...'/> <!-- specify the paths for external javascript files --> <script src="js-url" /> <script src="js-url" /> <!-- specify the paths for external style sheet files --> <stylesheet src="css-url" /> <stylesheet src="css-url" /> </module>Following is the brief detail about different parts used in module descriptor.
| S.N. | Nodes & Description |
|---|---|
| 1 | <module rename-to="helloworld"> This provides name of the application. |
| 2 | <inherits name="logical-module-name" />This adds other gwt module in application just like import does in java applications. Any number of modules can be inherited in this manner. |
| 3 | <entry-point class="classname" />This specifies the name of class which will start loading the GWT Application. Any number of entry-point classes can be added and they are called sequentially in the order in which they appear in the module file. So when the onModuleLoad() of your first entry point finishes, the next entry point is called immediately. |
| 4 | <source path="path" />This specifies the names of source folders which GWT compiler will search for source compilation. |
| 5 | <public path="path" />The public path is the place in your project where static resources referenced by your GWT module, such as CSS or images, are stored. The default public path is the public subdirectory underneath where the Module XML File is stored. |
| 6 | <script src="js-url" />Automatically injects the external JavaScript file located at the location specified by src. |
| 7 | <stylesheet src="css-url" />Automatically injects the external CSS file located at the location specified by src. |
No comments:
Post a Comment