
What is Gulp?
Gulp is a task runner that uses Node.js as a platform. Gulp purely uses the JavaScript code and helps to run front-end tasks and large-scale web applications. It builds system automated tasks like CSS and HTML minification, concatenating library files, and compiling the SASS files. These tasks can be run using Shell or Bash scripts on the command line.Why to use Gulp?
- It is shorter, simpler and faster as compared to other task runner.
- Uses SASS and LESS as CSS preprocessor.
- Automatically refreshes page after editing the source files.
- Easy to understand and build the Gulpfile.js because, it uses pure JavaScript code to build the task.
History
All the documentation of Gulp is covered by the CC0 license. Initially, Gulp v1.0.0 was released on January 15, 2015, and the current version of Gulp is v3.9.0.Features
- Provides minification and concatenation.
- Uses pure JavaScript code.
- Converts LESS or SASS to CSS compilation.
- Manages file manipulation in the memory and enhances speed by using the Node.js platform.
Advantages
- Huge speed advantage over any other task runner
- Easy to code and understand.
- Easy to test the web applications..
- Plugins are simple to use and they are designed to do one thing at a time.
- Performs repetitive tasks repeatedly such as minifying stylesheets, compressing images, etc.
Disadvantages
- More number of dependencies and is a newcomer compared to Grunt.
- Using Gulp plugins, you cannot perform multiple tasks.
- Configuration is not as clean as Grunt.
Gulp - Installation
This article provides a step-by-step procedure of Gulp installation.System Requirements for Gulp
- Operating System − Cross-platform
- Browser Support − IE (Internet Explorer 8+), Firefox, Google Chrome, Safari, Opera
Installation of Gulp
Step 1 − We need Node.js to run Gulp examples. To download Node.js, open the https://nodejs.org/en/, you will see a screen as shown below −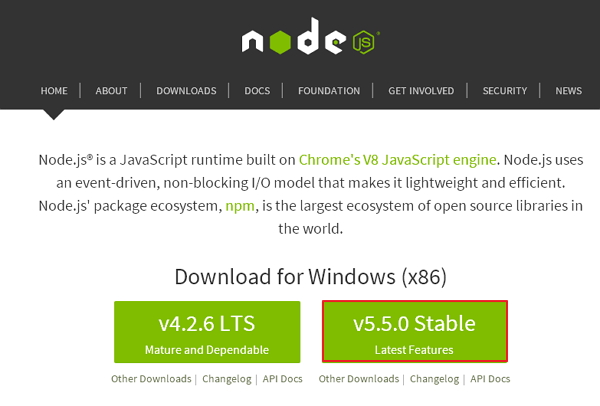 Download the latest features version of the zip file.
Step 2 − Next, run the setup to install the NodeJs on your computer.
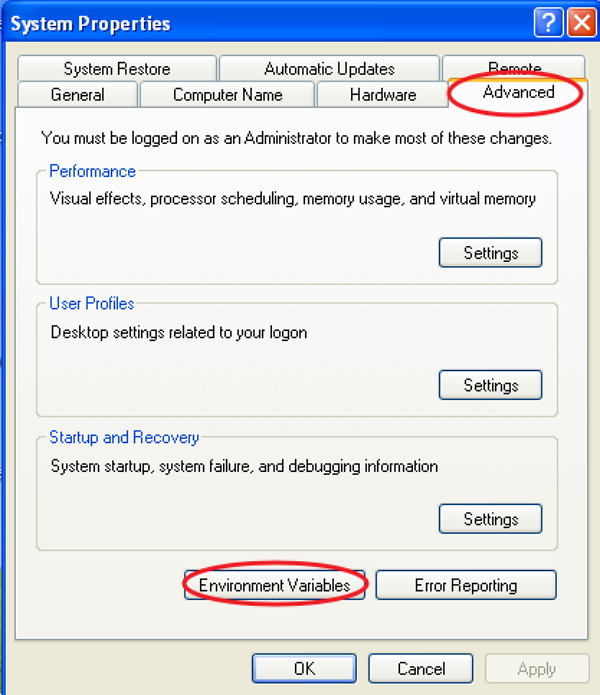
Step 3 − You need to set environment variables.
Path User Variable
- Right-click on My Computer.
- Select Properties.
- Select Advanced tab and click ‘Environment Variables’.
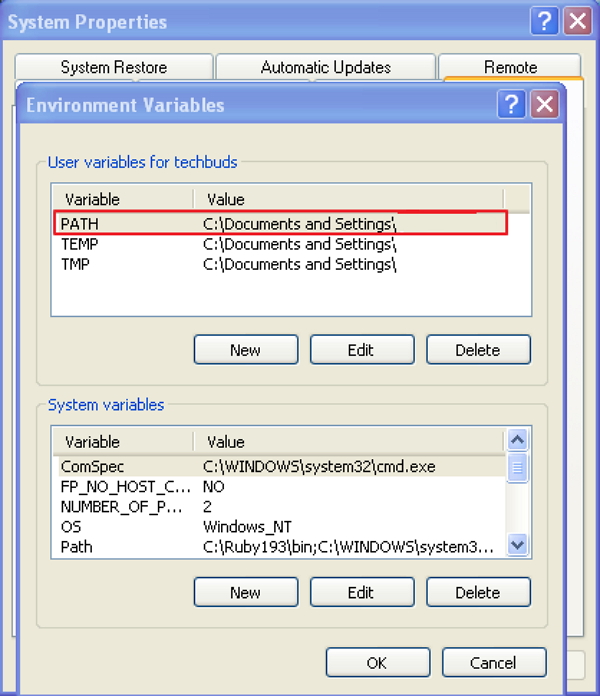
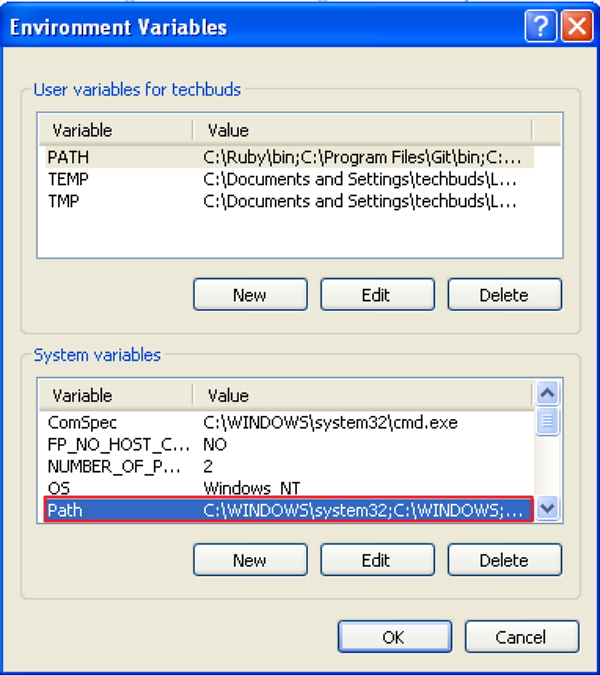
- Under Environment Variables window, double-click on the PATH as shown in the following screen.
- You will get an Edit User Variable window as shown in the following screenshot. Add Node.js folder path in the Variable Value field as C:\Program Files\nodejs\node_modules\npm. If the path is set already for other files, then you need to put a semicolon (;) after that and add the Node.js path as shown in the following screenshot.
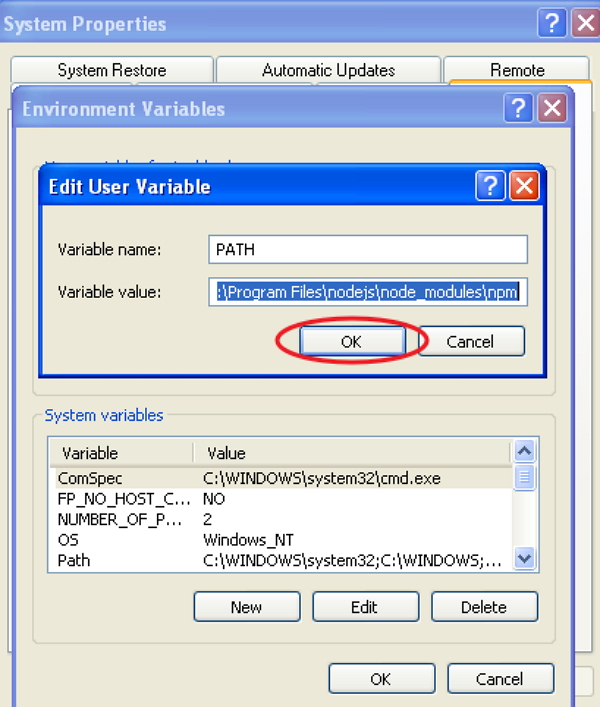 At the end, click the ‘Ok’ button.
System Variable
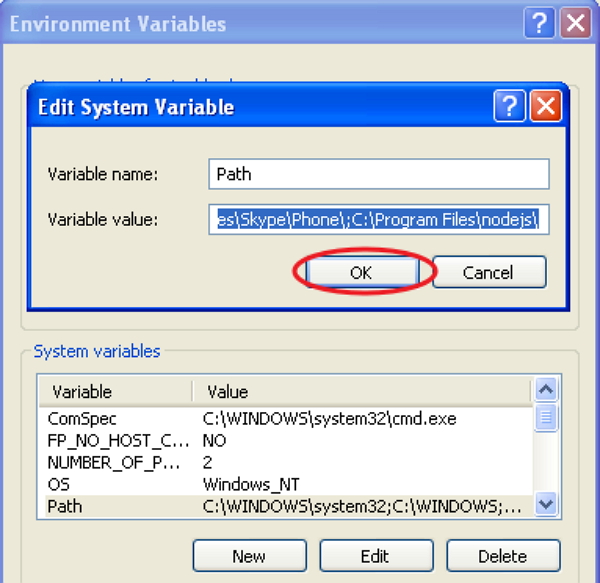
- Under System variables, double-click on Path as shown in the following screen.
- You will get an Edit System Variable window as shown in the following screenshot. Add Node.js folder path in the Variable Value field as C:\Program Files\nodejs\ and click ‘Ok’ as shown in the following screenshot.
 Step 4 − Open the command prompt in your system and enter the following command. It will display the installed Node.js version.
node -v
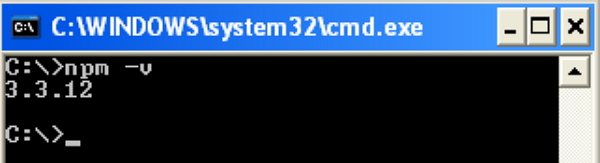
 Step 5 − In the command prompt, enter the following command to display the version of npm (Node.js package manager) which is used to install modules. It will display the installed Node.js version.
npm -v
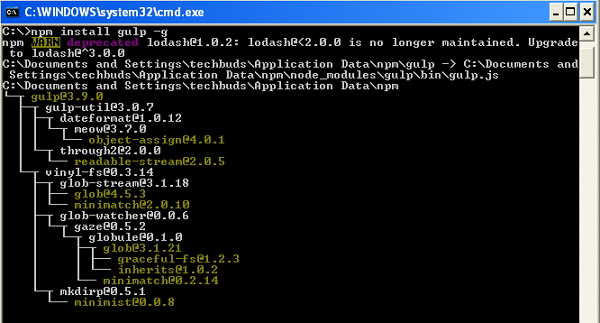
 Step 6 − In the command prompt, enter the following command to install Gulp. Adding “-g” flag ensures that the Gulp is globally available for any project.
npm install gulp -g
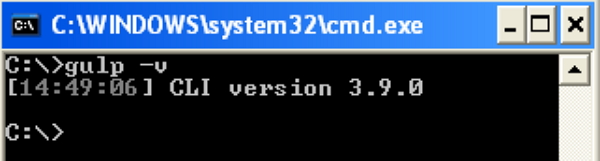
 Step 7 − To verify that Gulp has been installed successfully, enter the following command to display the Gulp version.
gulp -v
Gulp - Basics
In this chapter, you will get acquainted with some basics related to Gulp.What is a Build System?
A Build System is referred to as collection of tasks (collectively called as task runners), which automate the repetitive work.Following is a list of some of the tasks that can be handled using the build system −
- Compilation of preprocess CSS and JavaScript.
- Minification of files to reduce its size.
- Concatenation of files into one.
- Triggering the server for automatic reloading.
- Creation of deployment builds to store the resulting files in one location.
- Package managers
- Preprocessors
- Task runners and build tools
Package Managers
It is used to automate the installation upgrade, removal of required dependencies, clean libraries, and packages used in the development environment. Example for package managers are bower and npm.Preprocessors
Preprocessors are very useful for an efficient modern workflow by adding an optimized syntax and additional features that compiles into its native language.Some of the popular preprocessors are −
- CSS − SASS, LESS and Stylus.
- JS − CoffeeScript, LiveScript, TypeScript, etc.
- HTML − Markdown, HAML, Slim, Jade, etc.
Task Runners
Task runners automate tasks like SASS to CSS conversion, minify the files, optimize images, and many other tasks used in the development workflow. Gulp is one of the task runner in the modern front-end work environment and it runs on Node.Setting Up Your Project
To set your project in your computer, create a folder called “work” for example. The work folder contains following sub-folders and files −- Src − Location of pre-processed HTML source files and folders.
- Images − Contains images which are uncompressed.
- Scripts − Contains multiple pre-processed script files.
- Styles − Contains multiple pre-processed CSS files.
- Build − This folder will be created automatically which contains the production files.
- Images − Contains compressed images.
- Scripts − Single script file that contains minified codes.
- Styles − Single CSS file that contains minified codes.
- gulpfile.js − It is the configuration file, which is used to define our tasks.
Gulp - Developing An Application
In the previous chapters, you have studied about Gulp installation and Gulp basics which includes build system of Gulp, package manager, task runner, structure of Gulp, etc.In this chapter, we will see the basics for developing an application, which includes the following −
- Declaring required dependencies
- Creating task for the dependencies
- Running the task
- Watching the task
Dependencies Declaration
When you are installing plugins for the application, you need to specify dependencies for the plugins. The dependencies are handled by the package manager such as bower and npm.Let's take one plugin called gulp-imagemin to define dependencies for it in the configuration file. This plugin can be used to compress the image file and can be installed using the following command line −
npm install gulp-imagemin --save-devYou can add dependencies to your configuration file as shown in the following code.
var imagemin = require('gulp-imagemin');
The above line includes the plug-in and it is included as an object named imagemin.Creating Task for Dependencies
Task enables a modular approach for configuring Gulp. We need to create a task for each dependency, which we would add up as we find and install other plugins. The Gulp task will have the following structure −gulp.task('task-name', function() {
//do stuff here
});
Where ‘task-name’ is a string name and ‘function()’ performs your task. The ‘gulp.task’ registers the function as a task within name and specifies the dependencies on other tasks.You can create the task for the above defined dependency as shown in the following code.
gulp.task('imagemin', function() {
   var img_src = 'src/images/**/*', img_dest = 'build/images';

   gulp.src(img_src)
   .pipe(changed(img_dest))
   .pipe(imagemin())
   .pipe(gulp.dest(img_dest));
});
The images are located in src/images/**/* which is saved in the img_srcobject. It is piped to other function created by the imagemin constructor. It compresses the images from src folder and copied to build folder by calling dest method with an argument, which represents the target directory.
Running the Task
Gulp file is set up and ready to execute. Use the following command in your project directory to run the task −gulp imageminOn running the task using the above command, you will see the following result in the command prompt −
C:\work>gulp imagemin
[16:59:09] Using gulpfile C:\work\gulpfile.js
[16:59:09] Starting 'imagemin'...
[16:59:09] Finished 'imagemin' after 19 ms
[16:59:09] gulp-imagemin: Minified 2 images (saved 80.81 kB - 16.9%)
Gulp - Combining Tasks
Task enables a modular approach to configure Gulp. We need to create task for each dependency, which we would add up as we find and install other plugins. The Gulp task will have following structure −gulp.task('task-name', function() {
//do stuff here
});
Where “task-name” is a string name and “function()” performs your task. The “gulp.task” registers the function as a task within the name and specifies the dependencies on other tasks.Installing Plugins
Let's take one plugin called minify-css to merge and minify all CSS scripts. It can be installed by using npm as shown in the following command −npm install gulp-minify-css --save-devTo work with “gulp-minify-css plugin”, you need to install another plugin called “gulp-autoprefixer” as shown in the following command −
npm install gulp-autoprefixer --save-devTo concatenate the CSS files, install the gulp-concat as shown in the following command −
npm install gulp-concat --save-devAfter installation of plugins, you need to write dependencies in your configuration file as follows −
var autoprefix = require('gulp-autoprefixer');
var minifyCSS = require('gulp-minify-css');
var concat = require('gulp-concat');
Adding Task to Gulp file
We need to create task for each dependency, which we would add up as we install the plugins. The Gulp task will have following structure −gulp.task('styles', function() { gulp.src(['src/styles/*.css']) .pipe(concat('styles.css')) .pipe(autoprefix('last 2 versions')) .pipe(minifyCSS()) .pipe(gulp.dest('build/styles/')); });The ‘concat’ plugin concatenates the CSS files and ‘autoprefix’ plugin indicates the current and the previous versions of all browsers. It minifies all CSS scripts from src folder and copies to the build folder by calling ‘dest’ method with an argument, which represents the target directory.
To run the task, use the following command in your project directory −
gulp stylesSimilarly, we will use another plugin called ‘gulp-imagemin’ to compress the image file, which can be installed using the following command −
npm install gulp-imagemin --save-devYou can add dependencies to your configuration file using the following command −
var imagemin = require('gulp-imagemin');
You can create the task for above defined dependency as shown in the following code.gulp.task('imagemin', function() { var img_src = 'src/images/**/*', img_dest = 'build/images'; gulp.src(img_src) .pipe(changed(img_dest)) .pipe(imagemin()) .pipe(gulp.dest(img_dest)); });The images are located in “src/images/**/*” which are saved in the img_srcobject. It is piped to other functions created by the ‘imagemin’ constructor. It compresses the images from src folder and copies to the build folder by calling ‘dest’ method with an argument, which represents the target directory.
To run the task, use the following command in your project directory −
gulp imagemin
No comments:
Post a Comment