In this chapter, we will study how to Customize Plugins in WordPress without writing any HTML or CSS. It's usually a large addition for multi-user sites. This new method allows you to customize your login page by using the WordPress theme customizer (no coding skills required).
Following are the simple steps to Customize Plugins in WordPress.
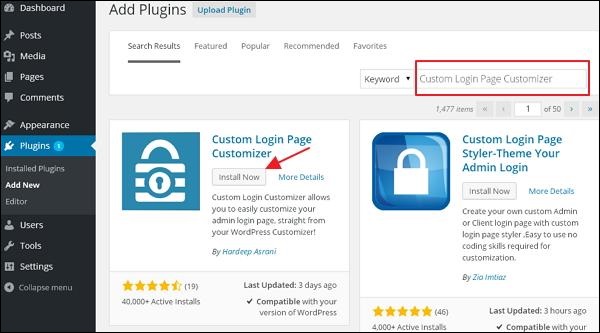
Step (1) − Click on Plugins → Add New.
 Step (2) − Install and activate the Custom Login Page Customizer Plugin.
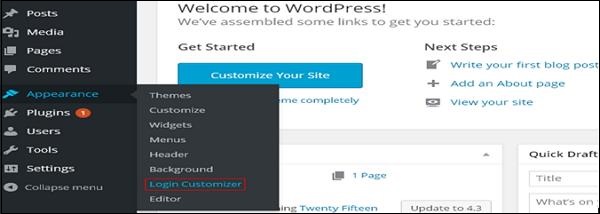
 Step (3) − Click on Appearance → Login Customize section.
 Step (4) − Click on Start Customizing button to proceed further.
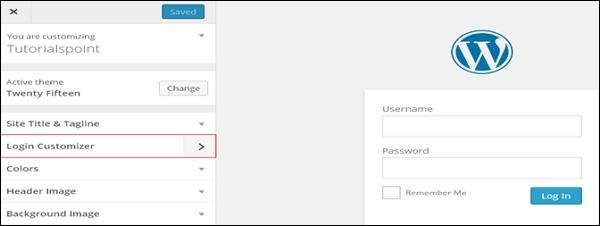
 Step (5) − It will launch the built-in WordPress theme customizer. You can customize the theme and make it look the way you want.
 Click on the new Login Customizer tab in the side panel. Login customizer page will get displayed. On the login customizer page, you can customize your login page in the same way as you customize your WordPress theme.
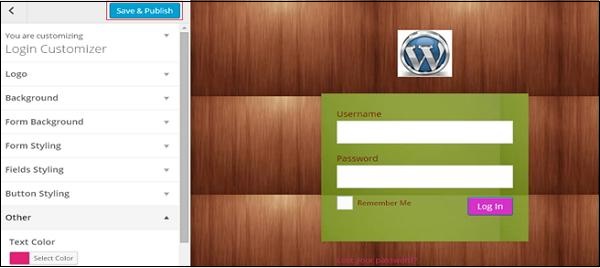
Step (6) − The customized login page will appear as shown in the following screen.

Following are the simple steps to Customize Plugins in WordPress.
Step (1) − Click on Plugins → Add New.
 Step (2) − Install and activate the Custom Login Page Customizer Plugin.
 Step (3) − Click on Appearance → Login Customize section.
 Step (4) − Click on Start Customizing button to proceed further.
 Step (5) − It will launch the built-in WordPress theme customizer. You can customize the theme and make it look the way you want.
 Click on the new Login Customizer tab in the side panel. Login customizer page will get displayed. On the login customizer page, you can customize your login page in the same way as you customize your WordPress theme.
Step (6) − The customized login page will appear as shown in the following screen.

- Logo − Upload logo of your choice to replace the default WordPress logo.
- Background − Add background image or you can choose a background color of your choice.
- Form Background − Select form background image or color for login form container of your choice.

No comments:
Post a Comment