
There are a variety of ways to work with Clojure as a programming language. We will look at two ways to work with Clojure programming.Try it Option Online
We have set up the Clojure Programming environment on-line, so that you can compile and execute all the available examples on line. It gives you confidence in what you are reading and enables you to verify the programs with different options. Feel free to modify any example and execute it on-line.
Try the following example using our on-line compiler available at CodingGround.
(ns clojure.examples.hello
   (:gen-class))

(defn hello-world [username]
   (println (format "Hello, %s" username)))

(hello-world "world")
For most of the examples given in this tutorial, you will find a Try it option in our website code sections at the top right corner that will take you to the online compiler. So just make use of it and enjoy your learning.
- Leiningen − Leiningen is an essential tool to create, build, and automate Clojure projects.
- Eclipse Plugin − There is a plugin called CounterClockwise, which is available for Eclipse for carrying out Clojure development in the Eclipse IDE.
Leiningen Installation
Ensure the following System requirements are met before proceeding with the installation.System Requirements
| JDK | JDK 1.7 or above |
| Memory | 2 GB RAM (recommended) |
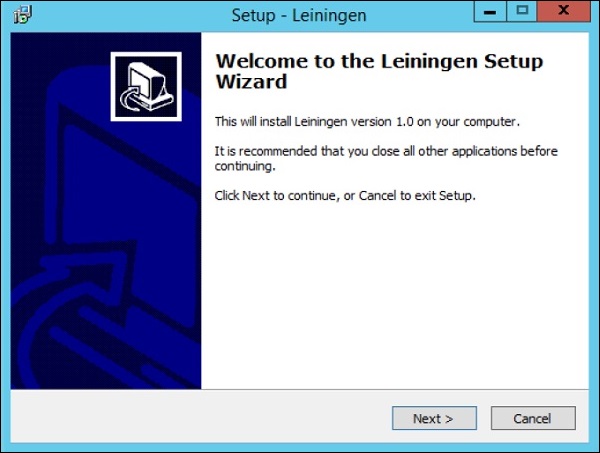
Step 2 − Launch the Installer and click the Next button.
 Step 3 Specify the location for the installation and click the Next button.
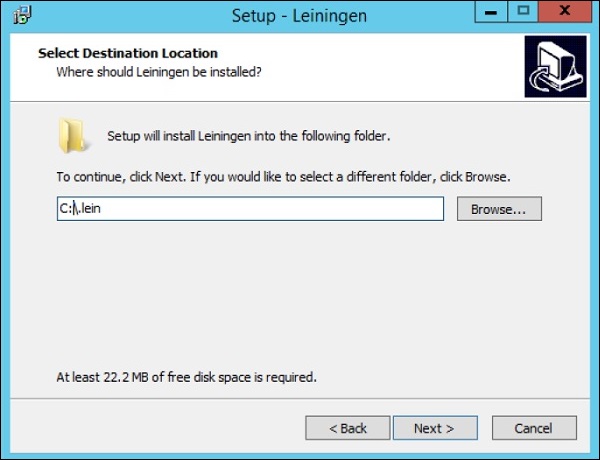 Step 4 − The setup will detect the location of an existing Java installation. Click the Next button to proceed.
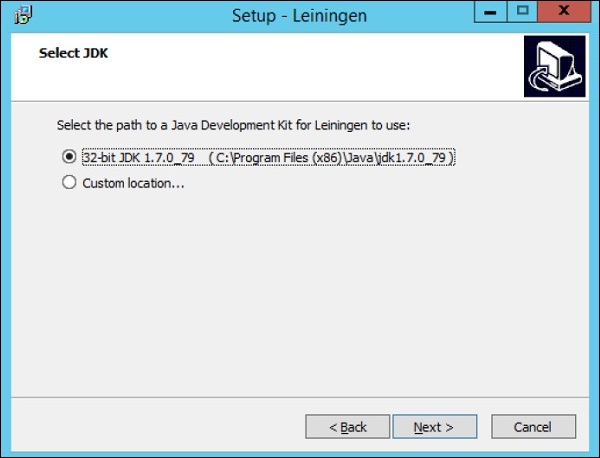 Step 5 − Click the Install button to begin the installation.
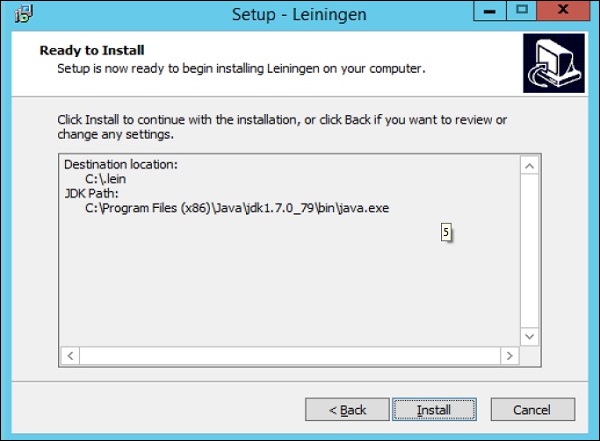 After the installation is complete, it will give you the option to
open a Clojure REPL, which is an environment that can be used to create
and test your Clojure programs.
After the installation is complete, it will give you the option to
open a Clojure REPL, which is an environment that can be used to create
and test your Clojure programs.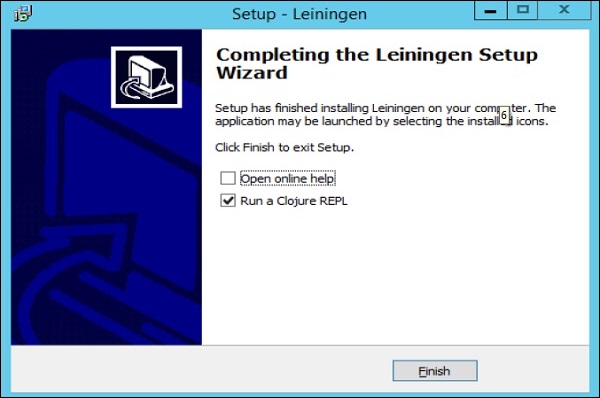
Eclipse Installation
Ensure the following System requirements are met before proceeding with the installation.System Requirements
| JDK | JDK 1.7 or above |
| Eclipse | Eclipse 4.5 (Mars) |
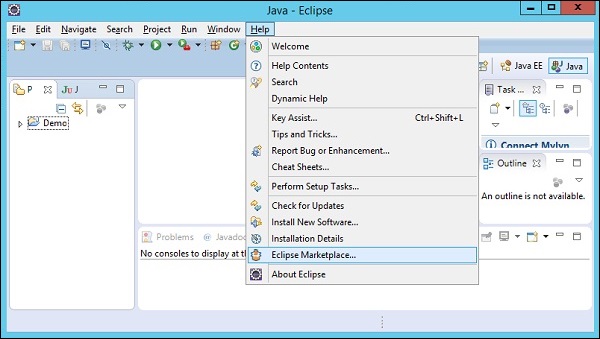 Step 2 − Type in the keyword Clojure in the dialog box which
appears and hit the ‘Go’ button. The option for counterclockwise will
appear, click the Install button to begin the installation of this
plugin.
Step 2 − Type in the keyword Clojure in the dialog box which
appears and hit the ‘Go’ button. The option for counterclockwise will
appear, click the Install button to begin the installation of this
plugin.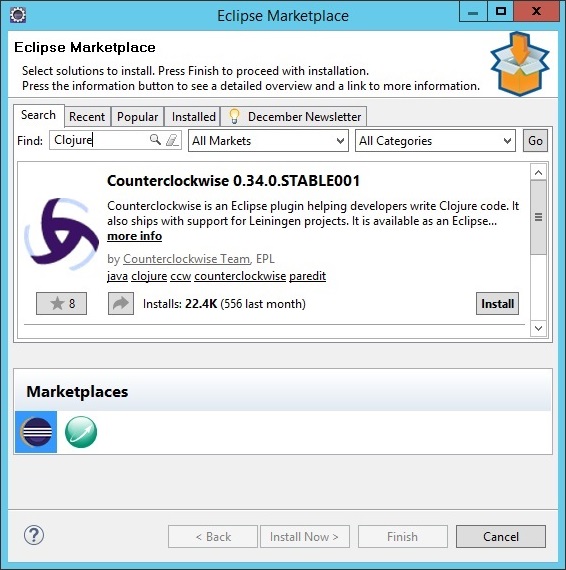 Step 3 − In the next dialog box, click the Confirm button to begin the installation.
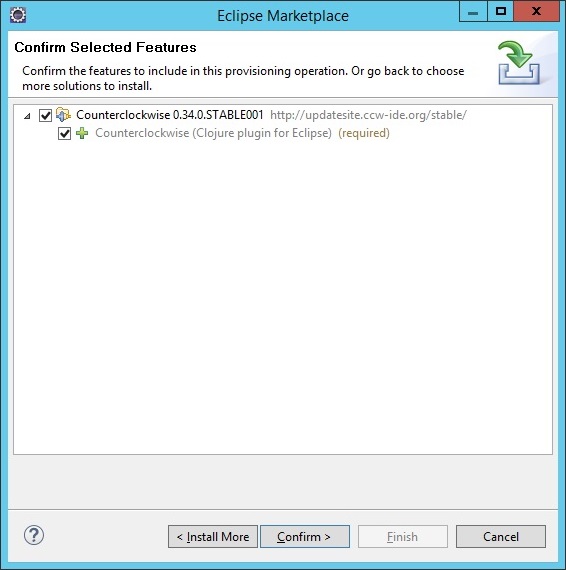 Step 4 − In the next dialog box, you will be requested to
accept the license agreement. Accept the license agreement and click the
Finish button to continue with the installation.
Step 4 − In the next dialog box, you will be requested to
accept the license agreement. Accept the license agreement and click the
Finish button to continue with the installation.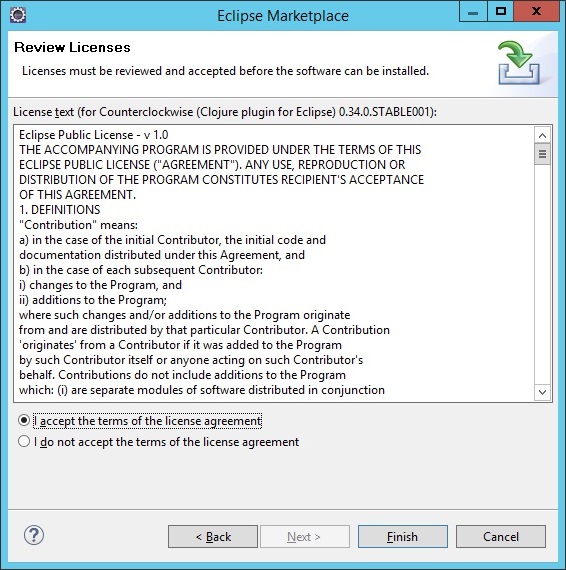 The installation will begin, and once completed, it will prompt you to restart Eclipse.
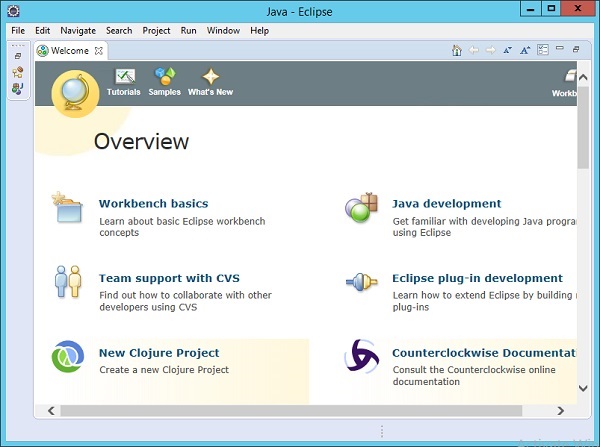
Once Eclipse is restarted, you will see the option in Eclipse to create a new Clojure project.
No comments:
Post a Comment