
In this chapter, we will learn some advanced Input and Output Functions.
Do not use anything less than 0V or more than 5V for external reference voltage on the AREF pin. If you are using an external reference on the AREF pin, you must set the analog reference to EXTERNAL before calling the analogRead() function. Otherwise, you will short the active reference voltage (internally generated) and the AREF pin, possibly damaging the microcontroller on your Arduino board.
 Alternatively, you can connect the external reference voltage to the
AREF pin through a 5K resistor, allowing you to switch between external
and internal reference voltages.
Alternatively, you can connect the external reference voltage to the
AREF pin through a 5K resistor, allowing you to switch between external
and internal reference voltages.
Note that the resistor will alter the voltage that is used as the reference because there is an internal 32K resistor on the AREF pin. The two act as a voltage divider. For example, 2.5V applied through the resistor will yield 2.5 * 32 / (32 + 5) = ~2.2V at the AREF pin.
Example


analogReference() Function
Configures the reference voltage used for analog input (i.e. the value used as the top of the input range). The options are −- DEFAULT − The default analog reference of 5 volts (on 5V Arduino boards) or 3.3 volts (on 3.3V Arduino boards)
- INTERNAL − An built-in reference, equal to 1.1 volts on the ATmega168 or ATmega328 and 2.56 volts on the ATmega8 (not available on the Arduino Mega)
- INTERNAL1V1 − A built-in 1.1V reference (Arduino Mega only)
- INTERNAL2V56 − A built-in 2.56V reference (Arduino Mega only)
- EXTERNAL − The voltage applied to the AREF pin (0 to 5V only) is used as the reference
analogReference() Function Syntax
analogReference (type);type − can use any type of the follow (DEFAULT, INTERNAL, INTERNAL1V1, INTERNAL2V56, EXTERNAL)
Do not use anything less than 0V or more than 5V for external reference voltage on the AREF pin. If you are using an external reference on the AREF pin, you must set the analog reference to EXTERNAL before calling the analogRead() function. Otherwise, you will short the active reference voltage (internally generated) and the AREF pin, possibly damaging the microcontroller on your Arduino board.
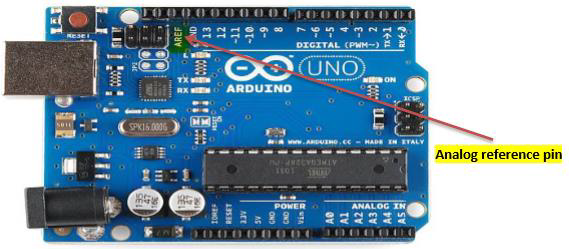
Alternatively, you can connect the external reference voltage to the
AREF pin through a 5K resistor, allowing you to switch between external
and internal reference voltages.Note that the resistor will alter the voltage that is used as the reference because there is an internal 32K resistor on the AREF pin. The two act as a voltage divider. For example, 2.5V applied through the resistor will yield 2.5 * 32 / (32 + 5) = ~2.2V at the AREF pin.
Example
int analogPin = 3;// potentiometer wiper (middle terminal) connected to analog pin 3
int val = 0; // variable to store the read value

void setup() {
   Serial.begin(9600); // setup serial
   analogReference(EXTERNAL); // the voltage applied to the AREF pin (0 to 5V only)
      // is used as the reference.
}

void loop() {
   val = analogRead(analogPin); // read the input pin
   Serial.println(val); // debug value
}
Advertisements
No comments:
Post a Comment