
This tutorial will explain you how to create an application war
file and how to deploy that in Apache Tomcat Websever root. If you
understood this simple example then you will also be able to deploy a
complex Flex application following the same steps.
Let us follow the following steps to create a Flex application:
Follow the following steps to create a release build of a Flex application and then deploy it to tomcat server:
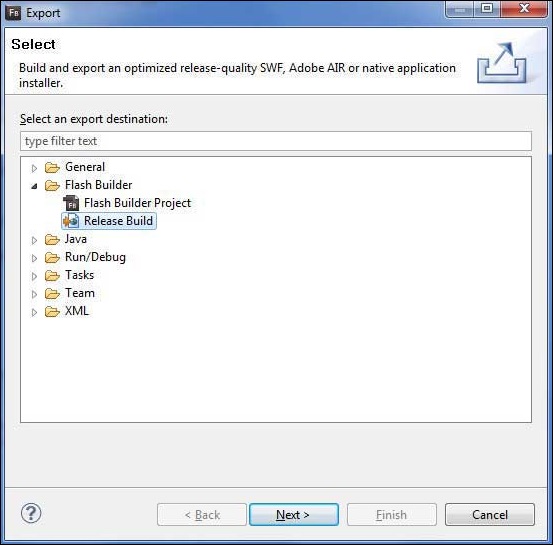
The first step is to create a release build using Flash Builder IDE. Launch release build wizard using the option File > Export > Flash Builder > Release Build
. Select project as HelloWorld using the wizard window as follows
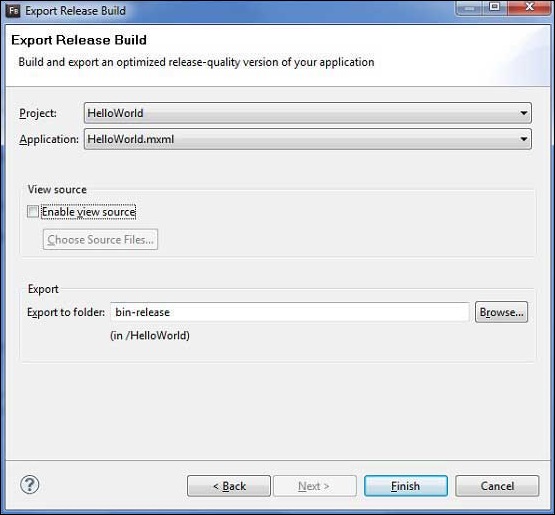 Leave other default values as such and click Finish Button. Now Flash
Builder will create a bin-release folder containing the project's
release build.
Leave other default values as such and click Finish Button. Now Flash
Builder will create a bin-release folder containing the project's
release build.
Now our release build is ready ,let us follow the following steps to deploy a Flex application:
Following is the content of the modified mxml file table table-bordered/com.tutorialspoint/HelloWorld.mxml.
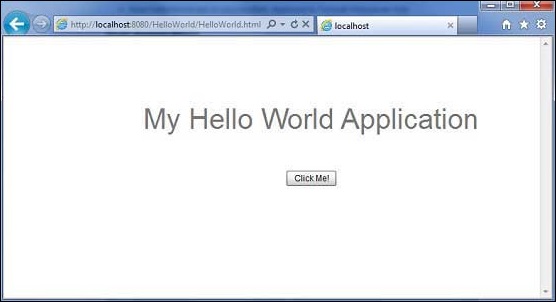
Server name (localhost) and port (8080) may vary as per your tomcat configuration.
Let us follow the following steps to create a Flex application:
| Step | Description |
|---|---|
| 1 | Create a project with a name HelloWorld under a package com.tutorialspoint.client as explained in the Flex - Create Application chapter. |
| 2 | Modify HelloWorld.mxml as explained below. Keep rest of the files unchanged. |
| 3 | Compile and run the application to make sure business logic is working as per the requirements. |
The first step is to create a release build using Flash Builder IDE. Launch release build wizard using the option File > Export > Flash Builder > Release Build
.
Select project as HelloWorld using the wizard window as follows
Leave other default values as such and click Finish Button. Now Flash
Builder will create a bin-release folder containing the project's
release build.Now our release build is ready ,let us follow the following steps to deploy a Flex application:
| Step | Description |
|---|---|
| 1 | Zip the content of the bin-release folder of the application in the form of HelloWorld.war file and deploy it in Apache Tomcat Webserver. |
| 2 | Launch your web application using appropriate URL as explained below in the last step. |
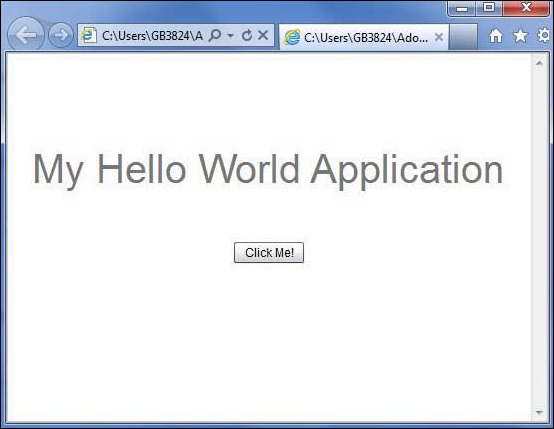
<?xml version="1.0" encoding="utf-8"?>
<s:Application xmlns:fx="http://ns.adobe.com/mxml/2009"
   xmlns:s="library://ns.adobe.com/flex/spark"
   xmlns:mx="library://ns.adobe.com/flex/mx"
   width="100%" height="100%"
   minWidth="500" minHeight="500"
   initialize="application_initializeHandler(event)">
   <fx:Style source="/com/tutorialspoint/client/Style.css"/>
   <fx:Script>
      <![CDATA[
         import mx.controls.Alert;
         import mx.events.FlexEvent;
         protected function btnClickMe_clickHandler(event:MouseEvent):void
         {
            Alert.show("Hello World!");
         }

         protected function application_initializeHandler(event:FlexEvent):void
         {
            lblHeader.text = "My Hello World Application";
         }
      ]]>
   </fx:Script>
   <s:BorderContainer width="500" height="500" id="mainContainer"
      styleName="container">
      <s:VGroup width="100%" height="100%" gap="50" horizontalAlign="center"
         verticalAlign="middle">
         <s:Label id="lblHeader" fontSize="40" color="0x777777"
            styleName="heading"/>
         <s:Button label="Click Me!" id="btnClickMe"
            click="btnClickMe_clickHandler(event)" styleName="button" />
      </s:VGroup>
   </s:BorderContainer>
</s:Application>
Once you are ready with all the changes done, let us compile and run the application in normal mode as we did in Flex - Create Application chapter. If everything is fine with your application, this will produce following result: [ Try it online ]
Create WAR File
Now our applictaion is working fine and we are ready to export it as a war file. Follow the following steps:- Go into your project's bin-release directory C:\workspace\HelloWorld\bin-release
- Select all the files & folders available inside bin-release directory.
- Zip all the selected files & folders in a file called HelloWorld.zip.
- Rename HelloWorld.zip to HelloWorld.war.
Deploy WAR file
- Stop the tomcat server.
- Copy the HelloWorld.war file to tomcat installation directory > webapps folder.
- Start the tomcat server.
- Look inside webapps directory, there should be a folder HelloWorld got created.
- Now HelloWorld.war is successfully deployed in Tomcat Webserver root.
Run Application
Enter a url in web browser: http://localhost:8080/HelloWorld/HelloWorld.html to launch the applicationServer name (localhost) and port (8080) may vary as per your tomcat configuration.
No comments:
Post a Comment