
One of the essential aspects of a web application is to present a user interface for the user. HTML provides a <form> tag, which is used to design an interface. A Form’s elements such as text input, radio, select etc. can be used appropriately.
Data entered by a user is submitted in the form of Http request message to the server side script by either GET or POST method.
Using Flask-WTF, we can define the form fields in our Python script and render them using an HTML template. It is also possible to apply validation to the WTF field.
Let us see how this dynamic generation of HTML works.
First, Flask-WTF extension needs to be installed.
WTforms package contains definitions of various form fields. Some Standard form fields are listed below.
For example, a form containing a text field can be designed as below −
When rendered, this will result into an equivalent HTML script as shown below.
We shall now apply ‘DataRequired’ validation rule for the name field in contact form.
Given below is the Flask application script (formexample.py).
 If there are any errors, the page will look like this −
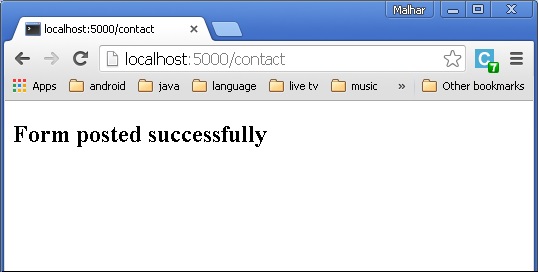
 If there are no errors, ‘success.html’ will be rendered.
Data entered by a user is submitted in the form of Http request message to the server side script by either GET or POST method.
- The Server side script has to recreate the form elements from http request data. So in effect, form elements have to be defined twice – once in HTML and again in the server side script.
- Another disadvantage of using HTML form is that it is difficult (if not impossible) to render the form elements dynamically. HTML itself provides no way to validate a user’s input.
Using Flask-WTF, we can define the form fields in our Python script and render them using an HTML template. It is also possible to apply validation to the WTF field.
Let us see how this dynamic generation of HTML works.
First, Flask-WTF extension needs to be installed.
pip install flask-WTFThe installed package contains a Form class, which has to be used as a parent for user- defined form.
WTforms package contains definitions of various form fields. Some Standard form fields are listed below.
| Sr.No | Standard Form Fields & Description |
|---|---|
| 1 |
TextField Represents <input type = 'text'> HTML form element |
| 2 |
BooleanField Represents <input type = 'checkbox'> HTML form element |
| 3 |
DecimalField Textfield for displaying number with decimals |
| 4 |
IntegerField TextField for displaying integer |
| 5 |
RadioField Represents <input type = 'radio'> HTML form element |
| 6 |
SelectField Represents select form element |
| 7 |
TextAreaField Represents <testarea> html form element |
| 8 |
PasswordField Represents <input type = 'password'> HTML form element |
| 9 |
SubmitField Represents <input type = 'submit'> form element |
from flask_wtf import Form
from wtforms import TextField

class ContactForm(Form):
   name = TextField("Name Of Student")
In addition to the ‘name’ field, a hidden field for CSRF token is created automatically. This is to prevent Cross Site Request Forgery attack.
When rendered, this will result into an equivalent HTML script as shown below.
<input id = "csrf_token" name = "csrf_token" type = "hidden" />
<label for = "name">Name Of Student</label><br>
<input id = "name" name = "name" type = "text" value = "" />
A user-defined form class is used in a Flask application and the form is rendered using a template.
from flask import Flask, render_template
from forms import ContactForm
app = Flask(__name__)
app.secret_key = 'development key'

@app.route('/contact')
def contact():
   form = ContactForm()
   return render_template('contact.html', form = form)

if __name__ == '__main__':
   app.run(debug = True)
WTForms package also contains validator class. It is useful in applying validation to form fields. Following list shows commonly used validators.
| Sr.No | Validators Class & Description |
|---|---|
| 1 |
DataRequired Checks whether input field is empty |
| 2 |
Email Checks whether text in the field follows email ID conventions |
| 3 |
IPAddress Validates IP address in input field |
| 4 |
Length Verifies if length of string in input field is in given range |
| 5 |
NumberRange Validates a number in input field within given range |
| 6 |
URL Validates URL entered in input field |
name = TextField("Name Of Student",[validators.Required("Please enter your name.")])
The validate() function of form object validates the form data and throws the validation errors if validation fails. The Error messages are sent to the template. In the HTML template, error messages are rendered dynamically.{% for message in form.name.errors %}
{{ message }}
{% endfor %}
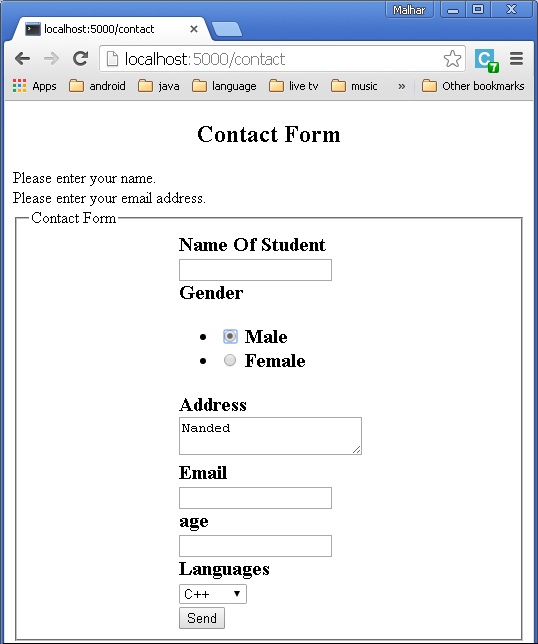
The following example demonstrates the concepts given above. The design of Contact form is given below (forms.py).from flask_wtf import Form from wtforms import TextField, IntegerField, TextAreaField, SubmitField, RadioField, SelectField from wtforms import validators, ValidationError class ContactForm(Form): name = TextField("Name Of Student",[validators.Required("Please enter your name.")]) Gender = RadioField('Gender', choices = [('M','Male'),('F','Female')]) Address = TextAreaField("Address") email = TextField("Email",[validators.Required("Please enter your email address."), validators.Email("Please enter your email address.")]) Age = IntegerField("age") language = SelectField('Languages', choices = [('cpp', 'C++'), ('py', 'Python')]) submit = SubmitField("Send")Validators are applied to the Name and Email fields.
Given below is the Flask application script (formexample.py).
from flask import Flask, render_template, request, flash
from forms import ContactForm
app = Flask(__name__)
app.secret_key = 'development key'

@app.route('/contact', methods = ['GET', 'POST'])
def contact():
   form = ContactForm()

   if request.method == 'POST':
      if form.validate() == False:
         flash('All fields are required.')
         return render_template('contact.html', form = form)
      else:
         return render_template('success.html')
      elif request.method == 'GET':
         return render_template('contact.html', form = form)

if __name__ == '__main__':
   app.run(debug = True)
The Script of the template (contact.html) is as follows −
<!doctype html>
<html>
   <body>

      <h2 style = "text-align: center;">Contact Form</h2>

      {% for message in form.name.errors %}
         <div>{{ message }}</div>
      {% endfor %}

      {% for message in form.email.errors %}
         <div>{{ message }}</div>
      {% endfor %}

      <form action = "http://localhost:5000/contact" method = post>
         <fieldset>
            <legend>Contact Form</legend>
            {{ form.hidden_tag() }}

            <div style = font-size:20px; font-weight:bold; margin-left:150px;>
               {{ form.name.label }}<br>
               {{ form.name }}
               <br>

               {{ form.Gender.label }} {{ form.Gender }}
               {{ form.Address.label }}<br>
               {{ form.Address }}
               <br>

               {{ form.email.label }}<br>
               {{ form.email }}
               <br>

               {{ form.Age.label }}<br>
               {{ form.Age }}
               <br>

               {{ form.language.label }}<br>
               {{ form.language }}
               <br>
               {{ form.submit }}
            </div>

         </fieldset>
      </form>

   </body>
</html>
Run formexample.py in Python shell and visit URL http://localhost:5000/contact. The Contact form will be displayed as shown below.
If there are any errors, the page will look like this −
If there are no errors, ‘success.html’ will be rendered.
No comments:
Post a Comment