
CherryPy - Introduction
CherryPy is a web framework of Python which provides a friendly interface to the HTTP protocol for Python developers. It is also called a web application library.CherryPy uses Python’s strengths as a dynamic language to model and bind HTTP protocol into an API. It is one of the oldest web frameworks for Python, which provides clean interface and reliable platform.
History of CherryPy
Remi Delon released the first version of CherryPy in late June 2002. This was the starting point of a successful Python web library. Remi is a French hacker who has trusted Python for being one of the greatest alternatives for web application development.The project developed by Remi attracted a number of developers who were interested in the approach. The approach included the following features −
- CherryPy was close to the model-view-controller pattern.
- A CherryPy class has to be processed and compiled by the CherryPy engine to produce a self-contained Python module embedding the complete application and also its own built-in web server.
- CherryPy can map a URL and its query string into a Python method call, for example −
http://somehost.net/echo?message=hello would map to echo(message='hello')During the two years of development in CherryPy project, it was supported by the community and Remi released several improved versions.
In June 2004, a discussion started about the future of the project and whether it should continue with the same architecture. Brainstorming and discussion by several project regulars then led to the concept of object-publishing engine and filters, which soon became a core part of CherryPy2.Later, in October 2004, the first version of CherryPy 2 alpha was released as a proof of concept of these core ideas. CherryPy 2.0 was a real success; however, it was recognized that its design could still be improved, and needed refactoring.
After discussions based on feedbacks, CherryPy's API was further modified to improve its elegance, leading to the release of CherryPy 2.1.0 in October 2005. After various changes, the team released CherryPy 2.2.0 in April 2006.
Strengths of CherryPy
The following features of CherryPy are considered as its strengths −Simplicity
Developing a project in CherryPy is a simple task with few lines of code developed as per the conventions and indentations of Python.CherryPy is also very modular. The primary components are well managed with correct logic concept and parent classes are expandable to child classes.
Power
CherryPy leverages all the power of Python. It also provides tools and plugins, which are powerful extension points needed to develop world-class applications.Open-source
CherryPy is an open-source Python Web Framework (licensed under the open-source BSD license), which means this framework can be used commercially at ZERO cost.Community Help
It has a devoted community which provides complete support with various types of questions and answers. The community tries to give complete assistance to the developers starting from the beginner level to the advanced level.Deployment
There are cost effective ways to deploy the application. CherryPy includes its own production-ready HTTP server to host your application. CherryPy can also be deployed on any WSGI-compliant gateway.CherryPy - Environment Setup
CherryPy comes in packages like most open-source projects, which can be downloaded and installed in various ways which are mentioned as follows −- Using a Tarball
- Using easy_install
- Using Subversion
Requirements
The basic requirements for installation of CherryPy framework include −- Python with version 2.4 or above
- CherryPy 3.0
python setup.py build
python setup.py install
The packages of Python are stored in the following default directories −
- On UNIX or Linux,
/usr/local/lib/python2.4/site-packages
or
/usr/lib/python2.4/site-packages
- On Microsoft Windows,
C:\Python or C:\Python2x
- On Mac OS,
Python:Lib:site-package
Installation using Tarball
A Tarball is a compressed archive of files or a directory. The CherryPy framework provides a Tarball for each of its releases (alpha, beta, and stable).It contains complete source code of the library. The name comes from the utility used in UNIX and other operating systems.
Here are the steps to be followed for the installation of CherryPy using tar ball −
Step 1 − Download the version as per user requirements from http://download.cherrypy.org/
Step 2 − Search for the directory where Tarball has been downloaded and uncompress it. For Linux operating system, type the following command −
tar zxvf cherrypy-x.y.z.tgzFor Microsoft Windows, the user can use a utility such as 7-Zip or Winzip to uncompress the archive via a graphical interface.
Step 3 − Move to the newly created directory and use the following command to build CherryPy −
python setup.py buildFor the global installation, the following command should be used −
python setup.py install
Installation using easy_install
Python Enterprise Application Kit (PEAK) provides a python module named Easy Install. This facilitates deployment of the Python packages. This module simplifies the procedure of downloading, building and deploying Python application and products.Easy Install needs to be installed in the system before installing CherryPy.
Step 1 − Download the ez_setup.py module from http://peak.telecommunity.com and run it using the administrative rights on the computer: python ez_setup.py.
Step 2 − The following command is used to install Easy Install.
easy_install product_nameStep 3 − easy_install will search the Python Package Index (PyPI) to find the given product. PyPI is a centralized repository of information for all Python products.
Use the following command to deploy the latest available version of CherryPy −
easy_install cherrypyStep 4 − easy_install will then download CherryPy, build, and install it globally to your Python environment.
Installation using Subversion
Installation of CherryPy using Subversion is recommended in the following situations −- A feature exists or a bug has been fixed and is only available in code under development.
- When the developer works on CherryPy itself.
- When the user needs a branch from the main branch in the versioning control repository.
- For bug fixing of the previous release.
Follow these steps to understand the installation of CherryPy using Subversion−
Step 1 − To use the most recent version of the project, it is necessary to check out the trunk folder found on the Subversion repository.
Step 2 − Enter the following command from a shell−
svn co http://svn.cherrypy.org/trunk cherrypyStep 3 − Now, create a CherryPy directory and download the complete source code into it.
Testing the Installation
It needs to be verified whether the application has properly been installed in the system or not in the same way as we do for applications like Java.You may choose any one of the three methods mentioned in the previous chapter to install and deploy CherryPy in your environment. CherryPy must be able to import from the Python shell as follows −
import cherrypy

cherrypy.__version__
'3.0.0'
If CherryPy is not installed globally to the local system’s Python environment, then you need to set the PYTHONPATH environment variable, else it will display an error in the following way −
import cherrypy

Traceback (most recent call last):
File "<stdin>", line 1, in ?
ImportError: No module named cherrypy
CherryPy - Vocabulary
There are a few important keywords which need to be defined in order to understand the working of CherryPy. The keywords and the definitions are as follows −| S.No | Keyword & Definition |
|---|---|
| 1. | Web Server It is an interface dealing with the HTTP protocol. Its goal is to transform the HTTP requests to the application server so that they get the responses. |
| 2. | Application It is a piece of software which gathers information. |
| 3. | Application server It is the component holding one or more applications |
| 4. | Web application server It is the combination of web server and application server. |
Example
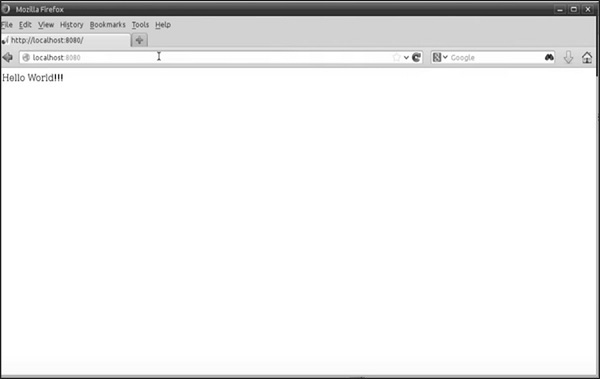
The following example shows a sample code of CherryPy −import cherrypy class demoExample: def index(self): return "Hello World!!!" index.exposed = True cherrypy.quickstart(demoExample())Let us now understand how the code works −
- The package named CherryPy is always imported in the specified class to ensure proper functioning.
- In the above example, the function named index returns the parameter “Hello World!!!”.
- The last line starts the web server and calls the specified class (here, demoExample) and returns the value mentioned in default function index.
Built-in Http Server & Internal Engine
CherryPy comes with its own web (HTTP) server. That is why CherryPy is self-contained and allows users to run a CherryPy application within minutes of getting the library.The web server acts as the gateway to the application with the help of which all the requests and responses are kept in track.
To start the web server, a user must make the following call −
cherryPy.server.quickstart()The internal engine of CherryPy is responsible for the following activities −
- Creation and management of request and response objects.
- Controlling and managing the CherryPy process.
CherryPy – Configuration
The framework comes with its own configuration system allowing you to parameterize the HTTP server. The settings for the configuration can be stored either in a text file with syntax close to the INI format or as a complete Python dictionary.To configure the CherryPy server instance, the developer needs to use the global section of the settings.
global_conf = {
   'global': {
      'server.socket_host': 'localhost',
      'server.socket_port': 8080,
   },
}

application_conf = {
   '/style.css': {
      'tools.staticfile.on': True,
      'tools.staticfile.filename': os.path.join(_curdir, 'style.css'),
   }
}

This could be represented in a file like this:
[global]
server.socket_host = "localhost"
server.socket_port = 8080
[/style.css]
tools.staticfile.on = True
tools.staticfile.filename = "/full/path/to.style.css"
HTTP Compliance
CherryPy has been evolving slowly but it includes the compilation of HTTP specifications with the support of HTTP/1.0 later transferring with the support of HTTP/1.1.CherryPy is said to be conditionally compliant with HTTP/1.1 as it implements all the must and required levels but not all the should levels of the specification. Therefore, CherryPy supports the following features of HTTP/1.1 −
- If a client claims to support HTTP/1.1, it must send a header field in any request made with the specified protocol version. If it is not done, CherryPy will immediately stop the processing of the request.
- CherryPy generates a Date header field which is used in all configurations.
- CherryPy can handle response status code (100) with the support of clients.
- CherryPy's built-in HTTP server supports persistent connections that are the default in HTTP/1.1, through the use of the Connection: Keep-Alive header.
- CherryPy handles correctly chunked requests and responses.
- CherryPy supports requests in two distinct ways − If-Modified-Since and If-Unmodified-Since headers and sends responses as per the requests accordingly.
- CherryPy allows any HTTP method.
- CherryPy handles the combinations of HTTP versions between the client and the setting set for the server.
Multithreaded Application Server
CherryPy is designed based on the multithreading concept. Every time a developer gets or sets a value into the CherryPy namespace, it is done in the multi-threaded environment.Both cherrypy.request and cherrypy.response are thread-data containers, which imply that your application calls them independently by knowing which request is proxied through them at runtime.
Application servers using the threaded pattern are not highly regarded because the use of threads is seen as increasing the likelihood of problems due to synchronization requirements.
The other alternatives include −
Multi-process Pattern
Each request is handled by its own Python process. Here, performance and stability of the server can be considered as better.Asynchronous Pattern
Here, accepting new connections and sending the data back to the client is done asynchronously from the request process. This technique is known for its efficiency.URL Dispatching
The CherryPy community wants to be more flexible and that other solutions for dispatchers would be appreciated. CherryPy 3 provides other built-in dispatchers and offers a simple way to write and use your own dispatchers.- Applications used to develop HTTP methods. (GET, POST, PUT, etc.)
- The one which defines the routes in the URL – Routes Dispatcher
HTTP Method Dispatcher
In some applications, URIs are independent of the action, which is to be performed by the server on the resource.For example,http://xyz.com/album/delete/10
The URI contains the operation the client wishes to carry out.
By default, CherryPy dispatcher would map in the following way −
album.delete(12)The above mentioned dispatcher is mentioned correctly, but can be made independent in the following way −
http://xyz.com/album/10The user may wonder how the server dispatches the exact page. This information is carried by the HTTP request itself. When there is request from client to server, CherryPy looks the best suiting handler, the handler is representation of the resource targeted by the URI.
DELETE /album/12 HTTP/1.1
Routes Dispatcher
Here is a list of the parameters for the method required in dispatching −- The name parameter is the unique name for the route to connect.
- The route is the pattern to match URIs.
- The controller is the instance containing page handlers.
- Using the Routes dispatcher connects a pattern that matches URIs and associates a specific page handler.
Example
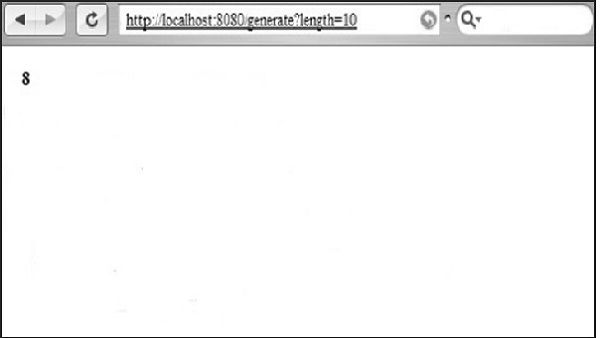
Let us take an example to understand how it works −import random import string import cherrypy class StringMaker(object): @cherrypy.expose def index(self): return "Hello! How are you?" @cherrypy.expose def generate(self, length=9): return ''.join(random.sample(string.hexdigits, int(length))) if __name__ == '__main__': cherrypy.quickstart(StringMaker ())Follow the steps given below to get the output of the above code −
Step 1 − Save the above mentioned file as tutRoutes.py.
Step 2 − Visit the following URL −
http://localhost:8080/generate?length=10Step 3 − You will receive the following output −
No comments:
Post a Comment