
VB.Net provides support for interoperability between the COM object model of Microsoft Excel 2010 and your application.
To avail this interoperability in your application, you need to import the namespace Microsoft.Office.Interop.Excel in your Windows Form Application.
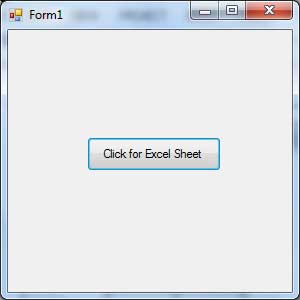
Finally, select OK, Microsoft Visual Studio creates your project and displays following Form1.
Insert a Button control Button1 in the form.
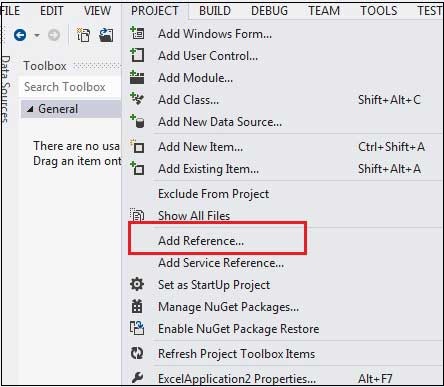
Add a reference to Microsoft Excel Object Library to your project. To do this:
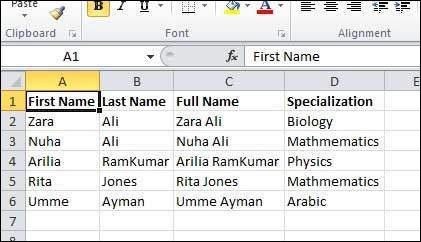
 Clicking on the Button would display the following excel sheet. You will be asked to save the workbook.
To avail this interoperability in your application, you need to import the namespace Microsoft.Office.Interop.Excel in your Windows Form Application.
Creating an Excel Application from VB.Net
Let's start with creating a Window Forms Application by following the following steps in Microsoft Visual Studio: File -> New Project -> Windows Forms ApplicationsFinally, select OK, Microsoft Visual Studio creates your project and displays following Form1.
Insert a Button control Button1 in the form.
Add a reference to Microsoft Excel Object Library to your project. To do this:
- Select Add Reference from the Project Menu.
- On the COM tab, locate Microsoft Excel Object Library and then click Select.
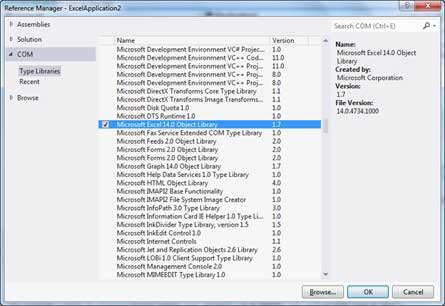
- Click OK.
'  Add the following code snippet on top of Form1.vb
Imports Excel = Microsoft.Office.Interop.Excel
Public Class Form1
   Private Sub Button1_Click(sender As Object, e As EventArgs) Handles Button1.Click
      Dim appXL As Excel.Application
      Dim wbXl As Excel.Workbook
      Dim shXL As Excel.Worksheet
      Dim raXL As Excel.Range
      ' Start Excel and get Application object.
      appXL = CreateObject("Excel.Application")
      appXL.Visible = True
      ' Add a new workbook.
      wbXl = appXL.Workbooks.Add
      shXL = wbXl.ActiveSheet
      ' Add table headers going cell by cell.
      shXL.Cells(1, 1).Value = "First Name"
      shXL.Cells(1, 2).Value = "Last Name"
      shXL.Cells(1, 3).Value = "Full Name"
      shXL.Cells(1, 4).Value = "Specialization"
      ' Format A1:D1 as bold, vertical alignment = center.
      With shXL.Range("A1", "D1")
          .Font.Bold = True
          .VerticalAlignment = Excel.XlVAlign.xlVAlignCenter
      End With
      ' Create an array to set multiple values at once.
      Dim students(5, 2) As String
      students(0, 0) = "Zara"
      students(0, 1) = "Ali"
      students(1, 0) = "Nuha"
      students(1, 1) = "Ali"
      students(2, 0) = "Arilia"
      students(2, 1) = "RamKumar"
      students(3, 0) = "Rita"
      students(3, 1) = "Jones"
      students(4, 0) = "Umme"
      students(4, 1) = "Ayman"
      ' Fill A2:B6 with an array of values (First and Last Names).
      shXL.Range("A2", "B6").Value = students
       ' Fill C2:C6 with a relative formula (=A2 & " " & B2).
      raXL = shXL.Range("C2", "C6")
      raXL.Formula = "=A2 & "" "" & B2"
       ' Fill D2:D6 values.
      With shXL
          .Cells(2, 4).Value = "Biology"
          .Cells(3, 4).Value = "Mathmematics"
          .Cells(4, 4).Value = "Physics"
          .Cells(5, 4).Value = "Mathmematics"
          .Cells(6, 4).Value = "Arabic"
      End With
      ' AutoFit columns A:D.
      raXL = shXL.Range("A1", "D1")
      raXL.EntireColumn.AutoFit()
       ' Make sure Excel is visible and give the user control
      ' of Excel's lifetime.
      appXL.Visible = True
      appXL.UserControl = True
       ' Release object references.
      raXL = Nothing
      shXL = Nothing
      wbXl = Nothing
      appXL.Quit()
      appXL = Nothing
      Exit Sub
Err_Handler:
      MsgBox(Err.Description, vbCritical, "Error: " & Err.Number)
   End Sub
End Class
When the above code is executed and run using Start button available at the Microsoft Visual Studio tool bar, it will show the following window:
Clicking on the Button would display the following excel sheet. You will be asked to save the workbook.
No comments:
Post a Comment