
The following example show how to write a simple web based Hello
World application using Spring MVC framework. To start with it, let us
have working Eclipse IDE in place and follow the following steps to
develope a Dynamic Web Application using Spring Web Framework:
HelloController.java
Now start your Tomcat server and make sure you are able to access other web pages from webapps folder using a standard browser. Now try to access the URL http://localhost:8080/HelloWeb/hello and if everything is fine with your Spring Web Application, you should see the following result:
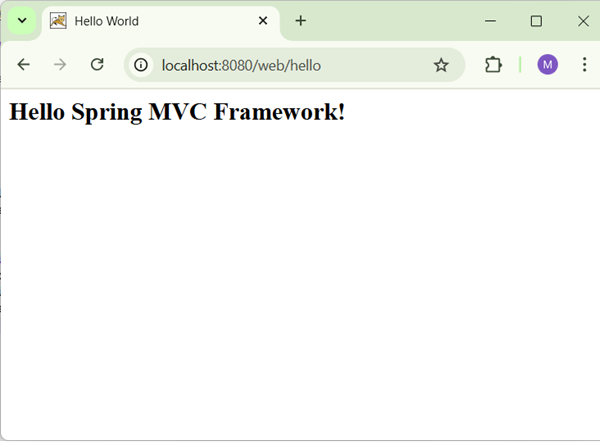 You should note that in the given URL, HelloWeb is the application name and hello
is the virtual subfolder which we have mentioned in our controller
using @RequestMapping("/hello"). You can use direct root while mapping
your URL using @RequestMapping("/"), in this case you can access the same page using short URL http://localhost:8080/HelloWeb/ but it is advised to have different functionalities under different folders.
You should note that in the given URL, HelloWeb is the application name and hello
is the virtual subfolder which we have mentioned in our controller
using @RequestMapping("/hello"). You can use direct root while mapping
your URL using @RequestMapping("/"), in this case you can access the same page using short URL http://localhost:8080/HelloWeb/ but it is advised to have different functionalities under different folders.
| Step | Description |
|---|---|
| 1 | Create a Dynamic Web Project with a name HelloWeb and create a package com.tutorialspoint under the src folder in the created project. |
| 2 | Drag and drop below mentioned Spring and other libraries into the folder WebContent/WEB-INF/lib. |
| 3 | Create a Java class HelloController under the com.tutorialspoint package. |
| 4 | Create Spring configuration files web.xml and HelloWeb-servlet.xml under the WebContent/WEB-INF folder. |
| 5 | Create a sub-folder with a name jsp under the WebContent/WEB-INF folder. Create a view file hello.jsp under this sub-folder. |
| 6 | The final step is to create the content of all the source and configuration files and export the application as explained below. |
package com.tutorialspoint;

import org.springframework.stereotype.Controller;
import org.springframework.web.bind.annotation.RequestMapping;
import org.springframework.web.bind.annotation.RequestMethod;
import org.springframework.ui.ModelMap;

@Controller
@RequestMapping("/hello")
public class HelloController{

   @RequestMapping(method = RequestMethod.GET)
   public String printHello(ModelMap model) {
      model.addAttribute("message", "Hello Spring MVC Framework!");

      return "hello";
   }

}
web.xml
<web-app id="WebApp_ID" version="2.4"
   xmlns="http://java.sun.com/xml/ns/j2ee"
   xmlns:xsi="http://www.w3.org/2001/XMLSchema-instance"
   xsi:schemaLocation="http://java.sun.com/xml/ns/j2ee
   http://java.sun.com/xml/ns/j2ee/web-app_2_4.xsd">

   <display-name>Spring MVC Application</display-name>

   <servlet>
      <servlet-name>HelloWeb</servlet-name>
      <servlet-class>
         org.springframework.web.servlet.DispatcherServlet
      </servlet-class>
      <load-on-startup>1</load-on-startup>
   </servlet>

   <servlet-mapping>
      <servlet-name>HelloWeb</servlet-name>
      <url-pattern>/</url-pattern>
   </servlet-mapping>

</web-app>
HelloWeb-servlet.xml
<beans xmlns="http://www.springframework.org/schema/beans"
   xmlns:context="http://www.springframework.org/schema/context"
   xmlns:xsi="http://www.w3.org/2001/XMLSchema-instance"
   xsi:schemaLocation="
   http://www.springframework.org/schema/beans
   http://www.springframework.org/schema/beans/spring-beans-3.0.xsd
   http://www.springframework.org/schema/context
   http://www.springframework.org/schema/context/spring-context-3.0.xsd">

   <context:component-scan base-package="com.tutorialspoint" />

   <bean class="org.springframework.web.servlet.view.InternalResourceViewResolver">
      <property name="prefix" value="/WEB-INF/jsp/" />
      <property name="suffix" value=".jsp" />
   </bean>

</beans>
hello.jsp
<%@ page contentType="text/html; charset=UTF-8" %>
<html>
<head>
<title>Hello World</title>
</head>
<body>
   <h2>${message}</h2>
</body>
</html>
Finally, following is the list of Spring and other libraries to be included in your web application. You simply drag these files and drop them in WebContent/WEB-INF/lib folder.
- servlet-api-x.y.z.jar
- commons-logging-x.y.z.jar
- spring-aop-x.y.z.jar
- spring-beans-x.y.z.jar
- spring-context-x.y.z.jar
- spring-core-x.y.z.jar
- spring-expression-x.y.z.jar
- spring-webmvc-x.y.z.jar
- spring-web-x.y.z.jar
Now start your Tomcat server and make sure you are able to access other web pages from webapps folder using a standard browser. Now try to access the URL http://localhost:8080/HelloWeb/hello and if everything is fine with your Spring Web Application, you should see the following result:
You should note that in the given URL, HelloWeb is the application name and hello
is the virtual subfolder which we have mentioned in our controller
using @RequestMapping("/hello"). You can use direct root while mapping
your URL using @RequestMapping("/"), in this case you can access the same page using short URL http://localhost:8080/HelloWeb/ but it is advised to have different functionalities under different folders.
No comments:
Post a Comment