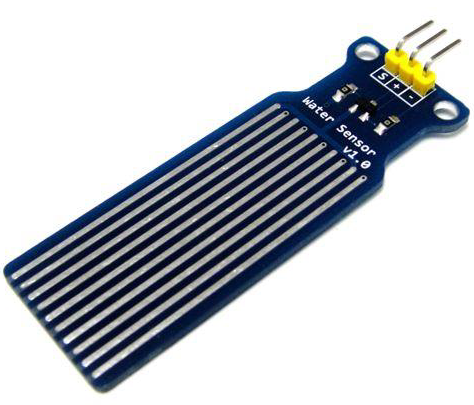
 Connecting a water sensor to an Arduino is a great way to detect a
leak, spill, flood, rain, etc. It can be used to detect the presence,
the level, the volume and/or the absence of water. While this could be
used to remind you to water your plants, there is a better Grove sensor
for that. The sensor has an array of exposed traces, which read LOW when
water is detected.
Connecting a water sensor to an Arduino is a great way to detect a
leak, spill, flood, rain, etc. It can be used to detect the presence,
the level, the volume and/or the absence of water. While this could be
used to remind you to water your plants, there is a better Grove sensor
for that. The sensor has an array of exposed traces, which read LOW when
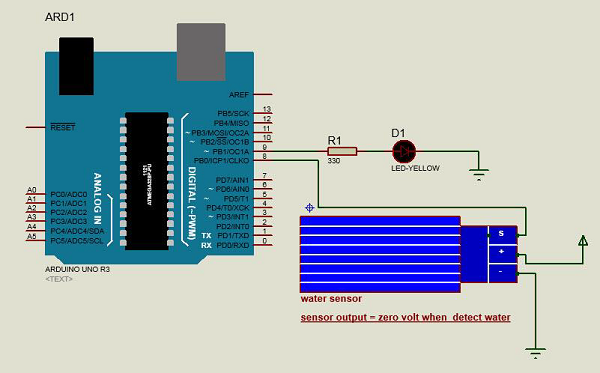
water is detected.In this chapter, we will connect the water sensor to Digital Pin 8 on Arduino, and will enlist the very handy LED to help identify when the water sensor comes into contact with a source of water.
Components Required
You will need the following components −- 1 × Breadboard
- 1 × Arduino Uno R3
- 1 × Water Sensor
- 1 × led
- 1 × 330 ohm resistor
Procedure
Follow the circuit diagram and hook up the components on the breadboard as shown in the image given below.
Sketch
Open the Arduino IDE software on your computer. Coding in the Arduino language will control your circuit. Open a new sketch File by clicking on New.
Arduino Code
#define Grove_Water_Sensor 8 // Attach Water sensor to Arduino Digital Pin 8
#define LED 9 // Attach an LED to Digital Pin 9 (or use onboard LED)

void setup() {
   pinMode(Grove_Water_Sensor, INPUT); // The Water Sensor is an Input
   pinMode(LED, OUTPUT); // The LED is an Output
}

void loop() {
   /* The water sensor will switch LOW when water is detected.
   Get the Arduino to illuminate the LED and activate the buzzer
   when water is detected, and switch both off when no water is present */
   if( digitalRead(Grove_Water_Sensor) == LOW) {
      digitalWrite(LED,HIGH);
   }else {
      digitalWrite(LED,LOW);
   }
}
Code to Note
Water sensor has three terminals - S, Vout(+), and GND (-). Connect the sensor as follows −- Connect the +Vs to +5v on your Arduino board.
- Connect S to digital pin number 8 on Arduino board.
- Connect GND with GND on Arduino.
- Connect LED to digital pin number 9 in Arduino board.

No comments:
Post a Comment