In this chapter we will show you how to set up Google authentication in Firebase.
Now you can choose Google from the list, enable it and save it.
We can also click Google Signout button to logout from the app. The console will confirm that the logout was successful.

Step 1 - Enable Google Authentication
Open Firebase dashboard and click Auth in left side menu. To open list of available methods, you need to click on SIGN_IN_METHODS in tab menu.Now you can choose Google from the list, enable it and save it.
Step 2 - Create Buttons
Inside our index.html we will add two buttons.index.html
<button onclick = "googleSignin()">Google Signin</button>
<button onclick = "googleSignout()">Google Signout</button>
Step 3 - Signin and Signout
In this step we will create Signin and Signout functions. We will use signInWithPopup() and signOut() methods.Example
var provider = new firebase.auth.GoogleAuthProvider();

function googleSignin() {
   firebase.auth()

   .signInWithPopup(provider).then(function(result) {
      var token = result.credential.accessToken;
      var user = result.user;

      console.log(token)
      console.log(user)
   }).catch(function(error) {
      var errorCode = error.code;
      var errorMessage = error.message;

      console.log(error.code)
      console.log(error.message)
   });
}

function googleSignout() {
   firebase.auth().signOut()

   .then(function() {
      console.log('Signout Succesfull')
   }, function(error) {
      console.log('Signout Failed')
   });
}
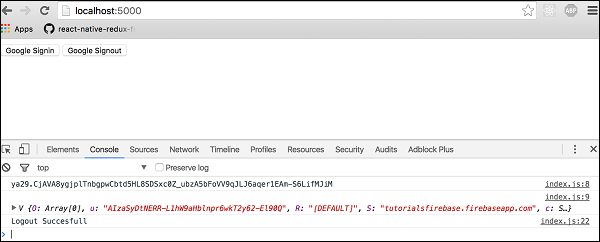
After we refresh the page, we can click on Google Signin button to trigger Google popup. If signing in is successful, developer console will log our user.
We can also click Google Signout button to logout from the app. The console will confirm that the logout was successful.


No comments:
Post a Comment