
Enterprise Application Development Example
For our tutorial, we will be implementing the CRM application for a Chemical Equipment and Processing company. This company deals with suppliers and provides services. We will work out small code snippets related to this example throughout our tutorial to understand every concept deeply.For executing the code in this tutorial, you will need to have two objects created: Customer and Invoice objects. If you already know how to create these objects in Salesforce, you can skip the below steps. Else, you can follow the step by step guide below.
Creating Customer Object
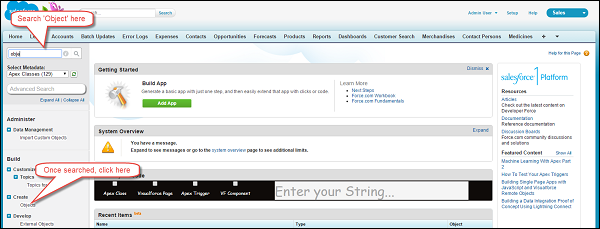
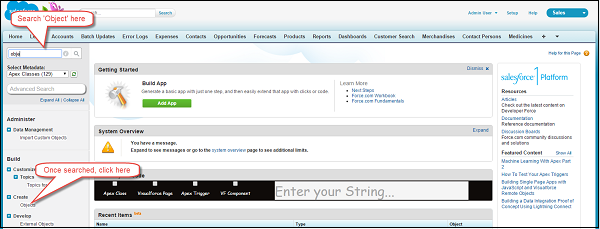
We will be setting up the Customer object first.Step 1: Go to Setup and then search for 'Object' as shown below. Then click on the Objects link as shown below:

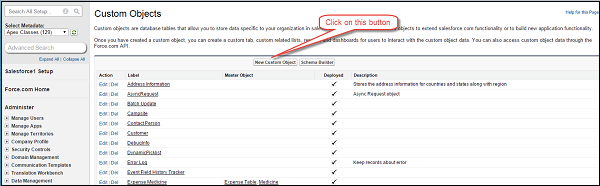
Step 2: Once the object page is opened, then click on the 'Create New Object' button as shown below:
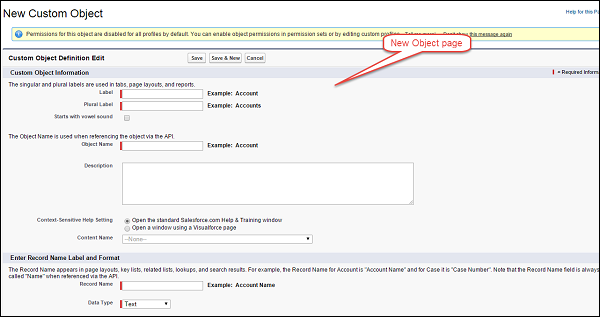
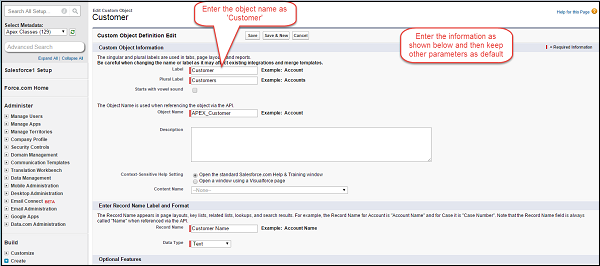
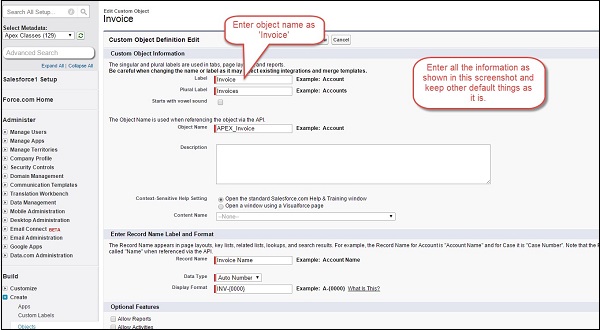
Step 3: After clicking on button, new object creation page will appear and then enter all the object details as entered below. Object name should be Customer. You just have to enter the information in the field as shown in below screenshot and keep other default things as it is.
Enter the information and then click on 'Save' button:
By following above steps, we have successfully created the Customer object.
Creating the Custom Fields for Customer object
Now that we have our Customer object set up, we will create a field 'Active' and then you could create the other fields by following similar steps. The Name and API name of the field will be given in the screenshot.Step 1: We will be creating a field named as 'Active' of data type as Checkbox. Go to Setup and click on it.

Step 2: Search for 'Object' as shown below and click on it:
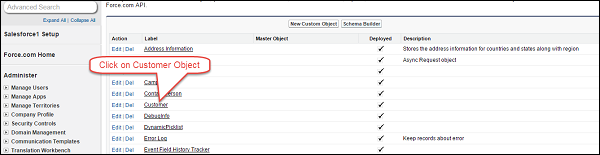
Step 3: Click on object 'Customer':
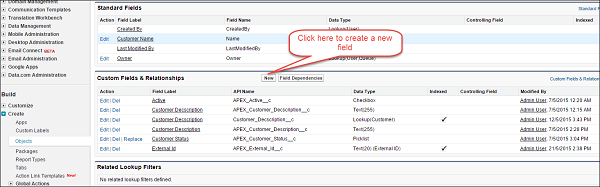
Step 4: Once you have clicked on Customer object link and the object detail page appears, click on the New button:
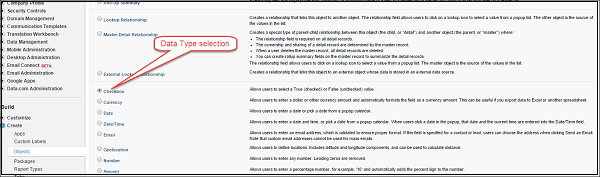
Step 5: Then select the data type as Checkbox and click next:
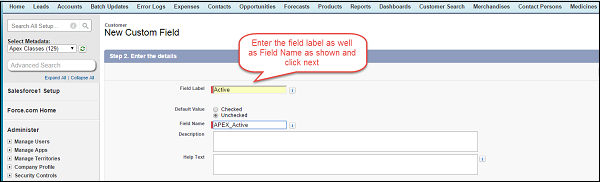
Step 6: Enter the field name and label as shown below:
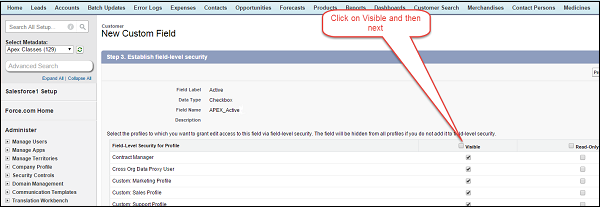
Step 7: Click on Visible and then click Next:
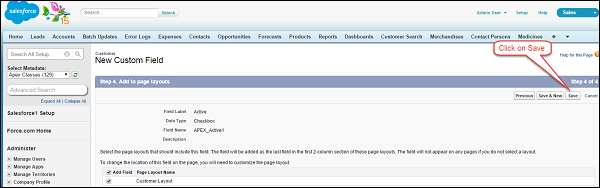
Click on 'Save'.
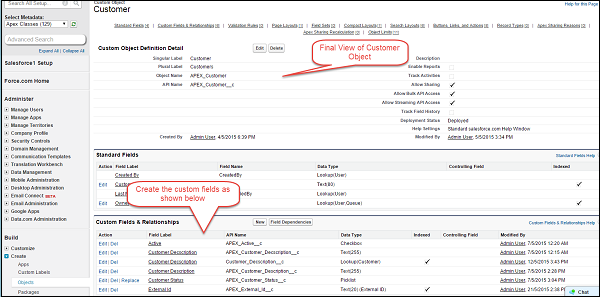
By following above steps, our custom field 'Active' is created. You have to follow all above custom field creation steps for remaining fields. This is the final view of customer object once all field are created:
Creating Invoice Object
Step 1: Go to Setup and search for 'Object' and then click on the Objects link as shown below: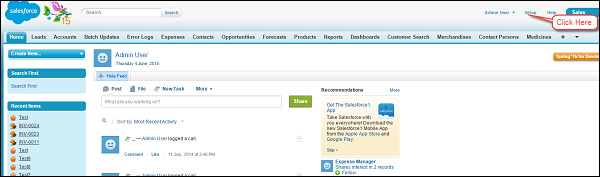

Step 2: Once the object page is opened, then click on the 'Create New Object' button as shown below:
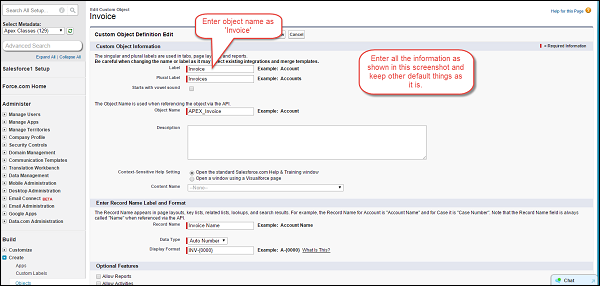
Step 3: After clicking on button, new object creation page will appear as shown below and then enter all the object details as entered below. Object name should be Invoice. This is similar to how we created the Customer object earlier in this tutorial.
Enter the information as shown below and then click on 'Save' button:
By following these steps, your Invoice object will be created.
Creating the Custom Fields for Invoice object
We will be creating the field Description on Invoice object as shown below:Step 1: Go to Setup and click on it.
Step 2: Search for 'Object' as shown below and click on it:
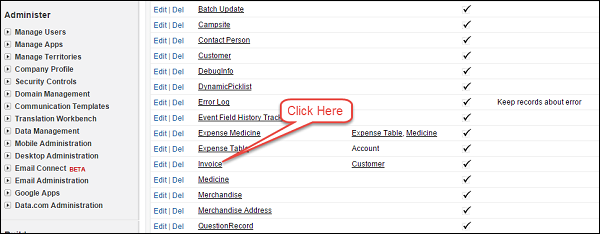
Step 3: Click on object 'Invoice'.
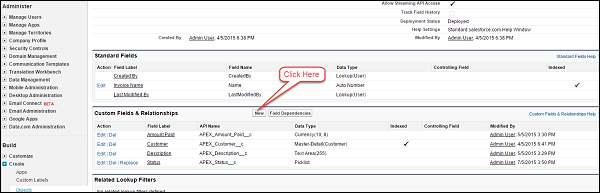
And then click on 'New'.
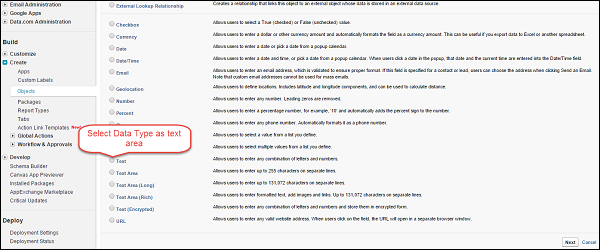
Step 4: Select data type as Text Area and then click on Next button.
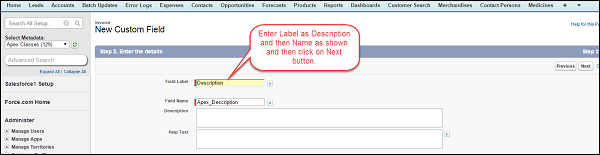
Step 5: Enter information as given below:
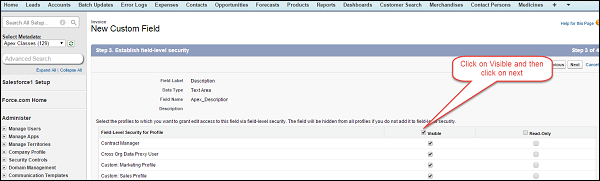
Step 6: Click on Visible and then next:
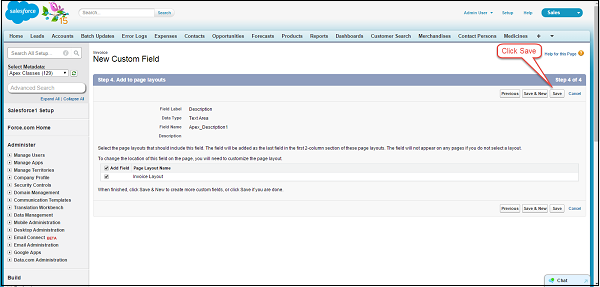
And then click on Save.
Similarly, you can create the other fields on the Invoice object.
By this, we have created the objects that are needed for following through the tutorial. We will be learning various examples in the further chapters based on these objects.
No comments:
Post a Comment