Subsequent chapters are based on the example taken in this chapter.
In this example we will create something simple but operational online
library system for holding and managing the books.
Now you have to be patient till you go through next few chapters. I'm sure after completing this tutorial you will have complete understanding on Rails.
This application has a basic architecture and will be built using two ActiveRecord models to describe the types of data that is stored in your database −
Here we are using -d mysql option to specify our interest to use MySQL database. We can specify any other database name like oracle or postgress using -d option. By default Rails uses SQLite database.
Most of our development work will be creating and editing files in the ~/library/app subdirectories. Here's a quick rundown of how to use them −
This server will be started from the application directory as follows. This runs on port number 3000.
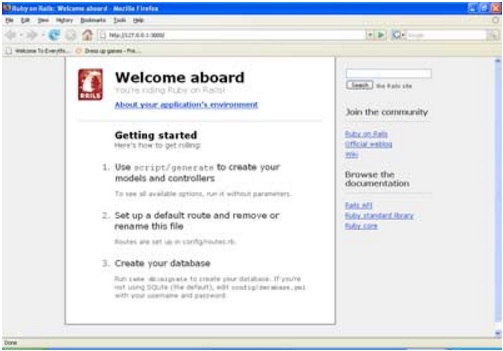
Now open your browser and browse to http://127.0.0.1:3000 If everything is gone fine then you should see a greeting message from WEBrick. Following is the screen for a successful setup −

If you do not get a greeting message as above, then it means there is
something wrong with your setup and you need to fix it before
proceeding ahead.
Further we will see what is Rail Migration and how it is used to maintain database tables.
Now you have to be patient till you go through next few chapters. I'm sure after completing this tutorial you will have complete understanding on Rails.
This application has a basic architecture and will be built using two ActiveRecord models to describe the types of data that is stored in your database −
- Books − They describe an actual listing of the books.
- Subject − This is used to group books together.
Workflow for creating Rails applications
A recommended workflow for creating a Rails Application is as follows −- Use the rails command to create the basic skeleton of the application.
- Create a database with necessary definition in the MySQL server to hold your data.
- Configure the application to know where your database is located and specify the login credentials for it.
- Create Rails Active Records ( Models ) because they are the business objects you'll be working with in your controllers.
- Generate Migrations that makes creating and maintaining database tables and columns easy.
- Write Controller Code to put a life in your application.
- Create Views to present your data through User Interface.
Creating an Empty Rails Application
Rails is both a runtime web application framework and a set of helper scripts that automate many of the things you do when developing a web application. In this step, we will use one such helper script to create the entire directory structure and the initial set of files to start our Library System Application.- Go into ruby installation directory to create your application.
- Run the following command to create a skeleton for our library application.
C:\ruby> rails -d mysql libraryThis will create a subdirectory for the library application containing a complete directory tree of folders and files for an empty Rails application. Check a complete directory structure of the application. Check Rails Directory Structure for more detail.
Here we are using -d mysql option to specify our interest to use MySQL database. We can specify any other database name like oracle or postgress using -d option. By default Rails uses SQLite database.
Most of our development work will be creating and editing files in the ~/library/app subdirectories. Here's a quick rundown of how to use them −
- The controllers subdirectory is where Rails looks to find controller classes. A controller handles a web request from the user.
- The views subdirectory holds the display templates to fill in with data from our application, convert to HTML, and return to the user's browser.
- The models subdirectory holds the classes that model and wrap the data stored in our application's database. In the most frameworks, this part of the application can grow pretty messy, tedious, verbose, and error-prone. Rails makes it dead simple.
- The helpers subdirectory holds any helper classes used to assist the model, view, and controller classes. This helps to keep the model, view, and controller code small, focused, and uncluttered.
Starting Web Server
Rails web application can run under virtually any web server, but the most convenient way to develop and test a Rails web application is to use the built-in WEBrick web server. Let's start this web server and then browse to our empty library application −This server will be started from the application directory as follows. This runs on port number 3000.
C:\> cd ruby\library
C:\ruby\library\> ruby script/server
This will start your WEBrick web server listening for Web Requests at port number 3000 at local machine.
Now open your browser and browse to http://127.0.0.1:3000 If everything is gone fine then you should see a greeting message from WEBrick. Following is the screen for a successful setup −

What is next ?
Next session will teach you how to create databases for your application and what is the configuration required to access these created databases.Further we will see what is Rail Migration and how it is used to maintain database tables.

No comments:
Post a Comment