Order management is important thing which allows business to run
smoothly and keeps customers happy, making them more likely to visit
your site in the future. When customer completes the order process, you
will receive a new order notification mail.
The following steps describe how to manage orders in Magento:
Step (1): Login to your Magento Admin Panel.
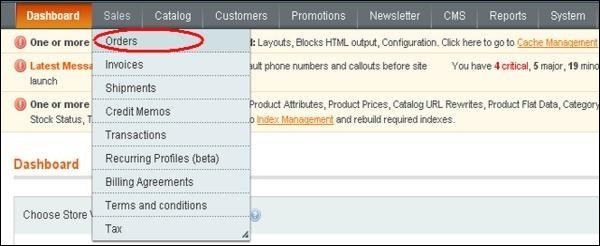
Step (2): Go to Sales menu and click on the Orders option.
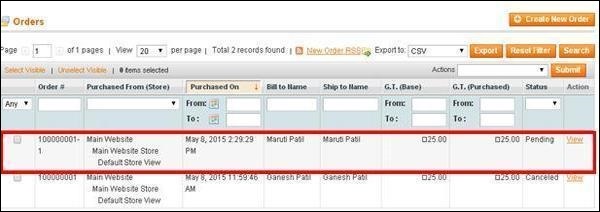
 Step (3): It will display the list of orders placed in the store and click on any of the orders.
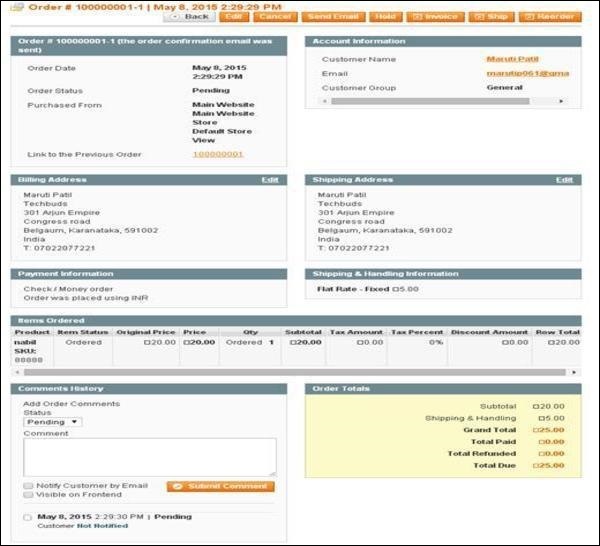
 Step (4): Next it will show the order form. It includes
information regarding the order such as the account information and
billing address of the customer, payment information, status of the
product and comment area under the Comments History column etc.
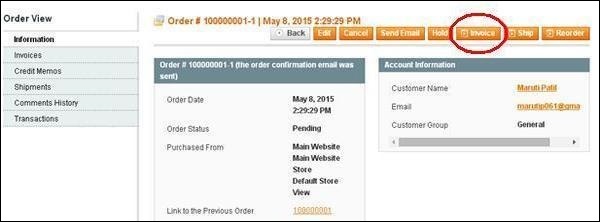
 Step (5): You can see the e-mail has been sent to the customer
regarding the product order. Create the invoice for the order and alert
the customer that the order is accepted by clicking on the Invoice button.
 Step (6): Next scroll down the invoice page and click on the Submit Invoice button.
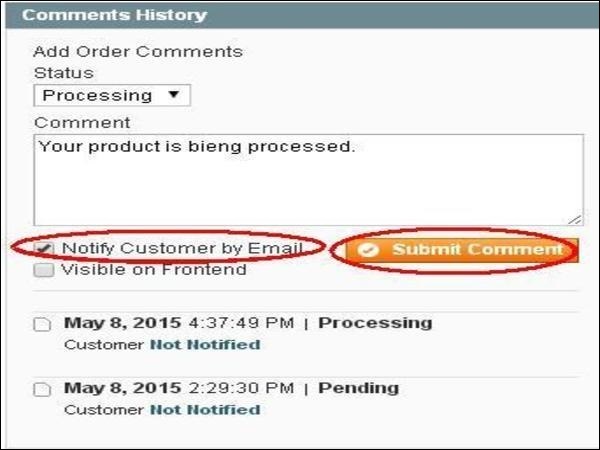
 Step (7): Now order will get processed and gets accepted into
the system. Alert the customer about product order by sending an e-mail.
Type your comment in the text area and click on the Submit Comment button.
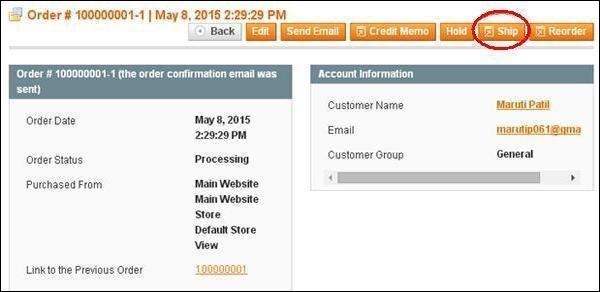
 Step (8): The product is shipped and you need to update the
customer on their order status. Enter the completed order into the
system and notify the customer regarding shipping of your product by
clicking on the Ship button.
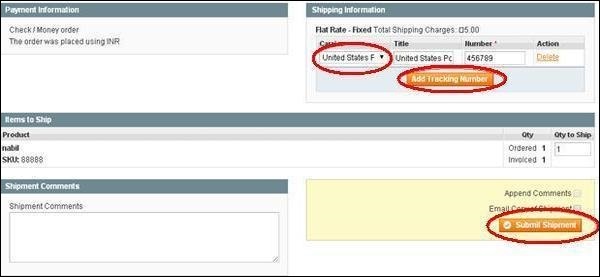
 Step (9): Under Shipping Information section, click on the Add Tracking Number button and choose your Carrier from the dropdown menu and put the tracking number of your order and click on the Submit Shipment button.
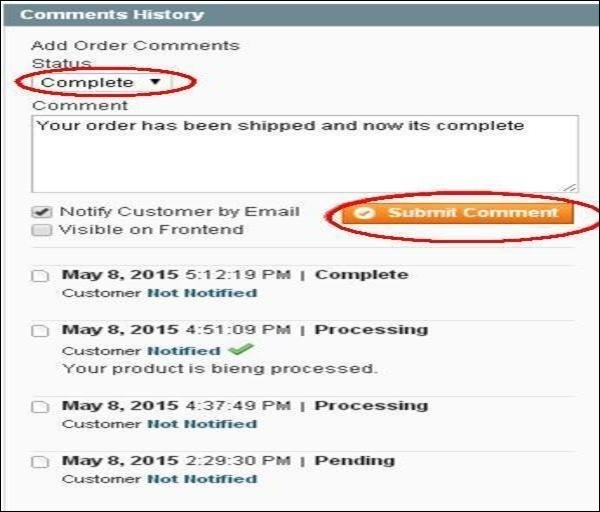
 Step (10): It will notify the customer regarding status of the product shipping. Type your comments and click on the Submit Comment button to notify the customer.
The following steps describe how to manage orders in Magento:
Step (1): Login to your Magento Admin Panel.
Step (2): Go to Sales menu and click on the Orders option.
 Step (3): It will display the list of orders placed in the store and click on any of the orders.
 Step (4): Next it will show the order form. It includes
information regarding the order such as the account information and
billing address of the customer, payment information, status of the
product and comment area under the Comments History column etc.
 Step (5): You can see the e-mail has been sent to the customer
regarding the product order. Create the invoice for the order and alert
the customer that the order is accepted by clicking on the Invoice button.
 Step (6): Next scroll down the invoice page and click on the Submit Invoice button.
 Step (7): Now order will get processed and gets accepted into
the system. Alert the customer about product order by sending an e-mail.
Type your comment in the text area and click on the Submit Comment button.
 Step (8): The product is shipped and you need to update the
customer on their order status. Enter the completed order into the
system and notify the customer regarding shipping of your product by
clicking on the Ship button.
 Step (9): Under Shipping Information section, click on the Add Tracking Number button and choose your Carrier from the dropdown menu and put the tracking number of your order and click on the Submit Shipment button.
 Step (10): It will notify the customer regarding status of the product shipping. Type your comments and click on the Submit Comment button to notify the customer.

No comments:
Post a Comment