
This article provides step-by-step procedure of LESS installation.
 Dowload the Latest Features version of the zip file.
Step(2): Next, run the setup to install the Node.js on your system.
Step(3): Next, install LESS on the server via NPM(Node package manager). Run the following command into the command prompt.
 When you run the above command, it will create style.css file automatically. Whenever you change the LESS file, it's necessary to run the above command in the cmd and then the style.css file will get updated.
The style.css file will have following code when you run the above command:
System Requirements for LESS
- Operating System : Cross-platform
- Browser Support: IE (Internet Explorer 8+), Firefox, Google Chrome, Safari.
Installation of LESS
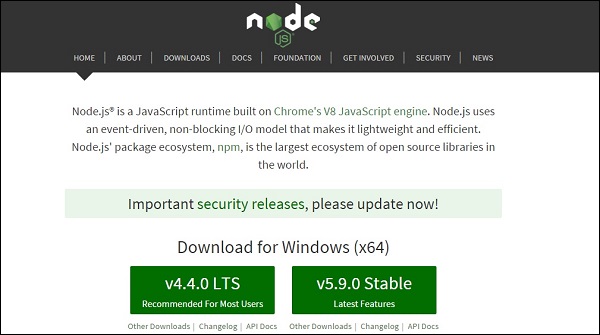
Step(1):We need NodeJs to run LESS examples. To download NodeJs, open the link https://nodejs.org/en/, you will see a screen as shown below:
Dowload the Latest Features version of the zip file.Step(2): Next, run the setup to install the Node.js on your system.
Step(3): Next, install LESS on the server via NPM(Node package manager). Run the following command into the command prompt.
npm install -g lessStep(4): Next, after successful installation of LESS, you will see following lines on the command prompt −
`-- less@2.6.1
  +-- errno@0.1.4
  | `-- prr@0.0.0
  +-- graceful-fs@4.1.3
  +-- image-size@0.4.0
  +-- mime@1.3.4
  +-- mkdirp@0.5.1
  | `-- minimist@0.0.8
  +-- promise@7.1.1
  | `-- asap@2.0.3
  +-- request@2.69.0
  | +-- aws-sign2@0.6.0
  | +-- aws4@1.3.2
  | | `-- lru-cache@4.0.0
  | |   +-- pseudomap@1.0.2
  | |   `-- yallist@2.0.0
  | +-- bl@1.0.3
  | | `-- readable-stream@2.0.6
  | |   +-- core-util-is@1.0.2
  | |   +-- inherits@2.0.1
  | |   +-- isarray@1.0.0
  | |   +-- process-nextick-args@1.0.6
  | |   +-- string_decoder@0.10.31
  | |   `-- util-deprecate@1.0.2
  | +-- caseless@0.11.0
  | +-- combined-stream@1.0.5
  | | `-- delayed-stream@1.0.0
  | +-- extend@3.0.0
  | +-- forever-agent@0.6.1
  | +-- form-data@1.0.0-rc4
  | | `-- async@1.5.2
  | +-- har-validator@2.0.6
  | | +-- chalk@1.1.1
  | | | +-- ansi-styles@2.2.0
  | | | | `-- color-convert@1.0.0
  | | | +-- escape-string-regexp@1.0.5
  | | | +-- has-ansi@2.0.0
  | | | | `-- ansi-regex@2.0.0
  | | | +-- strip-ansi@3.0.1
  | | | `-- supports-color@2.0.0
  | | +-- commander@2.9.0
  | | | `-- graceful-readlink@1.0.1
  | | +-- is-my-json-valid@2.13.1
  | | | +-- generate-function@2.0.0
  | | | +-- generate-object-property@1.2.0
  | | | | `-- is-property@1.0.2
  | | | +-- jsonpointer@2.0.0
  | | | `-- xtend@4.0.1
  | | `-- pinkie-promise@2.0.0
  | |   `-- pinkie@2.0.4
  | +-- hawk@3.1.3
  | | +-- boom@2.10.1
  | | +-- cryptiles@2.0.5
  | | +-- hoek@2.16.3
  | | `-- sntp@1.0.9
  | +-- http-signature@1.1.1
  | | +-- assert-plus@0.2.0
  | | +-- jsprim@1.2.2
  | | | +-- extsprintf@1.0.2
  | | | +-- json-schema@0.2.2
  | | | `-- verror@1.3.6
  | | `-- sshpk@1.7.4
  | |   +-- asn1@0.2.3
  | |   +-- dashdash@1.13.0
  | |   | `-- assert-plus@1.0.0
  | |   +-- ecc-jsbn@0.1.1
  | |   +-- jodid25519@1.0.2
  | |   +-- jsbn@0.1.0
  | |   `-- tweetnacl@0.14.1
  | +-- is-typedarray@1.0.0
  | +-- isstream@0.1.2
  | +-- json-stringify-safe@5.0.1
  | +-- mime-types@2.1.10
  | | `-- mime-db@1.22.0
  | +-- node-uuid@1.4.7
  | +-- oauth-sign@0.8.1
  | +-- qs@6.0.2
  | +-- stringstream@0.0.5
  | +-- tough-cookie@2.2.2
  | `-- tunnel-agent@0.4.2
  `-- source-map@0.5.3
Example
Below is a simple example of LESS.hello.htm
<!doctype html>
<head>
 <link rel="stylesheet" href="style.css" type="text/css" />
</head>
<body>
 <h1>Welcome to TutorialsPoint</h1>
 <h3>Hello!!!!!</h3>
</body>
</html>
Next, let's create a file style.less which is quite similar to CSS, the only difference is that it will be saved with .less extension. Both the files, .html and .less should be created inside the folder nodejs.
style.less
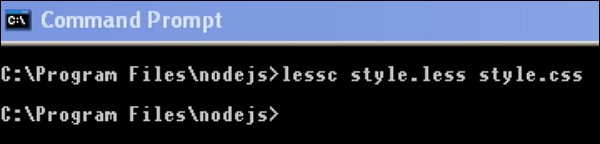
@primarycolor: #FF7F50;
@color:#800080;
h1{
color: @primarycolor;
}
h3{
color: @color;
}
Compile style.less file to style.css by using the following command:
lessc style.less style.css
When you run the above command, it will create style.css file automatically. Whenever you change the LESS file, it's necessary to run the above command in the cmd and then the style.css file will get updated.The style.css file will have following code when you run the above command:
style.css
h1 {
  color: #FF7F50;
}
h3 {
  color: #800080;
}
Output
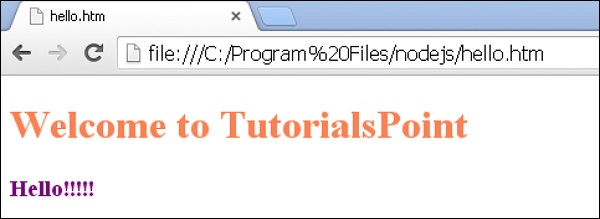
Let's carry out the following steps to see how above code works:- Save above html code in hello.htm file.
- Open this HTML file in a browser, an output as below gets displayed.
No comments:
Post a Comment