
The config directory, as the name implies, contains all of your
application's configuration files. In this directory, you will find
various files needed to configure database, session, mail, application,
services etc.

In case you haven’t installed Laravel, you can simply rename the .env.example file to .env file. A sample of Laravel.env file is shown below.
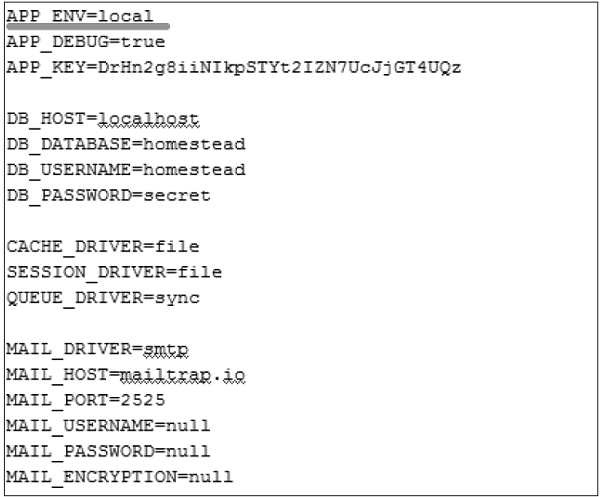 Notice the text underlined gray in the above image. Local environment variable has been set. It can further be changed to production or testing as per your requirement.
 It will activate the Maintenance mode and all the request to server
will be redirected to a single maintenance page as shown in the
following screenshot.
It will activate the Maintenance mode and all the request to server
will be redirected to a single maintenance page as shown in the
following screenshot.

Basic Configuration
- After installing Laravel, the first thing we need to do is to set the write permission for the directory storage and bootstrap/cache.
- Generate Application key to secure session and other encrypted data. If the root directory doesn’t contain the .env file then rename the .env.example to .env file and execute the following command where you have installed Laravel. The newly generated key can be seen in the .env file.
- You can also configure the locale, time zone, etc. of the application in the config/app.php file.
Environmental Configuration
Laravel provides facility to run your application in different environment like testing, production etc. You can configure the environment of your application in the .env file of the root directory of your application. If you have installed Laravel using composer, this file will automatically be created.In case you haven’t installed Laravel, you can simply rename the .env.example file to .env file. A sample of Laravel.env file is shown below.
Notice the text underlined gray in the above image. Local environment variable has been set. It can further be changed to production or testing as per your requirement.Database Configuration
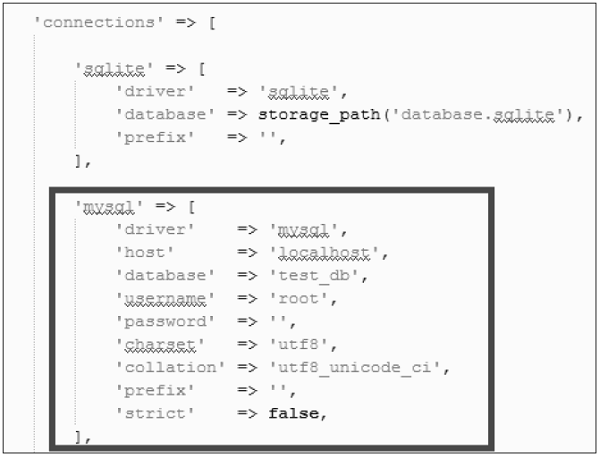
The database of your application can be configured from config/database.php file. You can set configuration parameters that can be used by different databases and you can also set the default one to use.
Naming the Application
The App Directory, by default, is namespaced under App. To rename it, you can execute the following command and rename the namespace.php artisan app:name <name-of-your-application>Replace the <name-of-your-application> with the new name of your application that you want to give.
Maintenance Mode
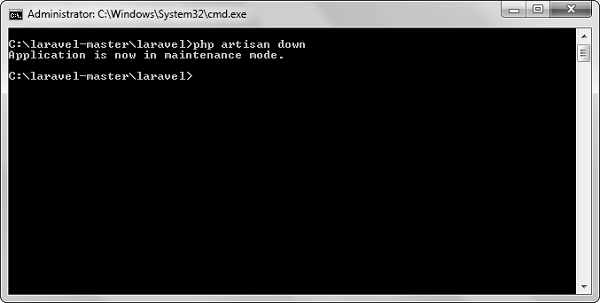
We need to modify our website on a regular basis. The website needs to be put on maintenance mode for this. Laravel has made this job easier. There are two artisan commands which are used to start and stop the maintenance mode which are described below.Start Maintenance Mode
To start the maintenance mode, simply execute the following command.php artisan downAfter successful execution, you will receive the following output −
It will activate the Maintenance mode and all the request to server
will be redirected to a single maintenance page as shown in the
following screenshot.
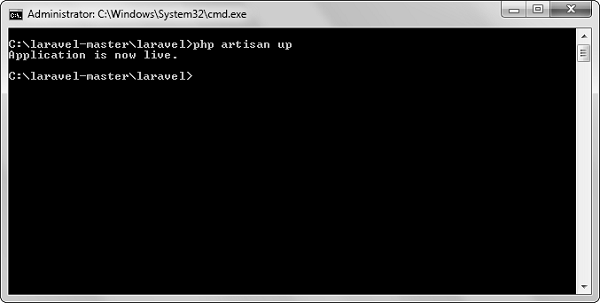
Stop Maintenance Mode
- After making changes to your website and to start it again, execute the following command.
php artisan up
- After successful execution, you will receive the following output −
thank you for nice information.
ReplyDeletelearn Laravel