
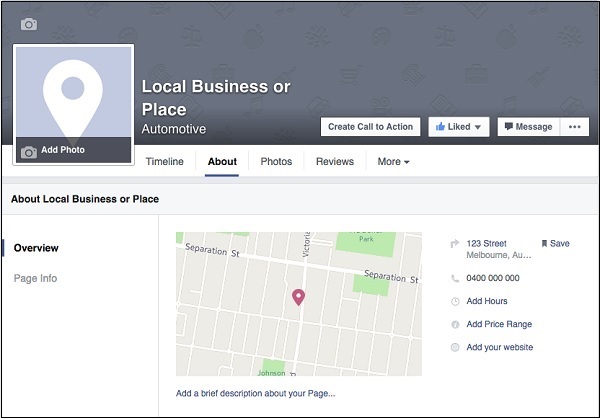
After completing the initial setup, you will be redirected to your
new Facebook page. Apart from the information you provided in the setup
process, it will look rather empty. In this chapter, we will show you
how to navigate through different areas of the page so that you are
comfortable with modifying and utilizing the functionalities
In the ‘About’ tab, you can ensure that all your business details have been entered correctly. The areas you can update/modify include −
Display picture size − 180px x 180px
Cover photo size − 851px x 315px
 The image above is to create call-to-action button.
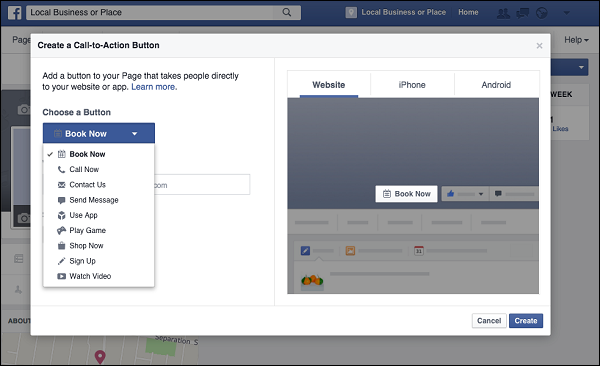 The image above shows the different types of buttons you can have displayed on your page.
 Other notable areas in the settings are −
Page roles − Choose to add new people in to your page as either an admin, editor, moderator, adviser or analyst.
Messaging − Show your average response time in getting back to private messages. You can also let people know that you will be either just as or less responsive outside of business hours.
Preferred page audience − Change who finds your page by optimizing the age criteria, location, gender and users’ interests.
In the ‘About’ tab, you can ensure that all your business details have been entered correctly. The areas you can update/modify include −
- Address
- Contact details
- Website URL
- Operating Hours
- Price Range
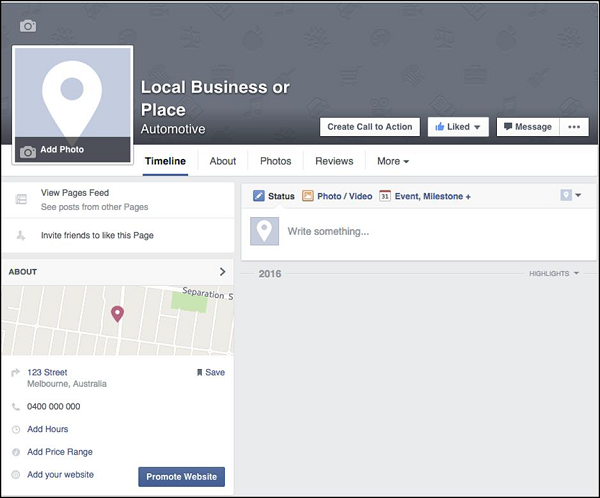
Adding a display picture and a cover photo
To add a display picture and a cover photo, you will need to click on the camera icon located within the designated areas (see picture below). In general, the display picture should represent your business with either a logo or icon that people will familiarize with your brand. The cover photo is a great way to show off what makes your brand shine by giving your users a graphical image that promotes your service. Depending on the culture and values of your organization this can be professional, creative, informative or a mix, there are no set rules, it will depend on how you want to market yourself.Display picture size − 180px x 180px
Cover photo size − 851px x 315px
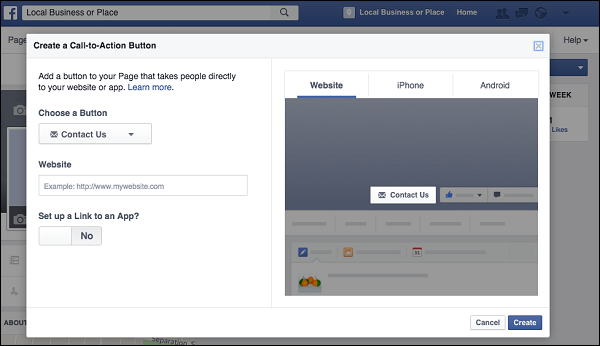
Create a ‘call-to-action’ button
Creating a call-to-action button on your page enables your audience to straight away be taken to a desired location. This is a great way to start generating leads, get traffic, bookings, subscriptions and much more. You will be able to choose what type of button you would like to have displayed and where it will take someone if they click on it. You can create call-to-action buttons for desktop, iPhone and Android.
The image above is to create call-to-action button.
The image above shows the different types of buttons you can have displayed on your page.Setting
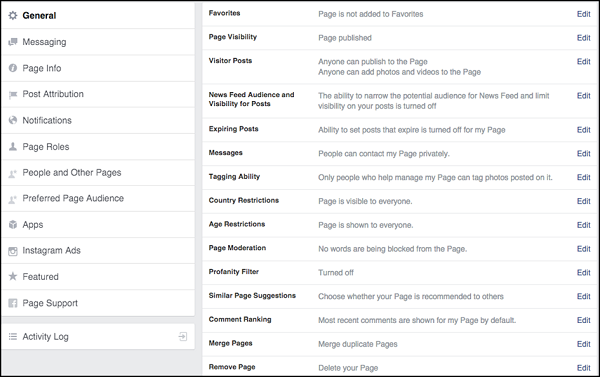
The settings tab gives you the access to monitor and perform adjustments on your page. In the general page, you can choose whether your page is public or private. In the initial phase of setting up your page, you may wish to change the status of the page to private until you are ready for people to start finding/seeing what you are up too. Here you can also set who can post on your wall, you can choose to either just let the admin post or let your fans and people who find your page, post and comment on your wall. You can also set who can tag photos, message you privately, restrict age to see the page and which countries it will be available for. You can also merge duplicate pages you have or delete the page entirely.
Other notable areas in the settings are −Page roles − Choose to add new people in to your page as either an admin, editor, moderator, adviser or analyst.
Messaging − Show your average response time in getting back to private messages. You can also let people know that you will be either just as or less responsive outside of business hours.
Preferred page audience − Change who finds your page by optimizing the age criteria, location, gender and users’ interests.
No comments:
Post a Comment