QPixmap class provides an off-screen representation of an
image. It can be used as a QPaintDevice object or can be loaded into
another widget, typically a label or button.
Qt API has another similar class QImage, which is optimized for I/O and other pixel manipulations. Pixmap, on the other hand, is optimized for showing it on screen. Both formats are interconvertible.
The types of image files that can be read into a QPixmap object are as follows −
Following methods are useful in handling QPixmap object −
The most common use of QPixmap is to display image on a label/button.

Qt API has another similar class QImage, which is optimized for I/O and other pixel manipulations. Pixmap, on the other hand, is optimized for showing it on screen. Both formats are interconvertible.
The types of image files that can be read into a QPixmap object are as follows −
| BMP | Windows Bitmap |
| GIF | Graphic Interchange Format (optional) |
| JPG | Joint Photographic Experts Group |
| JPEG | Joint Photographic Experts Group |
| PNG | Portable Network Graphics |
| PBM | Portable Bitmap |
| PGM | Portable Graymap |
| PPM | Portable Pixmap |
| XBM | X11 Bitmap |
| XPM | X11 Pixmap |
| S.No. | Methods & Description |
|---|---|
| 1 |
copy() Copies pixmap data from a QRect object |
| 2 |
fromImage() Converts QImage object into QPixmap |
| 3 |
grabWidget() Creates a pixmap from the given widget |
| 4 |
grabWindow() Create pixmap of data in a window |
| 5 |
Load() Loads an image file as pixmap |
| 6 |
save() Saves the QPixmap object as a file |
| 7 |
toImage Converts a QPixmap to QImage |
Example
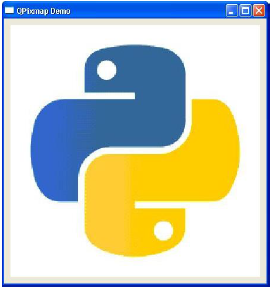
The following example shows an image displayed on a QLabel by using the setPixmap() method. The complete code is as follows −import sys from PyQt4.QtCore import * from PyQt4.QtGui import * def window(): app = QApplication(sys.argv) win = QWidget() l1 = QLabel() l1.setPixmap(QPixmap("python.jpg")) vbox = QVBoxLayout() vbox.addWidget(l1) win.setLayout(vbox) win.setWindowTitle("QPixmap Demo") win.show() sys.exit(app.exec_()) if __name__ == '__main__': window()The above code produces the following output −


No comments:
Post a Comment