
Swift is a new programming language developed by Apple Inc for iOS
and OS X development. Swift adopts the best of C and Objective-C,
without the constraints of C compatibility.
Swift comes with playground feature where Swift programmers can write their code and execute it to see the results immediately.
The first public release of Swift was released in 2010. It took Chris Lattner almost 14 years to come up with the first official version, and later, it was supported by many other contributors. Swift has been included in Xcode 6 beta.
Swift designers took ideas from various other popular languages such as Objective-C, Rust, Haskell, Ruby, Python, C#, and CLU.
To start with, we consider you already have an account at Apple Developer website. Once you are logged in, go to the following link − Download for Apple Developers
This will list down a number of software available as follows −
 Now select xCode and download it by clicking on the given link near
to disc image. After downloading the dmg file, you can install it by
simply double-clicking on it and following the given instructions.
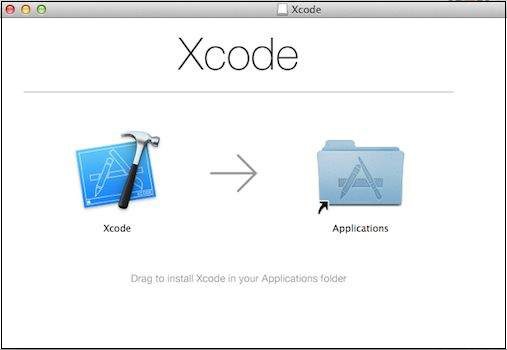
Finally, follow the given instructions and drop xCode icon into the
Application folder.
Now select xCode and download it by clicking on the given link near
to disc image. After downloading the dmg file, you can install it by
simply double-clicking on it and following the given instructions.
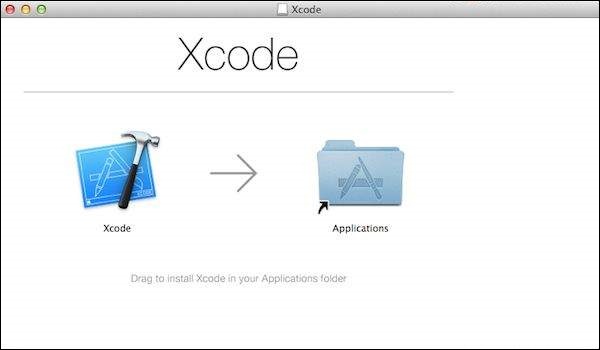
Finally, follow the given instructions and drop xCode icon into the
Application folder.
 Now you have xCode installed on your machine. Next, open Xcode from
the Application folder and proceed after accepting the terms and
conditions. If everything is fine, you will get the following screen −
Now you have xCode installed on your machine. Next, open Xcode from
the Application folder and proceed after accepting the terms and
conditions. If everything is fine, you will get the following screen −
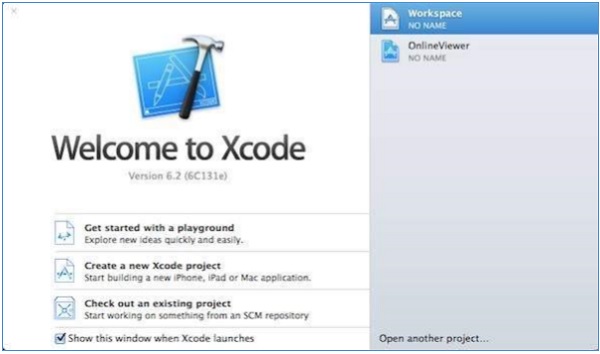 Select Get started with a playground option and enter a name for playground and select iOS as platform. Finally, you will get the Playground window as follows −
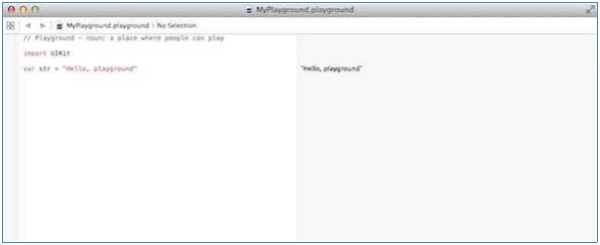 Following is the code taken from the default Swift Playground Window.
Cocoa is implemented in Objective-C, which is a superset of C, so it is easy to mix C and even C++ into your Swift applications.
However, if you are using multiple statements in the same line, then it is required to use a semicolon as a delimiter, otherwise the compiler will raise a syntax error. You can write the above Hello, World! program as follows −
Swift does not allow special characters such as @, $, and % within identifiers. Swift is a case sensitive programming language. Thus, Manpower and manpower are two different identifiers in Swift. Here are some examples of acceptable identifiers −
Whitespace is the term used in Swift to describe blanks, tabs, newline characters, and comments. Whitespaces separate one part of a statement from another and enable the compiler to identify where one element in a statement, such as int, ends and the next element begins. Therefore, in the following statement −
You may like to store information of various data types like string, character, wide character, integer, floating point, Boolean, etc. Based on the data type of a variable, the operating system allocates memory and decides what can be stored in the reserved memory.
As Swift is type-safe, it performs type-checks when compiling your code and flags any mismatched types as errors.
Swift supports the following basic types of variables −
The following section will cover how to declare and use various types of variables in Swift programming.
You can use simple or Unicode characters to name your variables. The following examples shows how you can name the variables −
An Optional is a type on its own, actually one of Swift’s new super-powered enums. It has two possible values, None and Some(T), where T is an associated value of the correct data type available in Swift.
Here’s an optional Integer declaration −
Let's take a simple example −
An optional binding for the if statement is as follows −
- Swift makes use of safe programming patterns.
- Swift provides modern programming features.
- Swift provides Objective-C like syntax.
- Swift is a fantastic way to write iOS and OS X apps.
- Swift provides seamless access to existing Cocoa frameworks.
- Swift unifies the procedural and object-oriented portions of the language.
- Swift does not need a separate library import to support functionalities like input/output or string handling.
Swift comes with playground feature where Swift programmers can write their code and execute it to see the results immediately.
The first public release of Swift was released in 2010. It took Chris Lattner almost 14 years to come up with the first official version, and later, it was supported by many other contributors. Swift has been included in Xcode 6 beta.
Swift designers took ideas from various other popular languages such as Objective-C, Rust, Haskell, Ruby, Python, C#, and CLU.
Swift - Environment
Try it Option Online
We have set up the Swift Programming environment online, so that you can compile and execute all the available examples online. It gives you confidence in what you are reading and enables you to verify the programs with different options. Feel free to modify any example and execute it online.
Try the following example using our online compiler available at CodingGround
import Cocoa

/* My first program in Swift */
var myString = "Hello, World!"

println(myString)
For most of the examples given in this tutorial, you will find a Try it option in our website code sections at the top right corner that will take you to the online compiler. So just make use of it and enjoy your learning.
Local Environment Setup
Swift provides a Playground platform for learning purpose and we are going to setup the same. You need xCode software to start your Swift coding in Playground. Once you are comfortable with the concepts of Swift, you can use xCode IDE for iSO/OS x application development.To start with, we consider you already have an account at Apple Developer website. Once you are logged in, go to the following link − Download for Apple Developers
This will list down a number of software available as follows −
Now select xCode and download it by clicking on the given link near
to disc image. After downloading the dmg file, you can install it by
simply double-clicking on it and following the given instructions.
Finally, follow the given instructions and drop xCode icon into the
Application folder.
Now you have xCode installed on your machine. Next, open Xcode from
the Application folder and proceed after accepting the terms and
conditions. If everything is fine, you will get the following screen −
Select Get started with a playground option and enter a name for playground and select iOS as platform. Finally, you will get the Playground window as follows −
Following is the code taken from the default Swift Playground Window.import UIKit var str = "Hello, playground"If you create the same program for OS X program, then it will include import Cocoa and the program will look like as follows −
import Cocoa

var str = "Hello, playground"
When the above program gets loaded, it should display the following result in Playground result area (Right Hand Side).
Hello, playgroundCongratulations, you have your Swift programming environment ready and you can proceed with your learning vehicle "Tutorials Point".
Swift - Basic Syntax
We have already seen a piece of Swift program while setting up the environment. Let's start once again with the following Hello, World! program created for OS X playground, which includes import Cocoa as shown below −import Cocoa /* My first program in Swift */ var myString = "Hello, World!" println(myString)If you create the same program for iOS playground, then it will include import UIKit and the program will look as follows −
import UIKit
var myString = "Hello, World!"
println(myString)
When we run the above program using an appropriate playground, we will get the following result −
Hello, World!Let us now see the basic structure of a Swift program, so that it will be easy for you to understand the basic building blocks of the Swift programming language.
Import in Swift
You can use the import statement to import any Objective-C framework (or C library) directly into your Swift program. For example, the above import cocoa statement makes all Cocoa libraries, APIs, and runtimes that form the development layer for all of OS X, available in Swift.Cocoa is implemented in Objective-C, which is a superset of C, so it is easy to mix C and even C++ into your Swift applications.
Tokens in Swift
A Swift program consists of various tokens and a token is either a keyword, an identifier, a constant, a string literal, or a symbol. For example, the following Swift statement consists of three tokens −println("test!")
The individual tokens are:
println (
"test!"
)
Comments
Comments are like helping texts in your Swift program. They are ignored by the compiler. Multi-line comments start with /* and terminate with the characters */ as shown below −/* My first program in Swift */Multi-line comments can be nested in Swift. Following is a valid comment in Swift −
/* My first program in Swift is Hello, World!
/* Where as second program is Hello, Swift! */
Single-line comments are written using // at the beginning of the comment.
// My first program in Swift
Semicolons
Swift does not require you to type a semicolon (;) after each statement in your code, though it’s optional; and if you use a semicolon, then the compiler does not complain about it.However, if you are using multiple statements in the same line, then it is required to use a semicolon as a delimiter, otherwise the compiler will raise a syntax error. You can write the above Hello, World! program as follows −
import Cocoa
/* My first program in Swift */
var myString = "Hello, World!"; println(myString)
Identifiers
A Swift identifier is a name used to identify a variable, function, or any other user-defined item. An identifier starts with an alphabet A to Z or a to z or an underscore _ followed by zero or more letters, underscores, and digits (0 to 9).Swift does not allow special characters such as @, $, and % within identifiers. Swift is a case sensitive programming language. Thus, Manpower and manpower are two different identifiers in Swift. Here are some examples of acceptable identifiers −
Azad       zara    abc   move_name  a_123
myname50   _temp   j     a23b9      retVal
To use a reserved word as an identifier, you will need to put a backtick (`) before and after it. For example, class is not a valid identifier, but `class` is valid.
Keywords
The following keywords are reserved in Swift. These reserved words may not be used as constants or variables or any other identifier names, unless they're escaped with backticks −Keywords used in declarations
| class | deinit | enum | extension |
| func | import | init | internal |
| let | operator | private | protocol |
| public | static | struct | subscript |
| typealias | var |
Keywords used in statements
| break | case | continue | default |
| do | else | fallthrough | for |
| if | in | return | switch |
| where | while |
Keywords used in expressions and types
| as | dynamicType | false | is |
| nil | self | Self | super |
| true | _COLUMN_ | _FILE_ | _FUNCTION_ |
| _LINE_ |
Keywords used in particular contexts
| associativity | convenience | dynamic | didSet |
| final | get | infix | inout |
| lazy | left | mutating | none |
| nonmutating | optional | override | postfix |
| precedence | prefix | Protocol | required |
| right | set | Type | unowned |
| weak | willSet |
Whitespaces
A line containing only whitespace, possibly with a comment, is known as a blank line, and a Swift compiler totally ignores it.Whitespace is the term used in Swift to describe blanks, tabs, newline characters, and comments. Whitespaces separate one part of a statement from another and enable the compiler to identify where one element in a statement, such as int, ends and the next element begins. Therefore, in the following statement −
var agethere must be at least one whitespace character (usually a space) between var and age for the compiler to be able to distinguish them. On the other hand, in the following statement −
int fruit = apples + oranges //get the total fruitsno whitespace characters are necessary between fruit and =, or between = and apples, although you are free to include some for better readability.
Literals
A literal is the source code representation of a value of an integer, floating-point number, or string type. The following are examples of literals −92 // Integer literal 4.24159 // Floating-point literal "Hello, World!" // String literal
Swift - Data Types
While doing programming in any programming language, you need to use different types of variables to store information. Variables are nothing but reserved memory locations to store values. This means that when you create a variable, you reserve some space in memory.You may like to store information of various data types like string, character, wide character, integer, floating point, Boolean, etc. Based on the data type of a variable, the operating system allocates memory and decides what can be stored in the reserved memory.
Built-in Data Types
Swift offers the programmer a rich assortment of built-in as well as user-defined data types. The following types of basic data types are most frequently when declaring variables −- Int or UInt − This is used for whole numbers. More specifically, you can use Int32, Int64 to define 32 or 64 bit signed integer, whereas UInt32 or UInt64 to define 32 or 64 bit unsigned integer variables. For example, 42 and -23.
- Float − This is used to represent a 32-bit floating-point number and numbers with smaller decimal points. For example, 3.14159, 0.1, and -273.158.
- Double − This is used to represent a 64-bit floating-point number and used when floating-point values must be very large. For example, 3.14159, 0.1, and -273.158.
- Bool − This represents a Boolean value which is either true or false.
- String − This is an ordered collection of characters. For example, "Hello, World!"
- Character − This is a single-character string literal. For example, "C"
- Optional − This represents a variable that can hold either a value or no value.
- On a 32-bit platform, Int is the same size as Int32.
- On a 64-bit platform, Int is the same size as Int64.
- On a 32-bit platform, UInt is the same size as UInt32.
- On a 64-bit platform, UInt is the same size as UInt64.
- Int8, Int16, Int32, Int64 can be used to represent 8 Bit, 16 Bit, 32 Bit, and 64 Bit forms of signed integer.
- UInt8, UInt16, UInt32, and UInt64 can be used to represent 8 Bit, 16 Bit, 32 Bit and 64 Bit forms of unsigned integer.
Bound Values
The following table shows the variable type, how much memory it takes to store the value in memory, and what is the maximum and minimum value which can be stored in such type of variables.| Type | Typical Bit Width | Typical Range |
|---|---|---|
| Int8 | 1byte | -127 to 127 |
| UInt8 | 1byte | 0 to 255 |
| Int32 | 4bytes | -2147483648 to 2147483647 |
| UInt32 | 4bytes | 0 to 4294967295 |
| Int64 | 8bytes | -9223372036854775808 to 9223372036854775807 |
| UInt64 | 8bytes | 0 to 18446744073709551615 |
| Float | 4bytes | 1.2E-38 to 3.4E+38 (~6 digits) |
| Double | 8bytes | 2.3E-308 to 1.7E+308 (~15 digits) |
Type Aliases
You can create a new name for an existing type using typealias. Here is the simple syntax to define a new type using typealias −typealias newname = typeFor example, the following line instructs the compiler that Feet is another name for Int −
typealias Feet = IntNow, the following declaration is perfectly legal and creates an integer variable called distance −
import Cocoa

typealias Feet = Int
var distance: Feet = 100
println(distance)
When we run the above program using playground, we get the following result −
100
Type Safety
Swift is a type-safe language which means if a part of your code expects a String, you can't pass it an Int by mistake.As Swift is type-safe, it performs type-checks when compiling your code and flags any mismatched types as errors.
import Cocoa

var varA = 42
varA = "This is hello"
println(varA)
When we compile the above program, it produces the following compile time error.
Playground execution failed: error: <EXPR>:6:6: error: cannot assign to 'let' value 'varA'
varA = "This is hello"
Type Inference
Type inference enables a compiler to deduce the type of a particular expression automatically when it compiles your code, simply by examining the values you provide. Swift uses type inference to work out the appropriate type as follows.import Cocoa // varA is inferred to be of type Int var varA = 42 println(varA) // varB is inferred to be of type Double var varB = 3.14159 println(varB) // varC is also inferred to be of type Double var varC = 3 + 0.14159 println(varC)When we run the above program using playground, we get the following result −
42
3.14159
3.14159
Swift - Variables
A variable provides us with named storage that our programs can manipulate. Each variable in Swift has a specific type, which determines the size and layout of the variable's memory; the range of values that can be stored within that memory; and the set of operations that can be applied to the variable.Swift supports the following basic types of variables −
- Int or UInt − This is used for whole numbers. More specifically, you can use Int32, Int64 to define 32 or 64 bit signed integer, whereas UInt32 or UInt64 to define 32 or 64 bit unsigned integer variables. For example, 42 and -23.
- Float − This is used to represent a 32-bit floating-point number. It is used to hold numbers with smaller decimal points. For example, 3.14159, 0.1, and -273.158.
- Double − This is used to represent a 64-bit floating-point number and used when floating-point values must be very large. For example 3.14159, 0.1, and -273.158.
- Bool − This represents a Boolean value which is either true or false.
- String − This is an ordered collection of characters. For example, "Hello, World!"
- Character − This is a single-character string literal. For example, "C"
The following section will cover how to declare and use various types of variables in Swift programming.
Variable Declaration
A variable declaration tells the compiler where and how much to create the storage for the variable. Before you use variables, you must declare them using var keyword as follows −var variableName = <initial value>The following example shows how to declare a variable in Swift −
import Cocoa

var varA = 42
println(varA)
When we run the above program using playground, we get the following result −
42
Type Annotations
You can provide a type annotation when you declare a variable, to be clear about the kind of values the variable can store. Here is the syntax −var variableName:<data type> = <optional initial value>The following example shows how to declare a variable in Swift using Annotation. Here it is important to note that if we are not using type annotation, then it becomes mandatory to provide an initial value for the variable, otherwise we can just declare our variable using type annotation.
import Cocoa

var varA = 42
println(varA)

var varB:Float

varB = 3.14159
println(varB)
When we run the above program using playground, we get the following result −
42
3.1415901184082
Naming Variables
The name of a variable can be composed of letters, digits, and the underscore character. It must begin with either a letter or an underscore. Upper and lowercase letters are distinct because Swift is a case-sensitive programming language.You can use simple or Unicode characters to name your variables. The following examples shows how you can name the variables −
import Cocoa

var _var = "Hello, Swift!"
println(_var)

var 你好 = "你好世界"
println(你好)
When we run the above program using playground, we get the following result −
Hello, Swift!
你好世界
Printing Variables
You can print the current value of a constant or variable with the println function. You can interpolate a variable value by wrapping the name in parentheses and escape it with a backslash before the opening parenthesis: Following are valid examples −import Cocoa var varA = "Godzilla" var varB = 1000.00 println("Value of \(varA) is more than \(varB) millions")When we run the above program using playground, we get the following result −
Value of Godzilla is more than 1000.0 millions
Swift - Optionals
Swift also introduces Optionals type, which handles the absence of a value. Optionals say either "there is a value, and it equals x" or "there isn't a value at all".An Optional is a type on its own, actually one of Swift’s new super-powered enums. It has two possible values, None and Some(T), where T is an associated value of the correct data type available in Swift.
Here’s an optional Integer declaration −
var perhapsInt: Int?Here’s an optional String declaration −
var perhapsStr: String?The above declaration is equivalent to explicitly initializing it to nil which means no value −
var perhapsStr: String? = nilLet's take the following example to understand how optionals work in Swift −
import Cocoa

var myString:String? = nil

if myString != nil {
   println(myString)
}else {
   println("myString has nil value")
}
When we run the above program using playground, we get the following result −
myString has nil valueOptionals are similar to using nil with pointers in Objective-C, but they work for any type, not just classes.
Forced Unwrapping
If you defined a variable as optional, then to get the value from this variable, you will have to unwrap it. This just means putting an exclamation mark at the end of the variable.Let's take a simple example −
import Cocoa

var myString:String?

myString = "Hello, Swift!"

if myString != nil {
   println(myString)
}else {
   println("myString has nil value")
}
When we run the above program using playground, we get the following result −
Optional("Hello, Swift!")
Now let's apply unwrapping to get the correct value of the variable −import Cocoa var myString:String? myString = "Hello, Swift!" if myString != nil { println( myString! ) }else { println("myString has nil value") }When we run the above program using playground, we get the following result −
Hello, Swift!
Automatic Unwrapping
You can declare optional variables using exclamation mark instead of a question mark. Such optional variables will unwrap automatically and you do not need to use any further exclamation mark at the end of the variable to get the assigned value. Let's take a simple example −import Cocoa var myString:String! myString = "Hello, Swift!" if myString != nil { println(myString) }else { println("myString has nil value") }When we run the above program using playground, we get the following result −
Hello, Swift!
Optional Binding
Use optional binding to find out whether an optional contains a value, and if so, to make that value available as a temporary constant or variable.An optional binding for the if statement is as follows −
if let constantName = someOptional {
   statements
}
Let's take a simple example to understand the usage of optional binding −import Cocoa var myString:String? myString = "Hello, Swift!" if let yourString = myString { println("Your string has - \(yourString)") }else { println("Your string does not have a value") }When we run the above program using playground, we get the following result −
Your string has - Hello, Swift!
No comments:
Post a Comment