
Yii - Overview
The Yii[ji:] framework is an open-source PHP framework for rapidly-developing, modern Web applications. It is built around the Model-View-Controller composite pattern.Yii provides secure and professional features to create robust projects rapidly.
The Yii framework has a component-based architecture and a full solid caching support. Therefore, it is suitable for building all kinds of Web applications: forums, portals, content managements systems, RESTful services, e-commerce websites, and so forth. It also has a code generation tool called Gii that includes the full CRUD(Create-Read-Update-Delete) interface maker.
Core Features
The core features of Yii are as follows −- Yii implements the MVC architectural pattern.
- It provides features for both relational and NoSQL databases.
- Yii never over-designs things for the sole purpose of following some design pattern.
- It is extremely extensible.
- Yii provides multi-tier caching support.
- Yii provides RESTful API development support.
- It has high performance.
Version 1.1 is now in maintenance mode and Version 2 adopts the latest technologies, including Composer utility for package distribution, PSR levels 1, 2, and 4, and many PHP 5.4+ features. It is version 2 that will receive the main development effort over the next few years.
Yii is a pure OOP (Object-Oriented Programming) framework. Hence, it requires a basic knowledge of OOP. The Yii framework also uses the latest features of PHP, like traits and namespaces. It would be easier for you to pick up Yii 2.0 if you understand these concepts.
Environment
The major requirements for Yii2 are PHP 5.4+ and a web server. Yii is a powerful console tool, which manages database migrations, asset compilation, and other stuff. It is recommended to have a command line access to the machine where you develop your application.For development purpose, we will use −
- Linux Mint 17.1
- PHP 5.5.9
- PHP built-in web server
Pre-installation check
To check whether your local machine is good to go with the latest Yii2 version, do the following −Step 1 − Install the latest php version.
sudo apt-get install php5Step 2 − Install the latest mysql version.
sudo apt-get install mysql-serverStep 3 − Download the Yii2 basic application template.
composer create-project --prefer-dist --stability=dev yiisoft/yii2-app-basic basicStep 4 − To start a PHP built-in server, inside the basic folder run.
php -S localhost:8080There is a useful script, requirements.php. It checks whether your server meets the requirements to run the application. You can find this script in the root folder of your application.
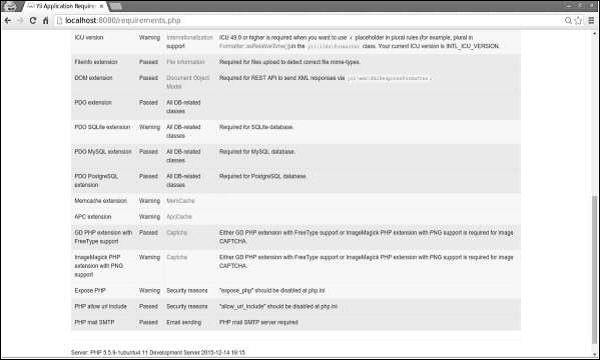 If you type http://localhost:8080/requirements.php in the address bar of the web browser, the page looks like as shown in the following screenshot −
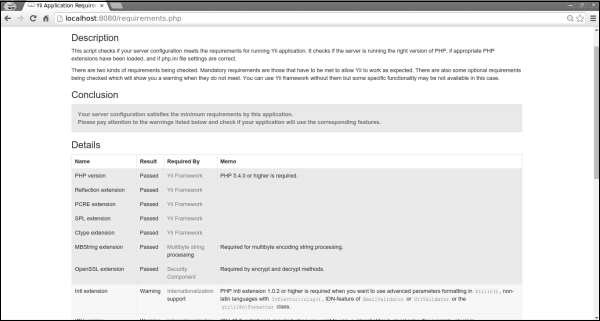
Yii - Installation
The most straightforward way to get started with Yii2 is to use the basic application template provided by the Yii2 team. This template is also available through the Composer tool.Step 1 − Find a suitable directory in your hard drive and download the Composer PHAR (PHP archive) via the following command.
curl -sS https://getcomposer.org/installer | phpStep 2 − Then move this archive to the bin directory.
mv composer.phar /usr/local/bin/composerStep 3 − With the Composer installed, you can install Yii2 basic application template. Run these commands.
composer global require "fxp/composer-asset-plugin:~1.1.1"
composer create-project --prefer-dist yiisoft/yii2-app-basic helloworld
The first command installs the composer asset plugin, which manages npm and bower dependencies. The second command installs Yii2 basic application template in a directory called helloworld.
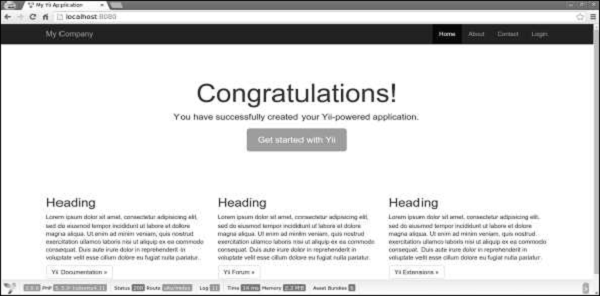
Step 4 − Now open the helloworld directory and launch the web server built into PHP.
php -S localhost:8080 -t webStep 5 − Then open http://localhost:8080 in your browser. You can see the welcome page.
Yii - Create Page
Now we are going to create a “Hello world” page in your application. To create a page, we must create an action and a view.Actions are declared in controllers. The end user will receive the execution result of an action.
Step 1 − Declare the speak action in the existing SiteController, which is defined in the class file controllers/SiteController.php.
<?php
   namespace app\controllers;
   use Yii;
   use yii\filters\AccessControl;
   use yii\web\Controller;
   use yii\filters\VerbFilter;
   use app\models\LoginForm;
   use app\models\ContactForm;
   class SiteController extends Controller {
      /* other code */
      public function actionSpeak($message = "default message") {
         return $this->render("speak",['message' => $message]);
      }
   }
?>
We defined the speak action as a method called actionSpeak. In Yii, all action methods are prefixed with the word action. This is how the framework differentiates action methods from non-action ones. If an action ID requires multiple words, then they will be concatenated by dashes. Hence, the action ID add-post corresponds to the action method actionAddPost.
In the code given above, the ‘out’ function takes a GET parameter, $message. We also call a method named ‘render’ to render a view file called speak. We pass the message parameter to the view. The rendering result is a complete HTML page.
View is a script that generates a response's content. For the speak action, we create a speak view that prints our message. When the render method is called, it looks for a PHP file names as view/controllerID/vewName.php.
Step 2 − Therefore, inside the views/site folder create a file called speak.php with the following code.
<?php
   use yii\helpers\Html;
?>
<?php echo Html::encode($message); ?>
Note that we HTML-encode the message parameter before printing to avoid XSS attack.
Step 3 − Type the following in your web browser http://localhost:8080/index.php?r=site/speak&message=hello%20world.
You will see the following window −
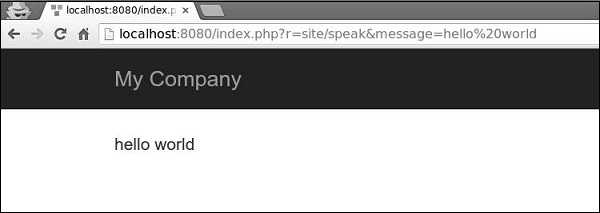 The ‘r’ parameter in the URL stands for route. The route's default format is controllerID/actionID. In our case, the route site/speak will be resolved by the SiteController class and the speak action.
Yii - Application Structure
There is only one folder in the overall code base that is publicly available for the web server. It is the web directory. Other folders outside the web root directory are out of reach for the web server.Note − All project dependencies are located in the composer.json file. Yii2 has a few important packages that are already included in your project by Composer. These packages are the following −
- Gii – The code generator tool
- The debug console
- The Codeception testing framework
- The SwiftMailer library
- The Twitter Bootstrap UI library
Yii2's application structure is precise and clear. It contains the following folders −
- Assets − This folder includes all .js and .css files referenced in the web page.
- Commands − This folder includes the controllers that can be used from the terminal.
- Config − This folder contains config files for managing database, application and application parameters.
- Mail − This folder includes the mail layout.
- Models − This folder includes the models used in the application.
- Runtime − This folder is for storing runtime data.
- Tests − This folder includes all the tests (acceptance, unit, functional).
- Vendor − This folder contains all the third-party packages managed by Composer.
- Views − This folder is for views, that are displayed by the controllers. The layout folder is a for page template.
- Web − The entry point from web.
Application Structure
Following is the diagrammatic representation of the application structure.
No comments:
Post a Comment